I recently came across a requirement where I needed to read SamAccountName and some ExtensionAttributes from Azure AD which are synced with On-Premise AD. I thought since all the On-premise attributes are being synced using Azure AD Connect, it should be easy enough to read those values from Azure AD using PowerShell or Microsoft Graph APIs.
Unfortunately Custom HTTP calls to Microsoft Graph became a Premium Connector in February 1, 2019 and now requires a P1 or P2 license of MS Flow.
Getting Started
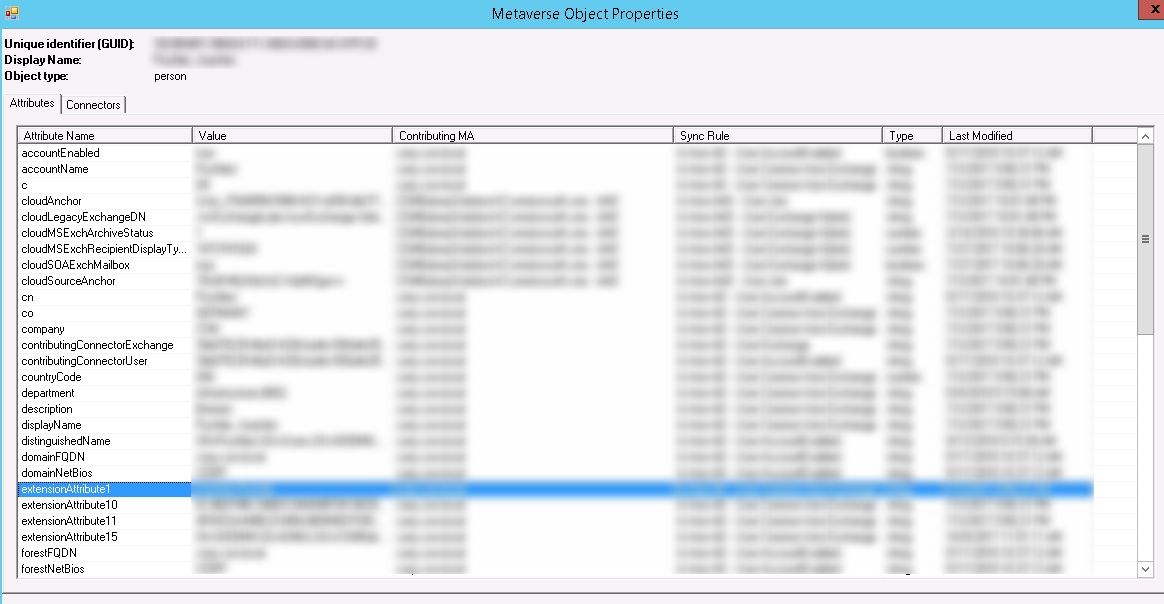
Before I jumped into the solution, I wanted to be sure that Extension Attributes are indeed being synced. So, I looked into the connector properties and it was clear at that at least some of the Extension Attributes are being synced.
Let me take you through my journey to the final solution, so that it is also clear that which way not to go 🙂
Attempt 1
Since the requirement was to extract the extension attributes from within Microsoft Flow, obviously the first step I took was to look into already available Actions there. The closest one I found was “Get User” action under “Azure AD”.
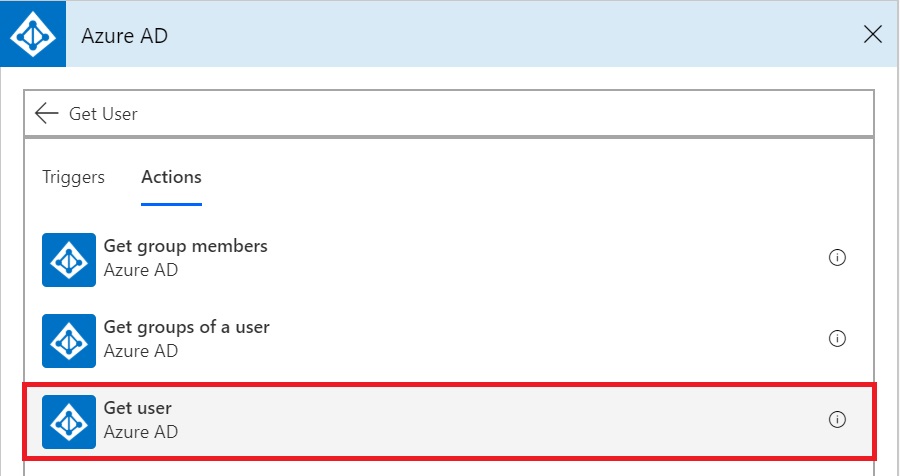
But just looking at the documentation about this action, it became clear that it may not be helpful. This action returns a body of type “GetUser_Response”. GetUser_Response contains a fixed set of fields from Azure AD – Business Phones, Display Name, Given Name, Id, Job Title, Mail, Mobile Phone, Office Location, Preferred Language, Surname, User Principal Name.
As you can see this doesn’t include the SamAccountName or any Extension Attributes we were looking for. So, time to move on.
Attempt 2
Still hopeful of finding something within available actions in MS Flow, I kept digging. Then I came across “HTTP with Azure AD”. This was exciting, I was almost sure that it could work.
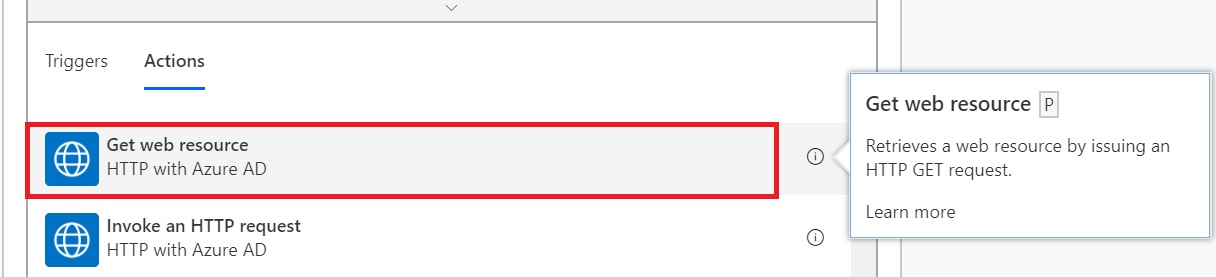
I went ahead and tried to add this action and BOOM… 😉
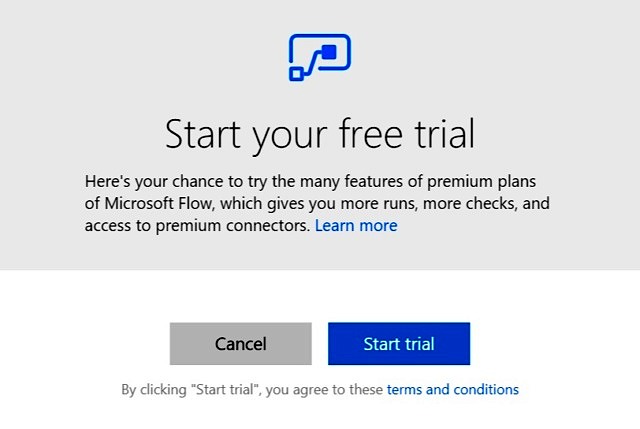
So, this is a “Premium” connector and only available with MS Flow Premium plans and NOT with Office 365. Heart broken!
Attempt 3
Fresh from the heart break, I moved on to PowerShell. The actual requirement was to extract these details in MS Flow but I thought if I could get these details using PowerShell, may be that would give me some ideas about which properties to look for. Just to see in which format and under which properties SamAccountName and Extension Attributes are shown. A quick search showed an MS article about Azure AD cmdlets for working with extension attributes and this blog article.
Time to give those a try. First, I tried to show all properties but that doesn’t seem to include any Extension Attributes.
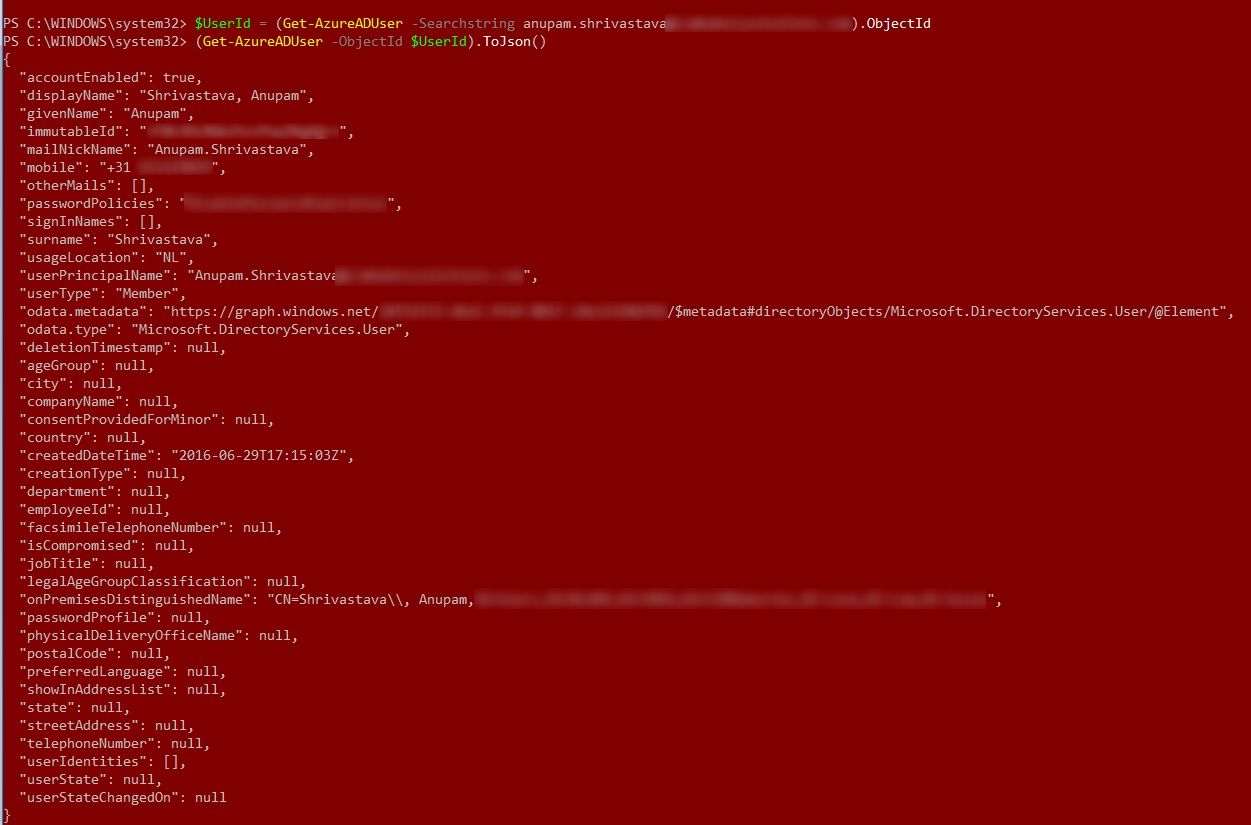
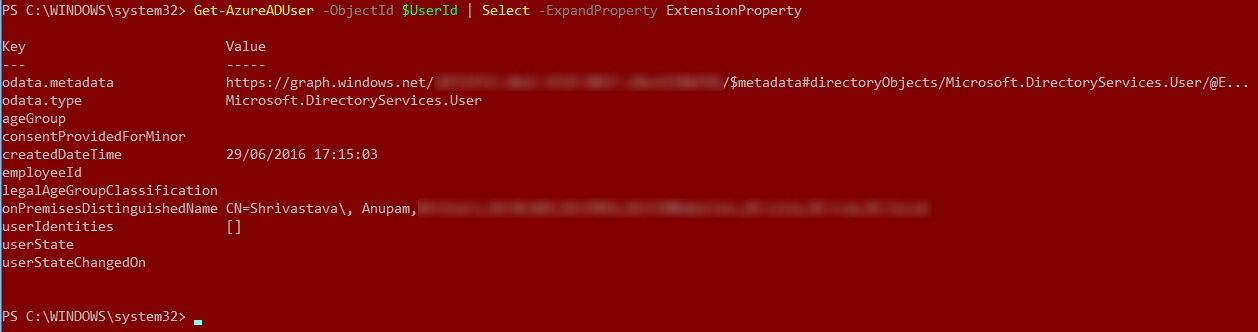
Next, as explained in the above mentioned blog article, try to expand only the extension attributes. Well, for some reason even this command refused to show up any of the extension attributes. I guess it only shows Extension properties created in Azure AD directly and not the Synced ones from on-premise AD.
Eureka Moment
After trying the above PowerShell commands a few times without success, it was time to move on. That’s when I came across this Microsoft Article about User Resource Type. Even though this API is still in Beta, it was encouraging to see the the properties like onPremisesSamAccountName and onPremisesExtensionAttributes in the JSON representation of the resource.
I was ready to give it a try. Since, it’s a REST API call from MS Flow, I would walk you through the required steps which may not very clear if following related MS articles.
So, let’s get started.
Register App in Microsoft Application Registration Portal
To call Microsoft Graph APIs, first step is to register an App in Microsoft Application Registration Portal. Browse to the portal from the link given above and login with your Office 365 credentials.

Once signed in click on the “Add an app”

This will open up another page to type in the Application Name. In this case, I typed in “Get Extension Attributes from Azure AD”. You can choose any name you like as this is not going to be visible to any end users anyway. Click on create to create the Application.
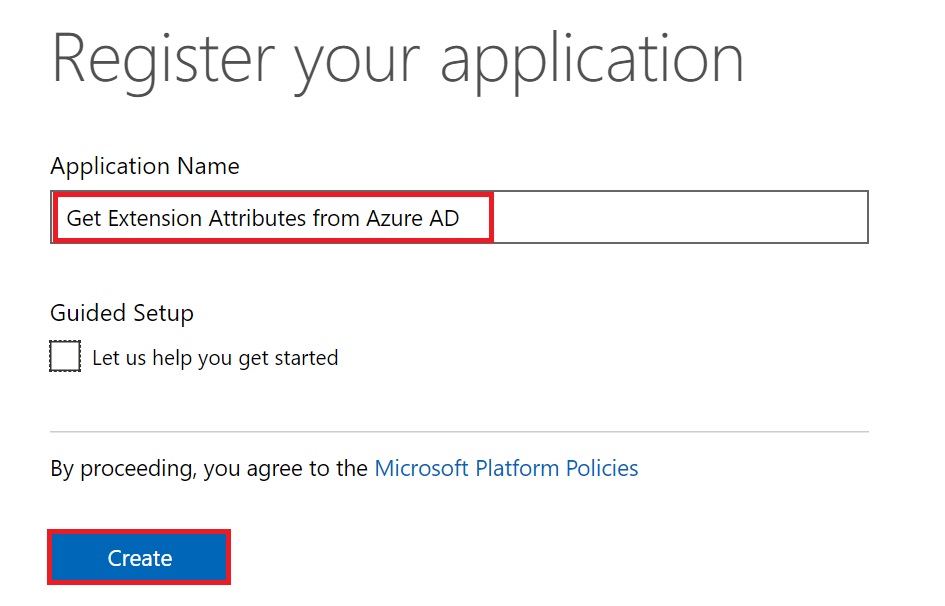
As soon as the application gets created, it generates and shows the Application Id. Make a note of this Application Id as this would be our “Client ID” that we need to use to generate the access token.
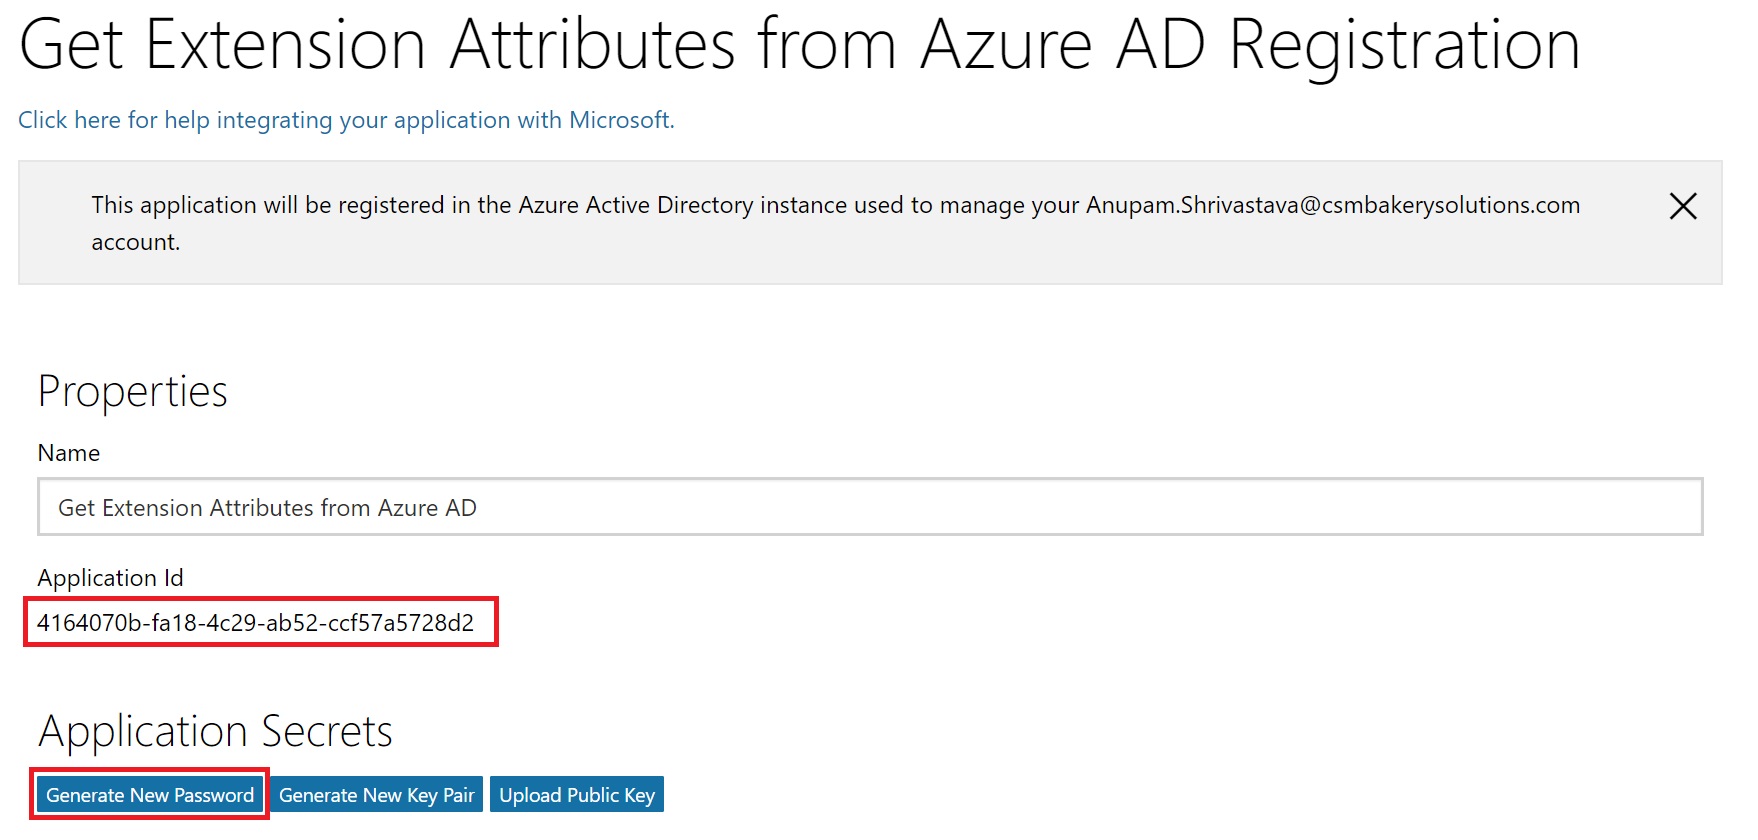
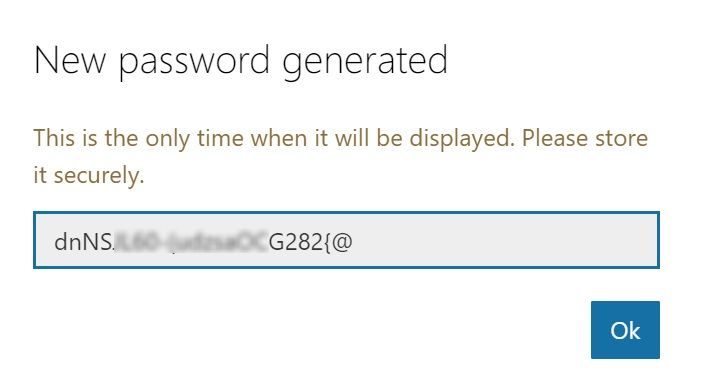
Now, click on the Generate New Password. A generated password will be shown in a pop-up window. Note down the password in a notepad as this would be our “Client Secret” to be used to get the access token.
Now that we have our Client Id and Client Secret, it’s time configure some other stuffs.
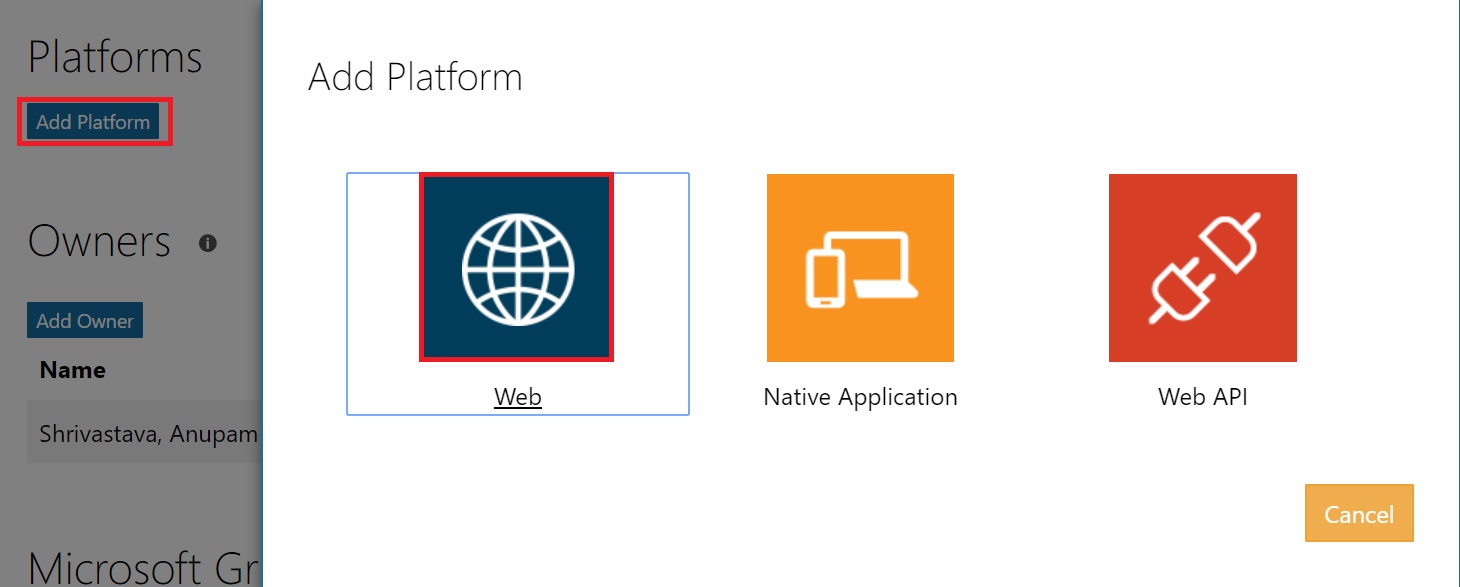
Under Platforms, click on Add Platform and select “Web” from the options.
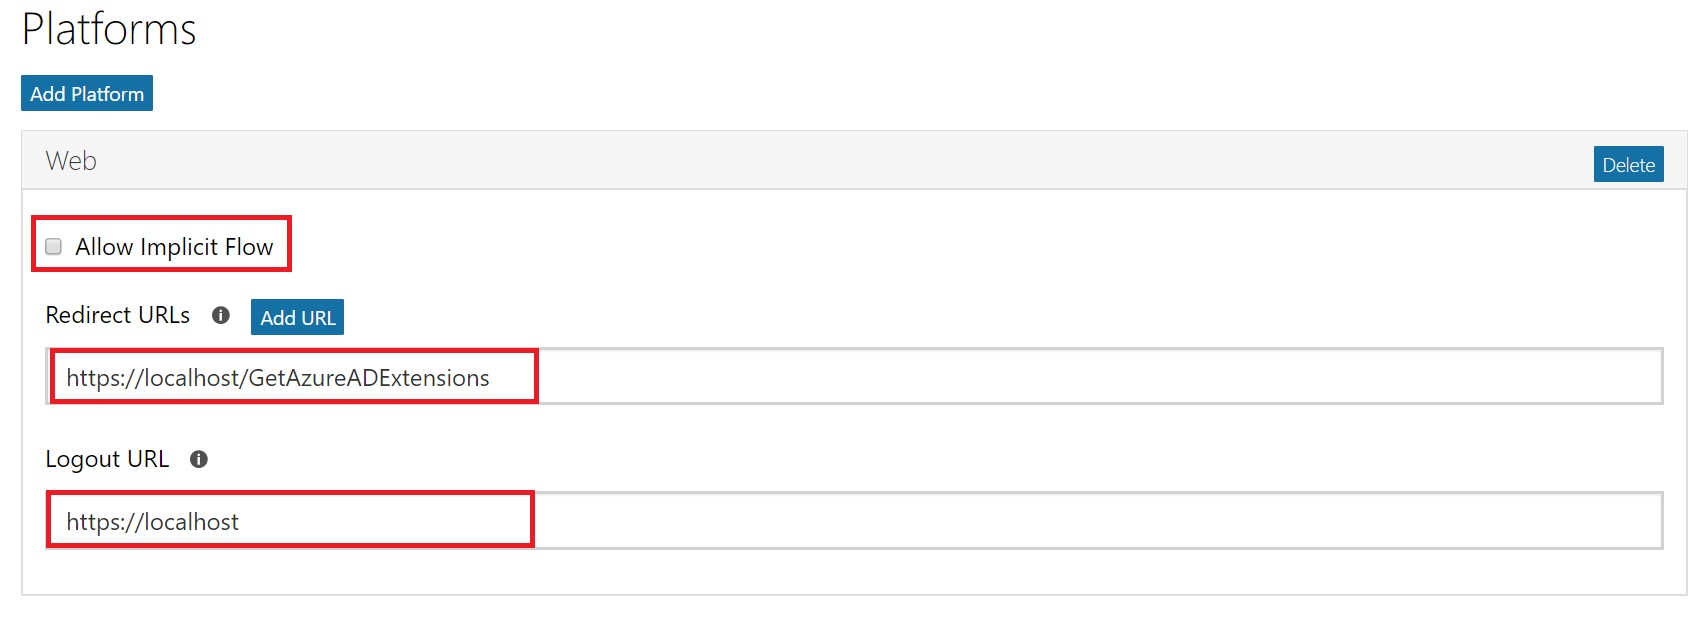
Uncheck the option “Allow Implicit Flow” and Fill in Redirect URLs as “https://localhost/GetAzureADExtensions” and Logout URL as https://localhost.
Pls. note you can type in any URL type string here, since we won’t be using this call from a browser actually, so this doesn’t matter much.
Time to assign the required permission to the App, so that it can read the extension attributes from Azure AD. By default, you would see “User.Read” permission added under Delegated Permissions. Click on “X” to delete that permission.
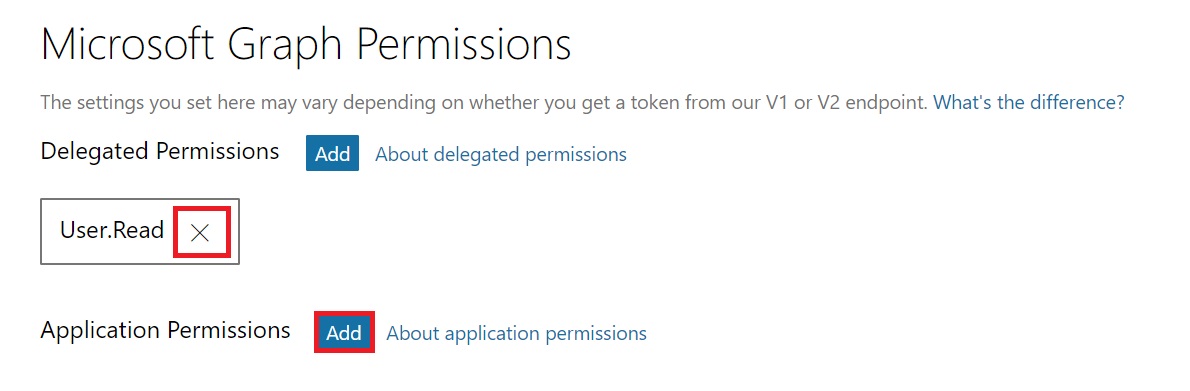
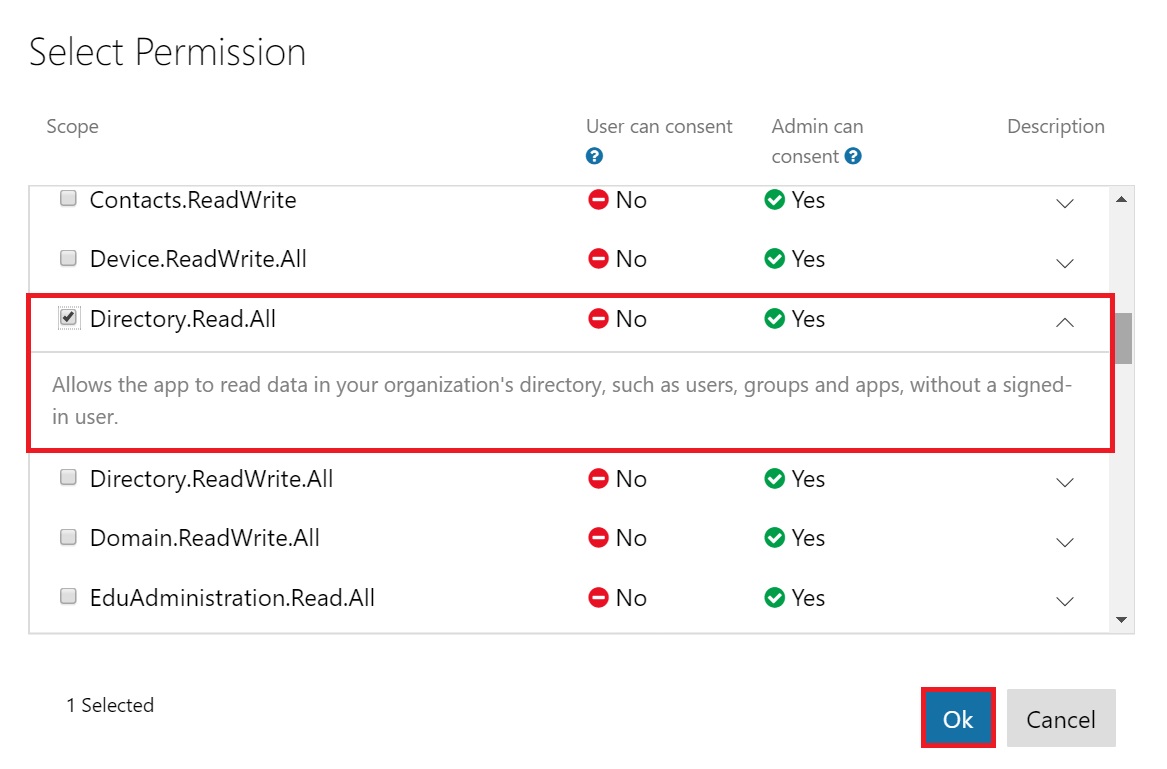
Now, click on Add next to Application Permissions. Scroll down and select “Directory.Read.All” and click Ok.
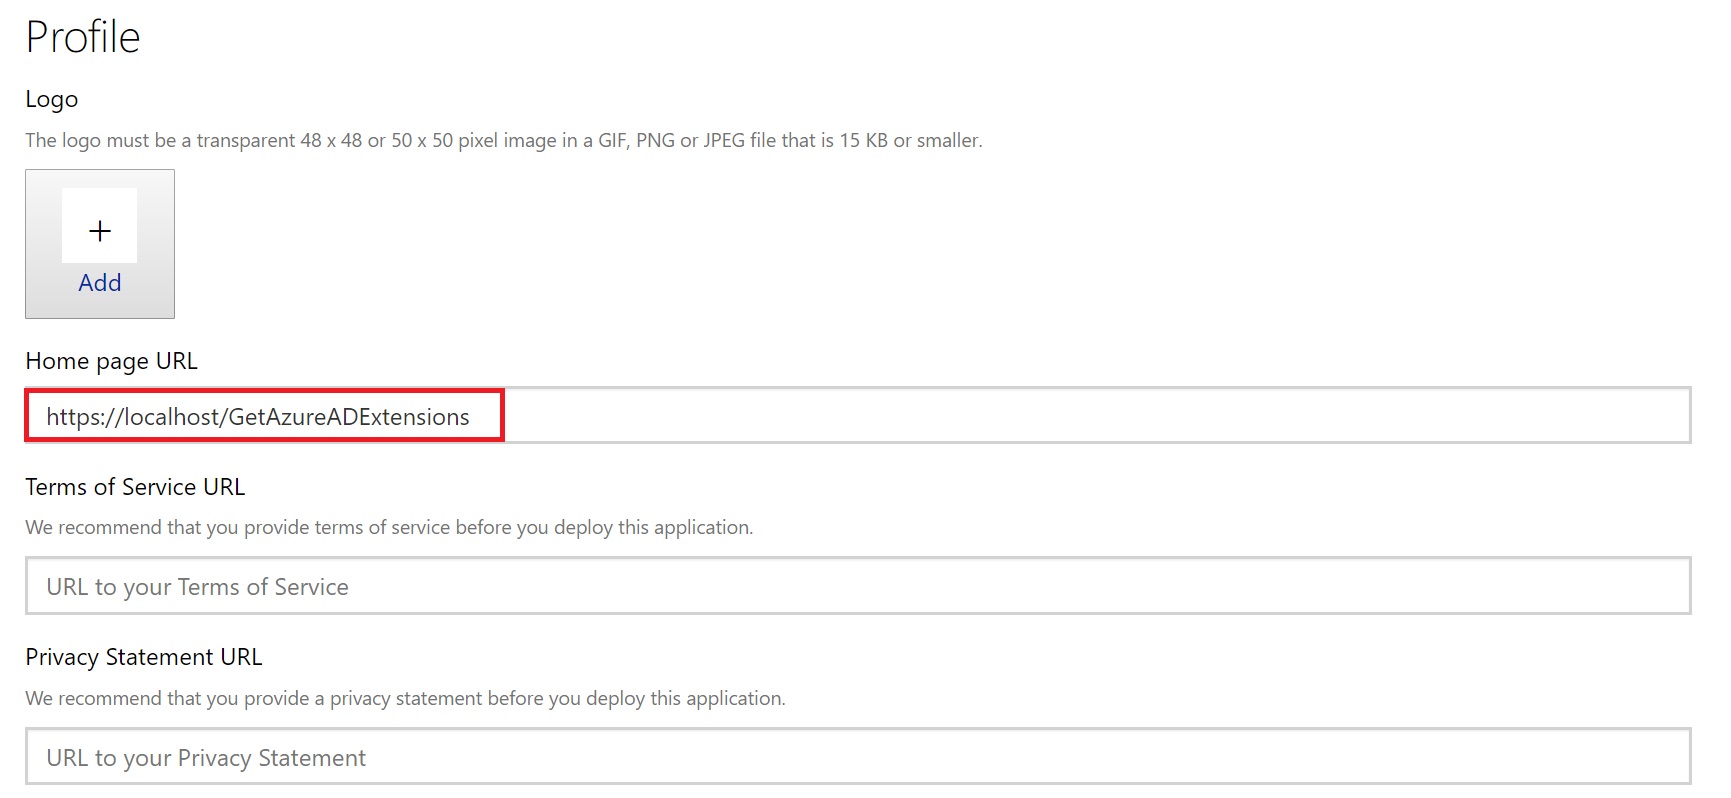
Update the Home page URL under Profile section to https://localhost/GetAzureADExtensions. Again, what value you provide here doesn’t matter in our case because our target application which will be using the API is MS Flow and not a web application.
And that’s it go ahead and Save the Form.
At this point you should have the Application Id and Generated Password stored in a notepad to be used in MS Flow
Get Admin Consent
Now that we have got our application registered, an Office 365 Admin needs to provide the consent to this application to use the MS Graph APIs requiring Directory.Read.All permissions.
We need to construct the URL which will be used by the Office 365 Admin to open in the browser and click on Accept when prompted.
This is how you construct the Consent URL –
https://login.microsoftonline.com/<tenant ID>/adminconsent?client_id=<Application ID from previous step>&state=12345&redirect_uri=<Redirect URL mentioned in Application Registration Portal>
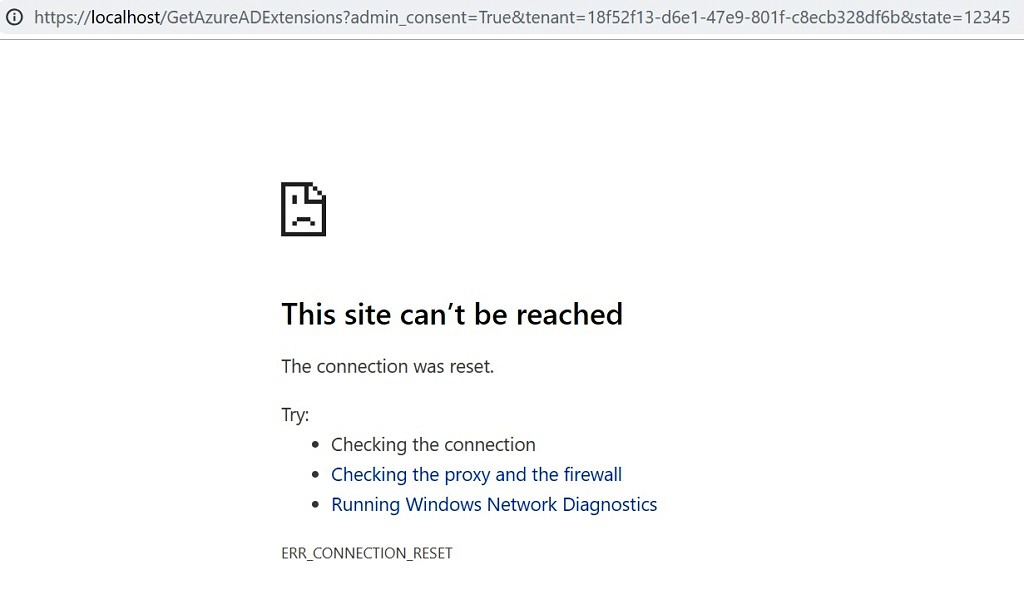
Construct the URL with actual values and share that with Office 365 Admin. If you are also an Office 365 Admin, just paste the URL in a browser. You would be prompted to login and after that, it would show you a screen. Click on “Accept”.
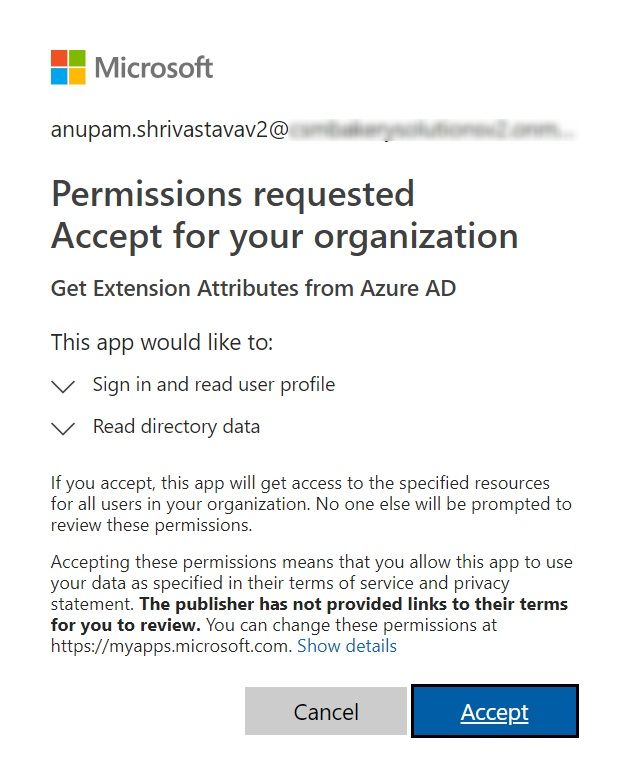
After the accept, the Office 365 Admin will see a screen like this, but this is expected as we didn’t use a valid existing Redirect URL. Don’t worry, if it tried to open this URL, this means the consent has been provided and we are good to go.
Now our application has required authorization to read the Azure AD.
Create Microsoft Flow
Let’s jump into our MS Flow and see how to extract the desired information from Azure AD. We’ll extend it to include the functionalities of Microsoft Graph API call. Click on My flows and chose “Create from blank”.

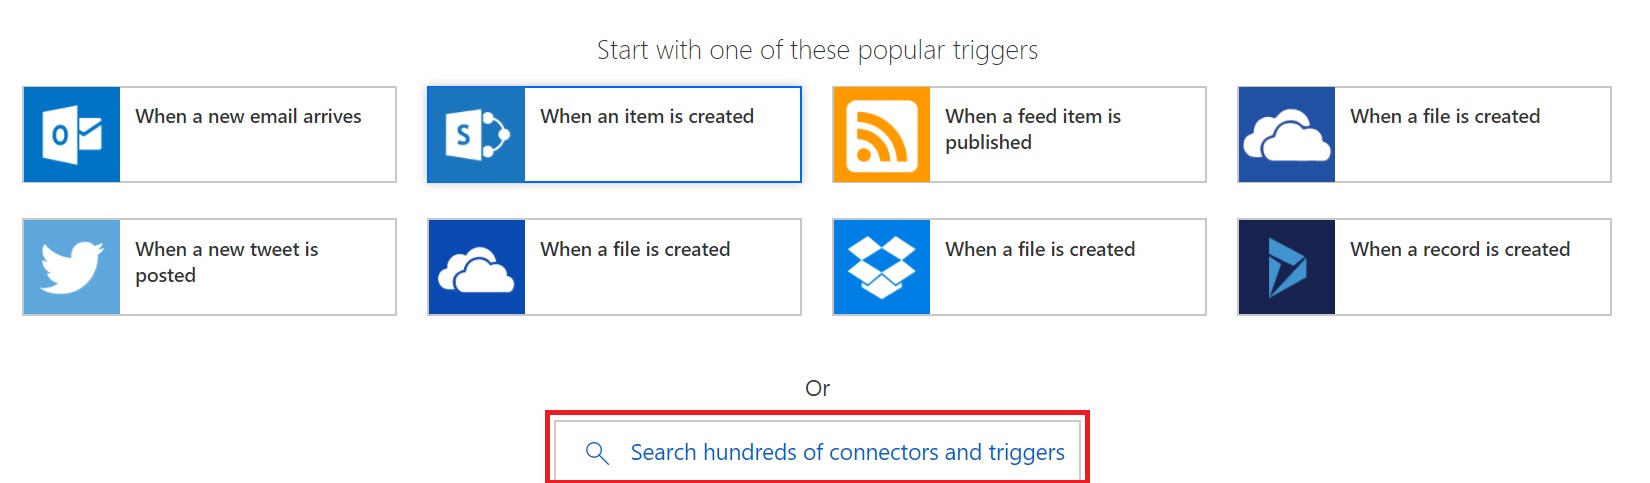
On the next page, it will ask to either choose from a list of popular triggers (event that will start the flow) or search for one. Click on Search hundreds of connectors and triggers.
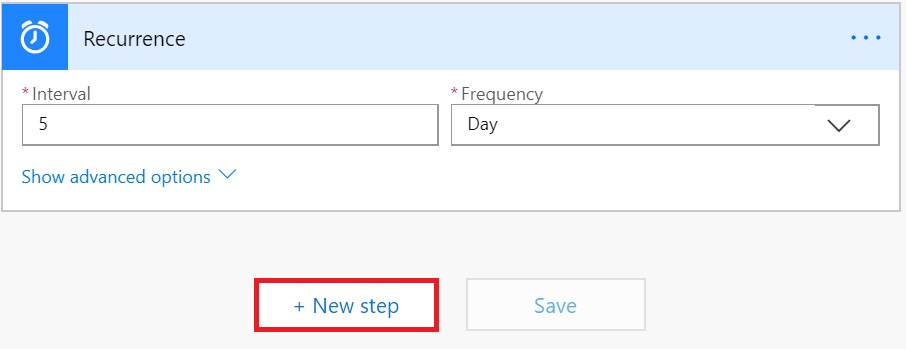
You can select any other tigger as per your requirement. For this article, I would select Schedule as trigger.
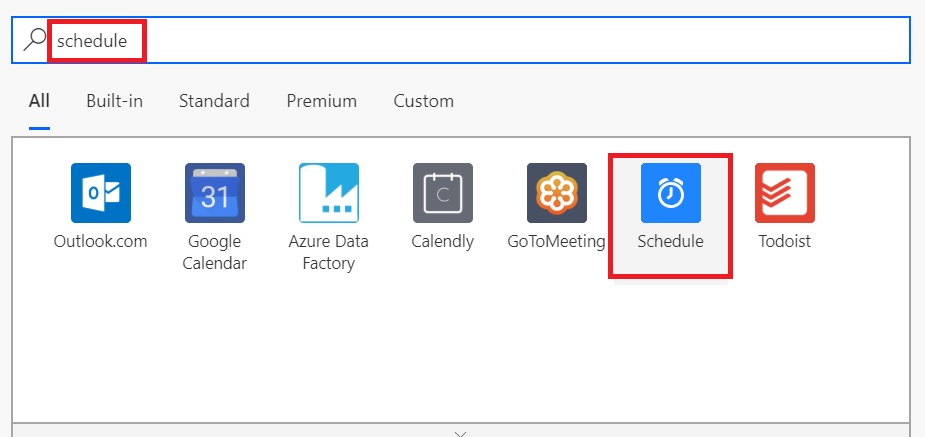
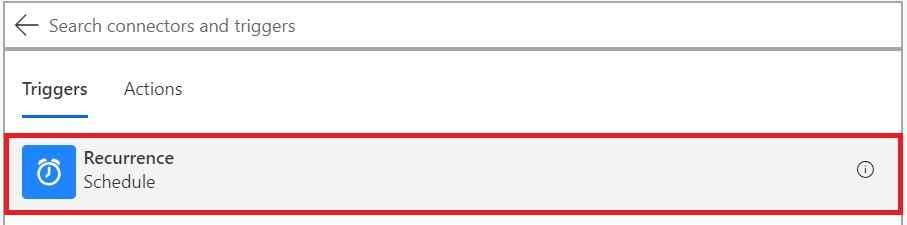
And then select Schedule from the list of triggers.
Change the schedule as per your requirement. In this case, I have just changed it to 5 days, as we’ll just be initiating this manually anyway. Click on Add an Action.
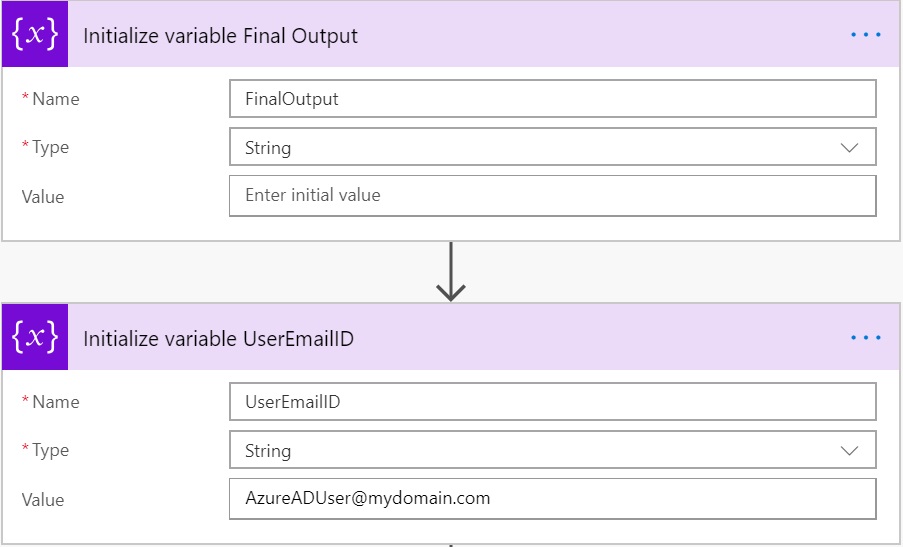
Let’s now initialize a couple of variables which we’ll use to store user email ID to be queried in Azure AD and to store the final outcome of the flow.
Now add another action and search for HTTP and select HTTP from the results
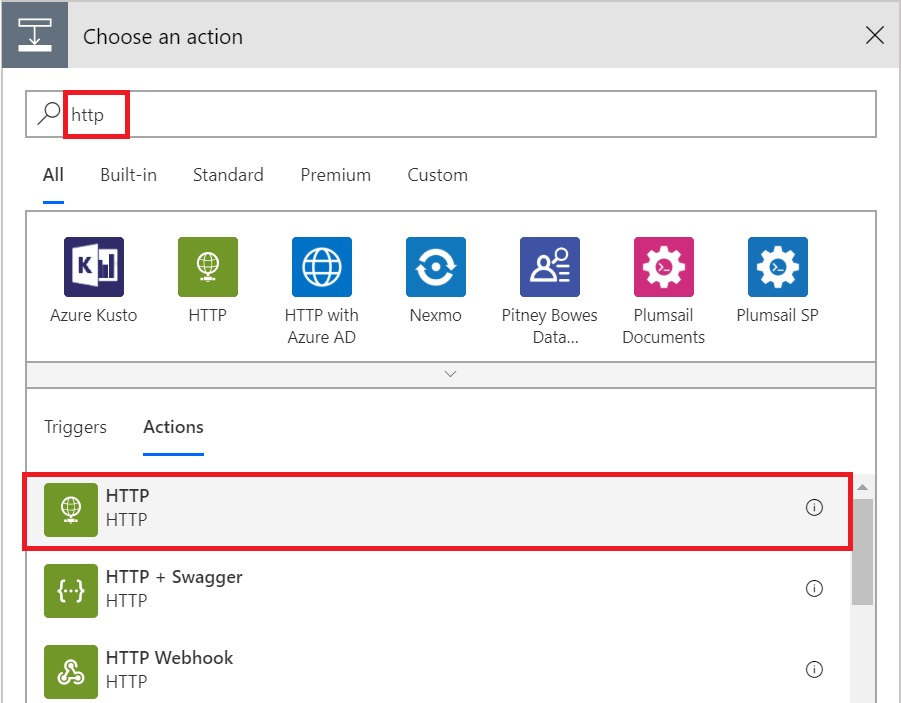
A new action named HTTP will get added as a step.
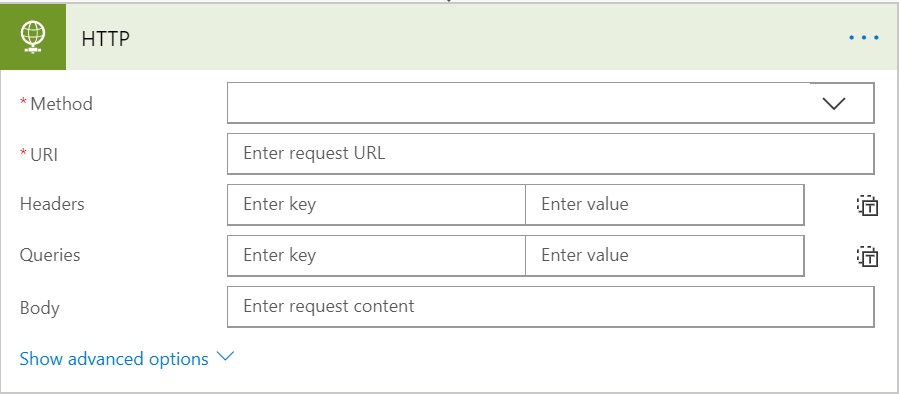
If you want, you can change the name of the action, by clicking “…” in right side of the screen and selecting Rename to make this step better identifiable later.

Get Bearer Token
At this stage, we’ll take a pause a bit and prepare for the values that we need to provide in the above form to move forward. If you have worked with Microsoft Graph APIs using .Net/PowerShell, you know that we need to get a bearer token first before we can call any APIs. This is received by passing the Client ID and Client Secret that we registered earlier in a specific format to a specific endpoint.
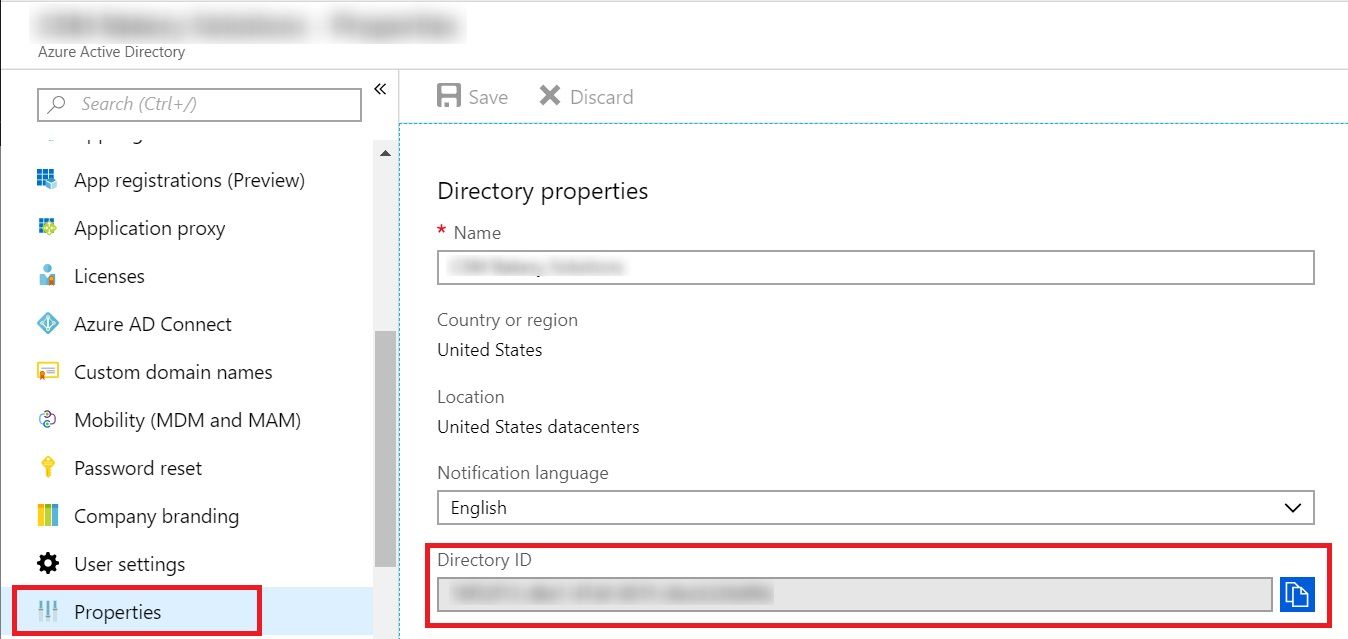
Another input we need is the Tenant ID. There are various ways to get that but easiest is to browse to https://portal.azure.com/#blade/Microsoft_AAD_IAM/ActiveDirectoryMenuBlade/Properties and copy the Directory ID from under Properties.
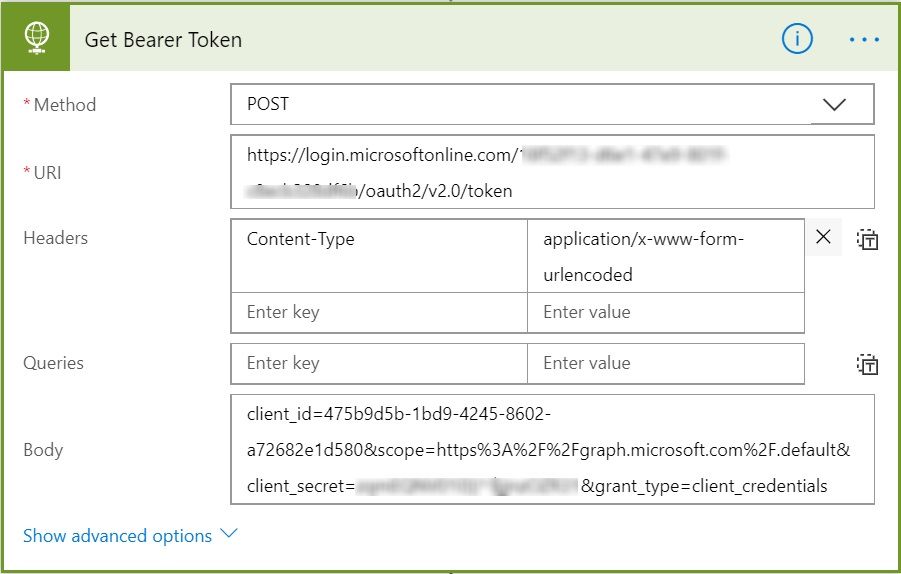
Now that we have all the inputs lets go ahead and fill the values in the Flow Action.
- Method: POST
- Uri: https://login.microsoftonline.com/<tenant ID>/oauth2/v2.0/token
- Headers: Content-Type as Key and application/x-www-form-urlencoded as Value
- Body: client_id=<Client ID>&scope=https%3A%2F%2Fgraph.microsoft.com%2F.default&client_secret=<Client Secret>&grant_type=client_credentials
We don’t need to go into Advanced options of this action, the current configurations are enough to get us the token. Let’s Create the Flow and see if we can get the token successfully.
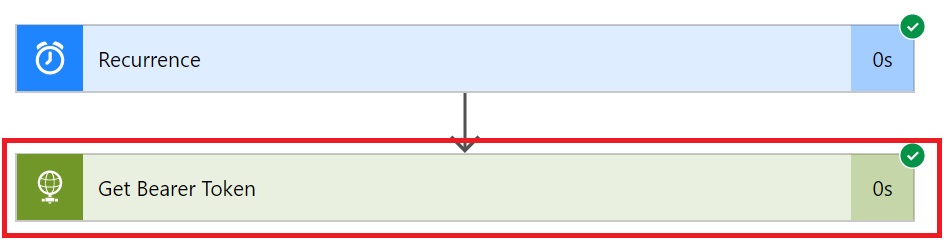
Click on Create Flow and then Run Now and then Run Flow in the popup. If all was configured well, you should get a popup message saying “Your flow was successfully started”. Click on See flow run activity to check the steps.
It would list all the executed steps with their status like success, error etc. I our case, we expect to see success obviously.
It would show the inputs and outputs of the step, scroll down to the end and check the body of the OUTPUTS section. You would see “access_token”: “<long string>”
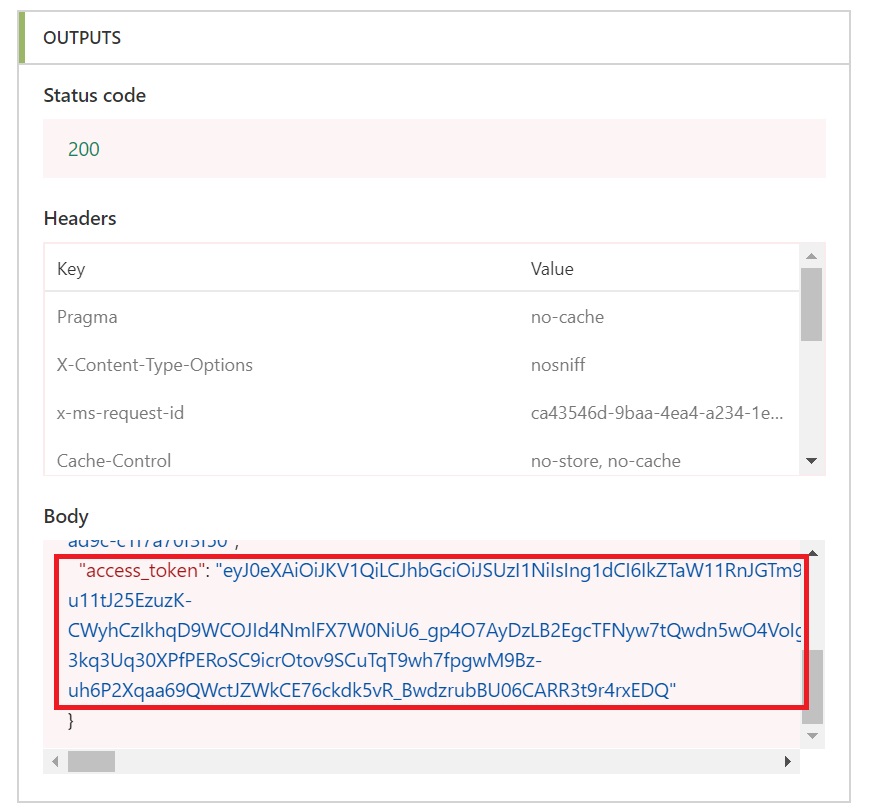
So, our Flow action is working as expected and getting us the required token now.
Extract Bearer Token
So, now that we have that access or bearer token, we need to extract it from the output and pass it on to the next step which will call the Microsoft Graph API.
Let’s go ahead and edit the Flow again and add another action after Get Bearer Token step and search for “Compose”.
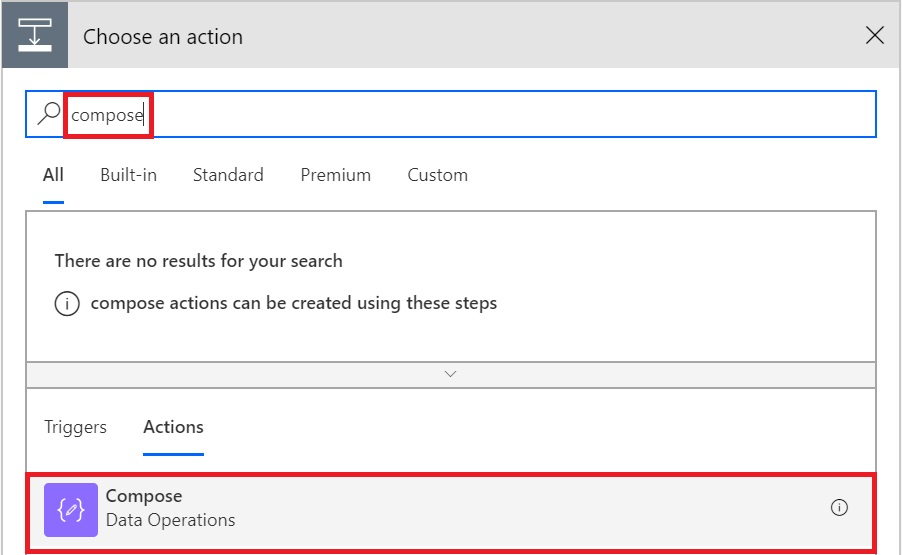
Select “Compose”. It will add another Action and will ask for Input. Type “@outputs(‘Get_Bearer_Token’).body.access_token” in the input box, including the double quotes.
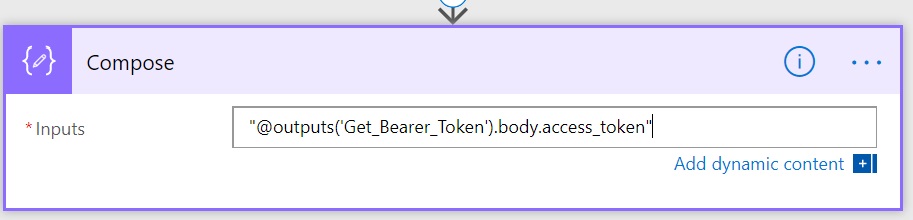
Here Get_Bearer_Token is the name of the previous action with spaces replaced with underscore (_) character. If you have named your previous action something else, use that name here. Also, always Type this, don’t copy-paste from here otherwise, you might get http 400, bad request error.
At this stage, we have extracted the access token which can be passed to the next action which will make Microsoft Graph API call.
Call Microsoft Graph API
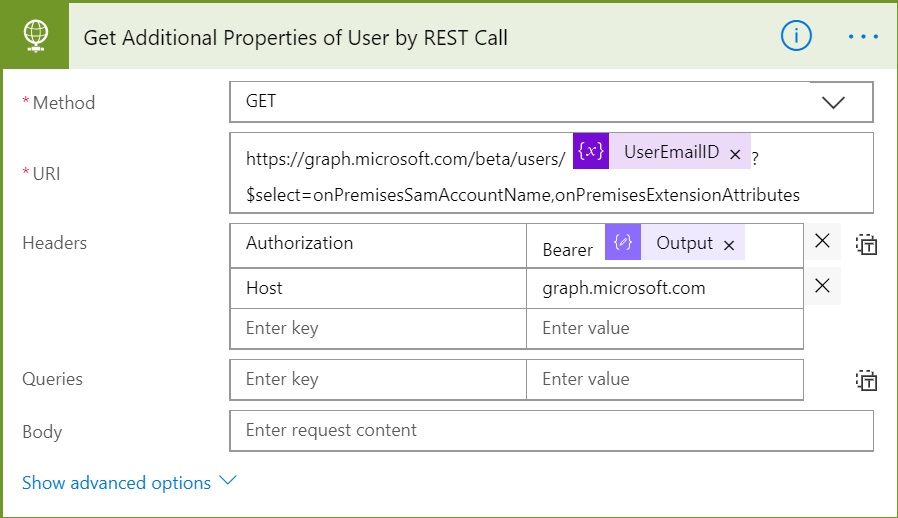
Add another Action after Compose and select HTTP like the previous step of Get Bearer Token. It will add another HTTP action and we need to prepare for the values to be passed to it. In this example, we are going to get SamAccountName and all Extension Attributes of a selected user.
- Method: GET
- Uri: https://graph.microsoft.com/beta/users/<Pass UserEmail ID variable>?$select=onPremisesSamAccountName,onPremisesExtensionAttributes
- Headers:
- Host as Key and graph.microsoft.com as Value
- Authorization as Key and Bearer<space><select output from previous step>
- Queries: <Leave Empty>
- Body: <Leave Empty>
This API is still in “Beta”, so the URL and API behaviour may change in future. Also, as per the official documentation, onPremisesExtensionAttributes property Contains extensionAttributes 1-15 for the user. Note that the individual extension attributes are neither selectable nor filterable.
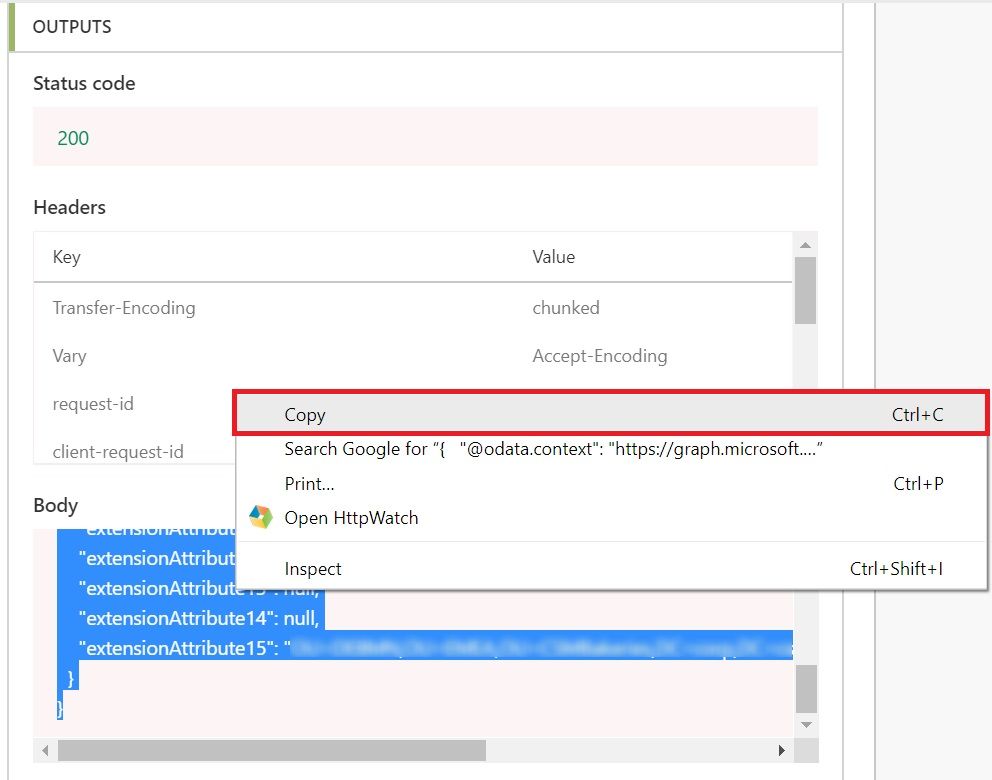
Update the Flow and Run it. If all went well, you would see the selected properties of the user in JSON format under body section of OUTPUTS of this action.
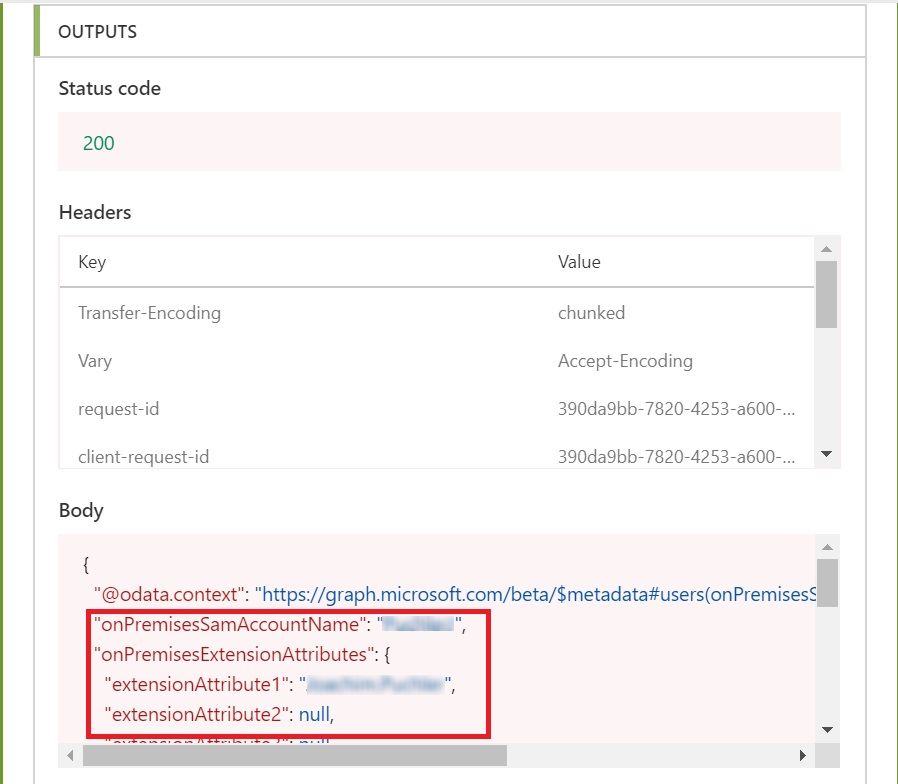
Great, so our Microsoft Graph API call is working as expected and we now have the expected output. But how can we use this output in next step, say what if we want to use only SamAccountName and extensionAttribute15?
Parsing the Output
Before we move forward, copy the JSON output from the Body section under OUTPUTS of the previous step and save that in notepad. We’ll need that in this step to generate the schema.
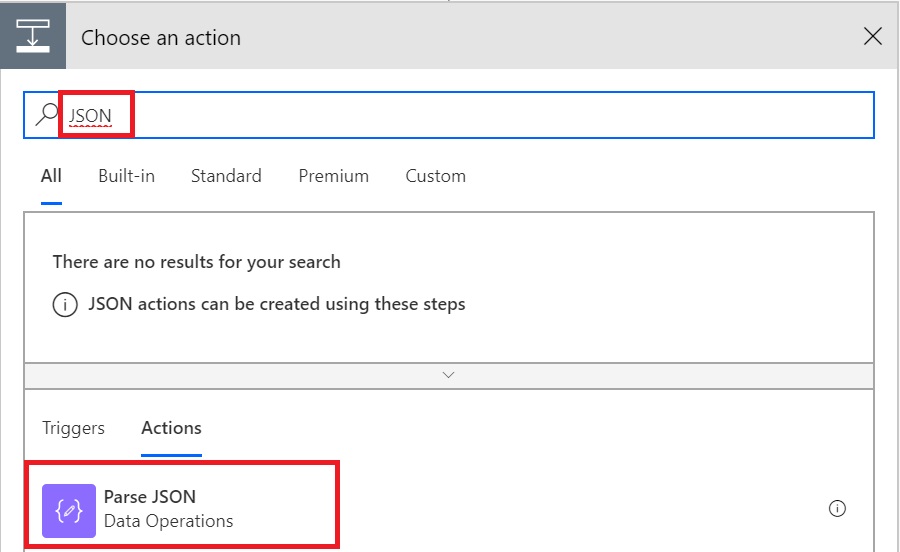
To parse the output, let’s add another action after our Microsoft Graph API call. Search for Parse JSON and select “Parse JSON”
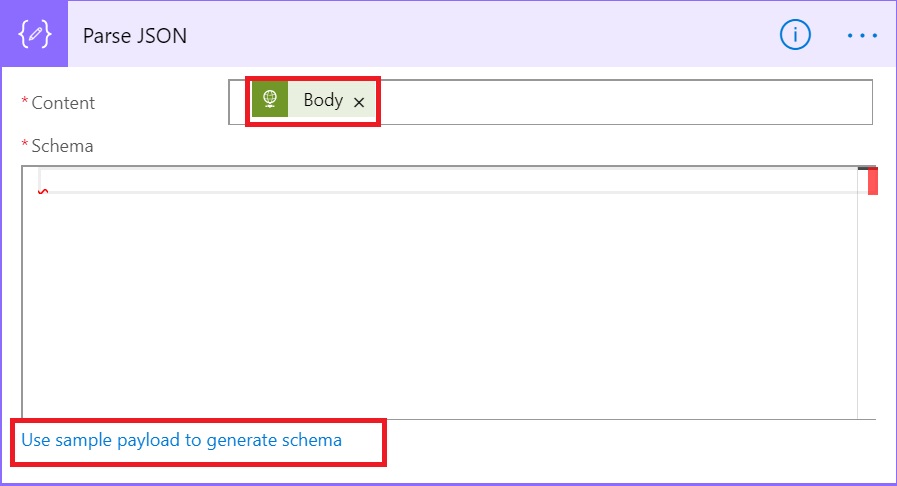
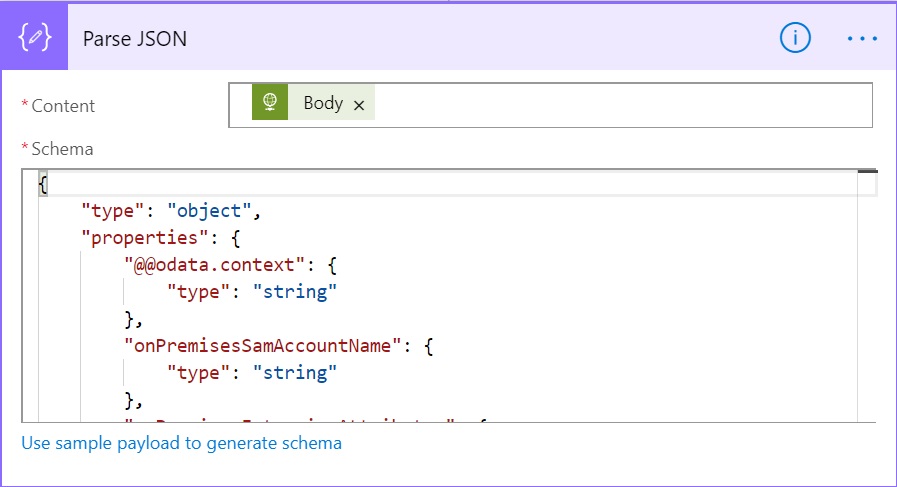
In the newly opened form under Content, select Body from the Dynamic content and then click on “Use sample payload to generate schema”.
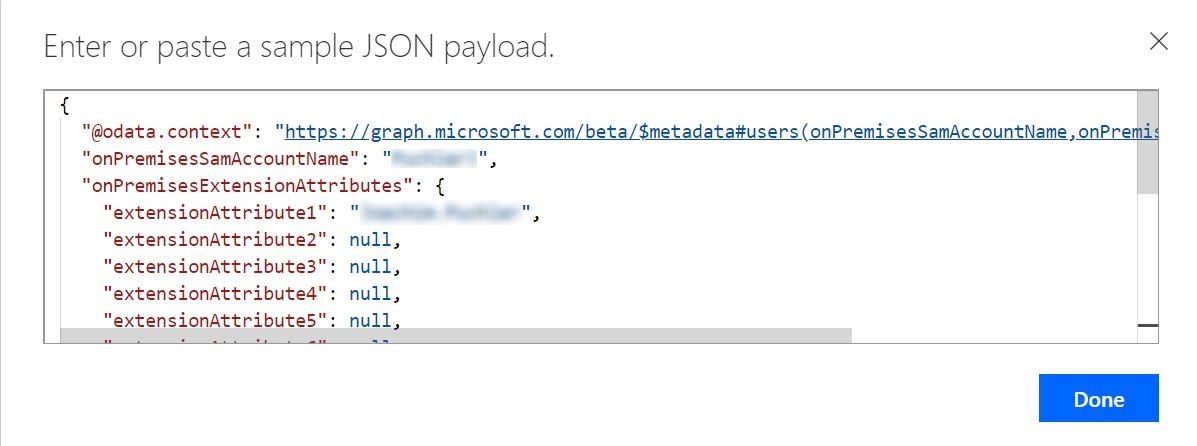
In the popup screen, you can paste the output copied from the body section of the previous step. You can also remove the additional fields and fields that you don’t want. If you remove those from the data before generating schema, those will not be available in next steps.
For ease of understanding, I just kept all generated fields from the generated output and clicked Done.
Now, you can see if action shows the generated schema based on the data provided.
Process Final Results
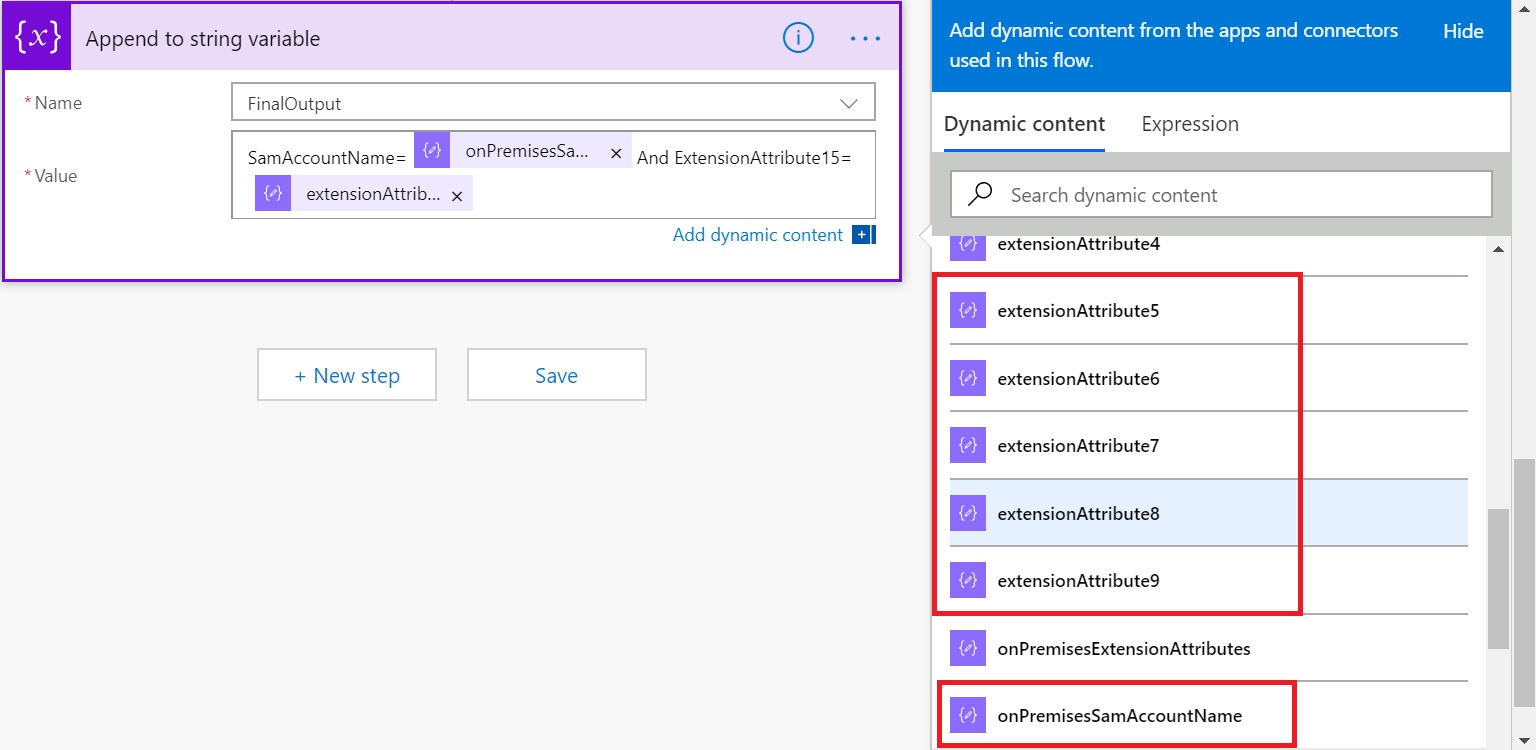
We are almost there. Now that we have parsed the JSON, lets see how we can use those extracted attributes. For the sake of simplicity, I will just append those values in the variable “FinalOutput” which we initialized earlier. As you can see, now all those Extension Attributes and SamAccountName is available under Dynamic Content to be used separately.
Let’s just create a text output combining SamAccountName and say extensionAttribute15.
Final Outcome
We are all done here. Run the flow and you can see the outcome like this.
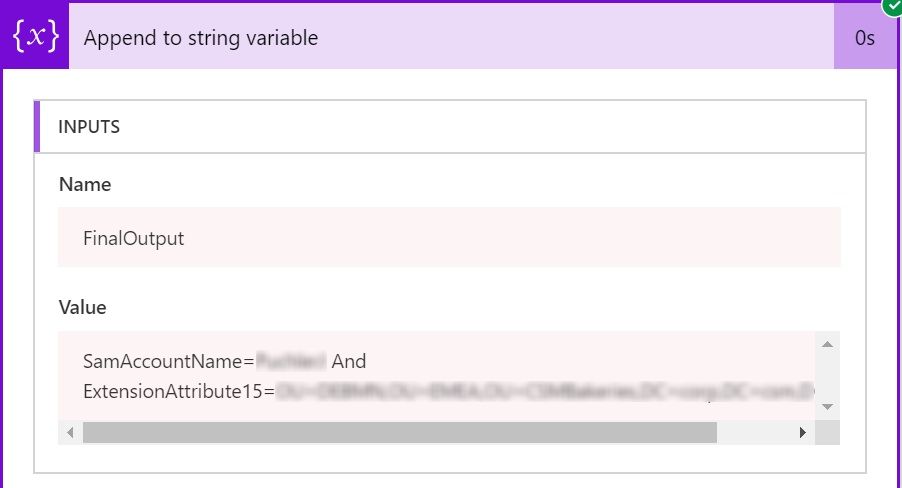
You can change the trigger to read user email from any other source like a SharePoint list or even loop through a list of users. As long as we can pass a valid existing email ID to the API, it would extract the available extension attributes.
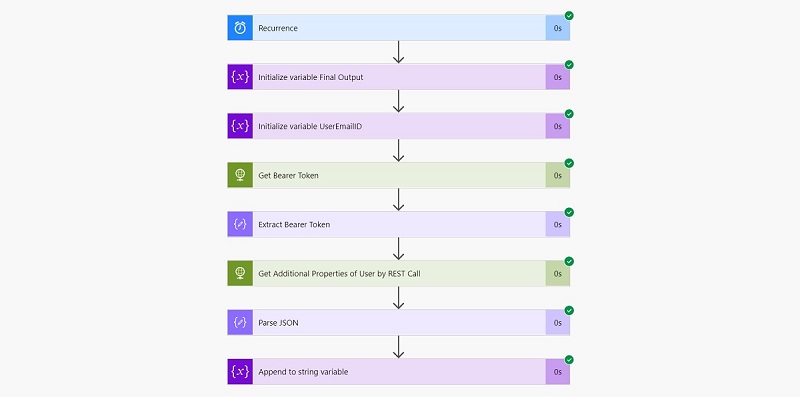
Final Flow Structure
This is how our final Flow looks like

And that’s it for today. Hope this helps.
Enjoy,
Anupam
4 comments
Awesome! You are a genius!
But can you tell me how to get the address of an individual from Azure AD?
I have not tried it, but the same API explained in the article, also has the fields like steetAddress, state, city, country etc., so you should be able to get those easily.
Great, I got those. But cant get the user’s manager. I added the Manager property in the GET call – https://graph.microsoft.com/beta/users/@{triggerBody()[‘Author’][‘Email’]}?$select=onPremisesSamAccountName,onPremisesExtensionAttributes,country,streetaddress,city,state,postalCode,physicalDeliveryOfficeName,Manager,faxnumber
I got the manager using a different queryhttps://graph.microsoft.com/v1.0/users/[user]/manager