Updated on 05-Feb-2021: There is an improved implementation possible to achieved this feature now. Refer this article – https://anupams.net/send-documents-by-mail-to-sharepoint-online/ – to know more about it.
Incoming emails or sending documents to SharePoint document libraries has been one of the most loved features of SharePoint by business users for long. This has been there since SharePoint 2007 and all on-premise versions including the latest SharePoint 2016. Even though, it requires quite some steps and infra components to do the initial setup, once running, it gives business users real ease of uploading documents to SharePoint library directly from their mail client like outlook.
With more and more companies looking to move to SharePoint Online, lack of this feature always comes as a tricky discussion between IT and business users. In on-premise system, they can just enable any document library for incoming mails and even control who can send documents via mail.
but unfortunately this feature is not available in SharePoint Online yet.
Alternate Solutions
Obviously, since this issue has been there for sometime now, SharePoint experts came up multiple workarounds like these. But none of these seem to fit the exact requirement easily, except last one which mentions Microsoft Flow.
The solution we are going to discuss today will use Microsoft Flow that can potentially provide almost similar functionality (with some drawbacks) with least efforts.
Microsoft Flow
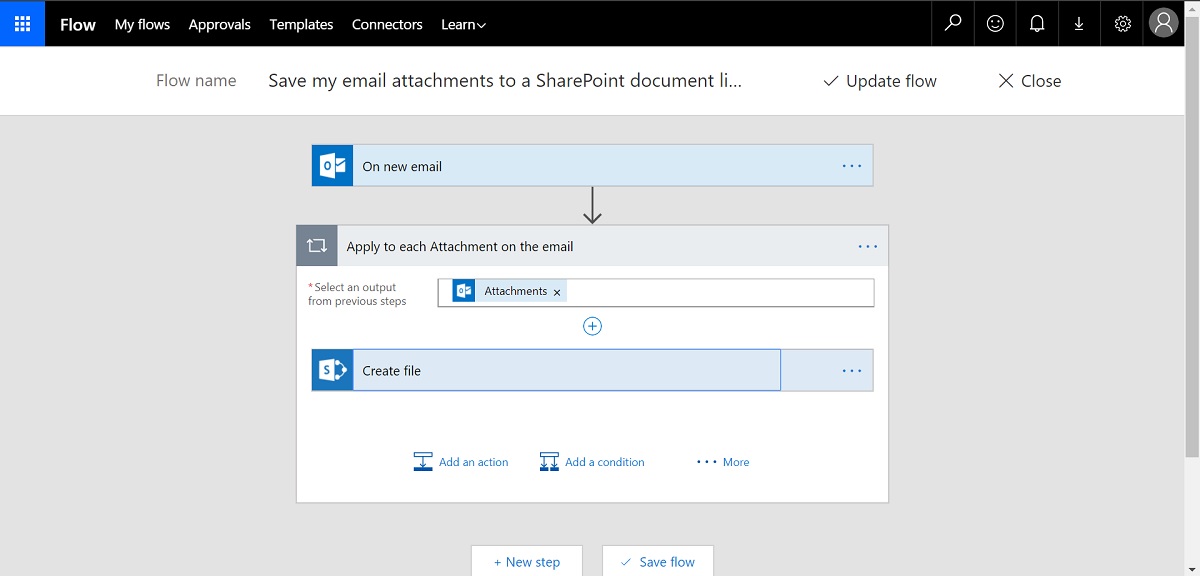
We can make use of Microsoft Flow to create a simple flow which will read mails from a Shared Mailbox in Exchange Online, get the attached documents and upload those in the SharePoint Online document library.
Pre-requisites
- An Office 365 account with Flow license assigned
- This account needs to be exchange administrator and user management administrator or Global administrator of the tenant. Alternatively, you can ask an existing administrator to perform the tasks
- A shared mailbox for each document library which needs to be mail enabled
- A SharePoint Online Site Collection with Document Library
Create a Shared Mailbox
Our first step is to create a shared mailbox that will be used as a mailbox for one specific SharePoint document library. You can also use any personal mailbox for this purpose, but since Shared Mailboxes don’t require licenses assigned, that’s a better choice.
If your account has exchange administrator permission (or global admin of tenant), then you can follow the steps yourself or ask any admin to do it for you.
- Go to Office 365 Admin portal
- Browse to Exchange Admin Center
- Select “recipients” from left nav, shared from top menu and click on the “+” icon
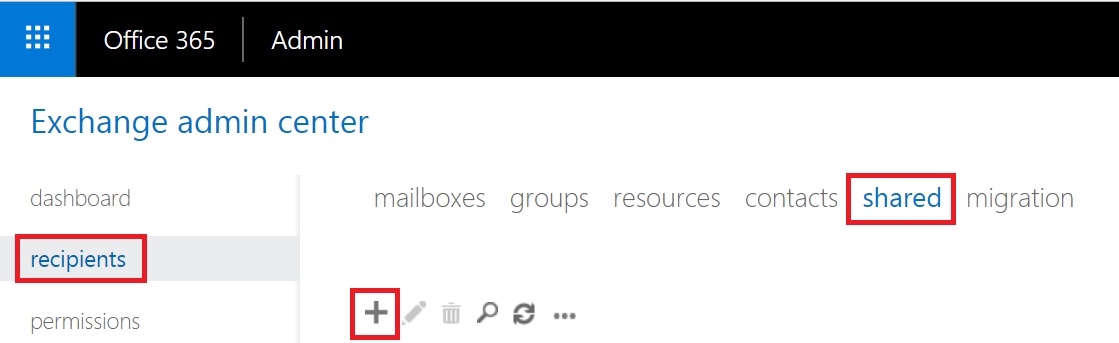
- Enter the Display name, email address to be used for the document library and the accounts under which the flow will run and click OK.
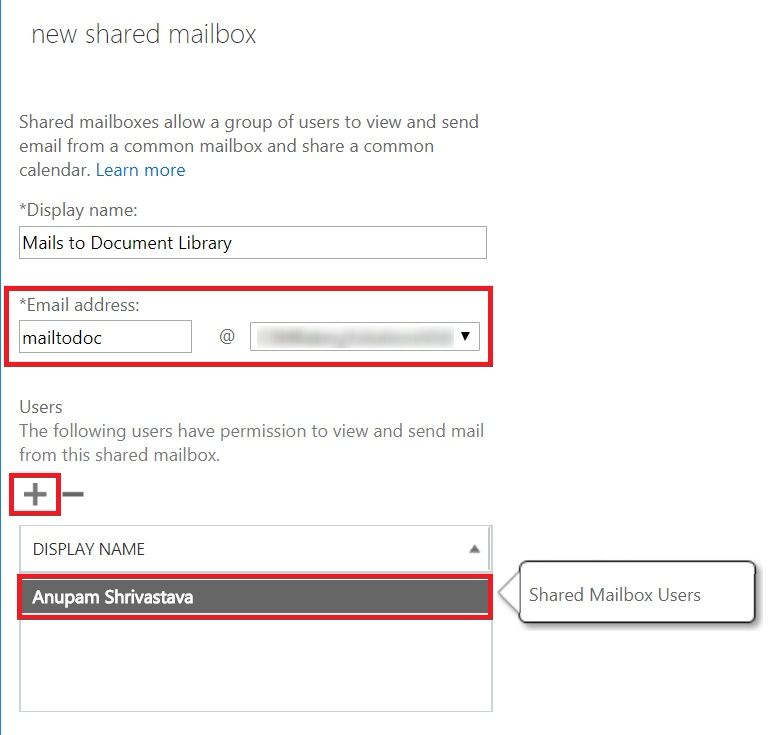
Now, we have a shared mailbox created on which users will send mails with attachments to store documents in corresponding SharePoint document library.
Reset Password
To use this mailbox in Microsoft Flow, we need to get the password for this newly created mailbox.
- Go to Office 365 Admin Portal and Click on Active Users from left menu
- Search for the newly created mailbox
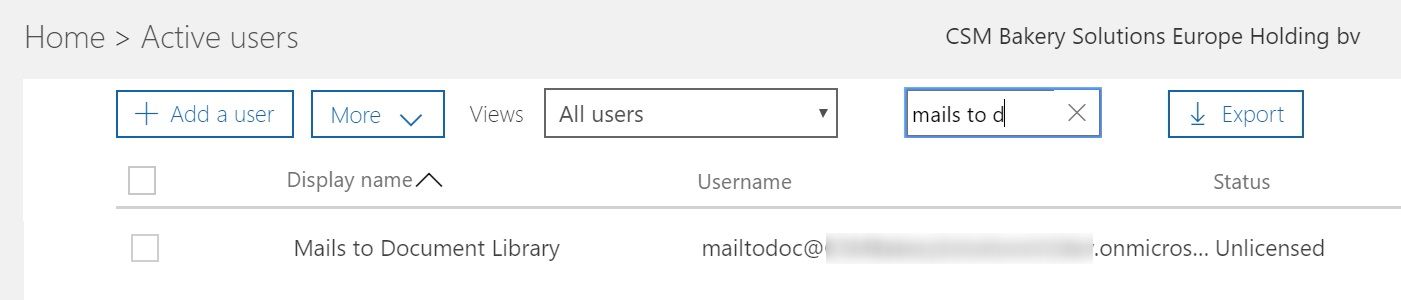
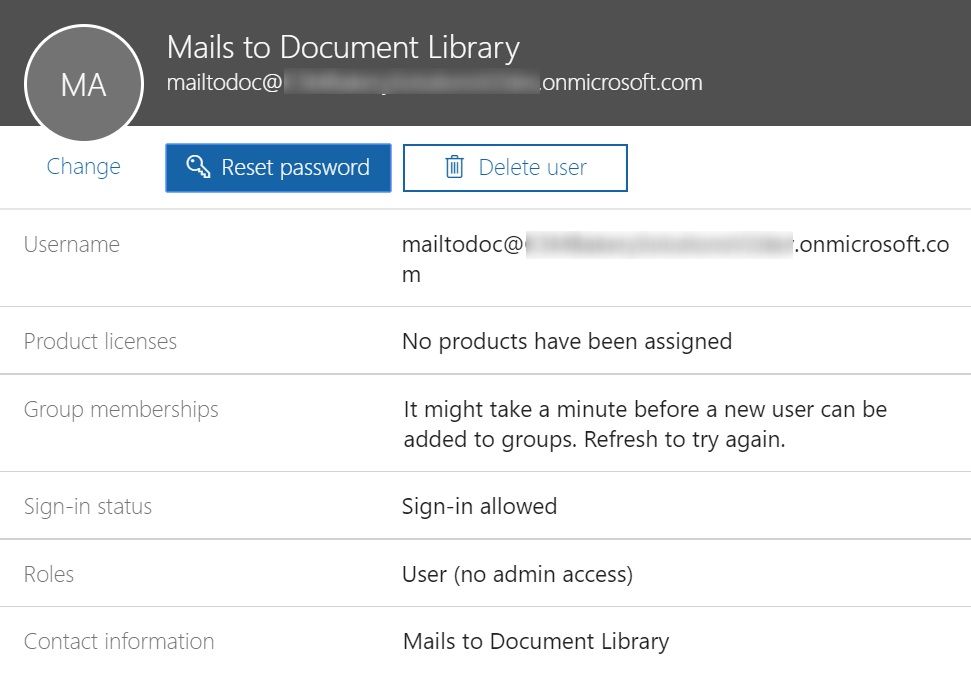
- Once found, click on the name to open the properties window
- Click on Reset Password and set a new password for this account
Create Flow
Now that we have the required mailbox and it’s password in place, lets go ahead and create our flow.
- Go to Microsoft Flow and login with your Office 365 account. This account need not be the same mailbox account.
- Click on My flows and then on Create from template

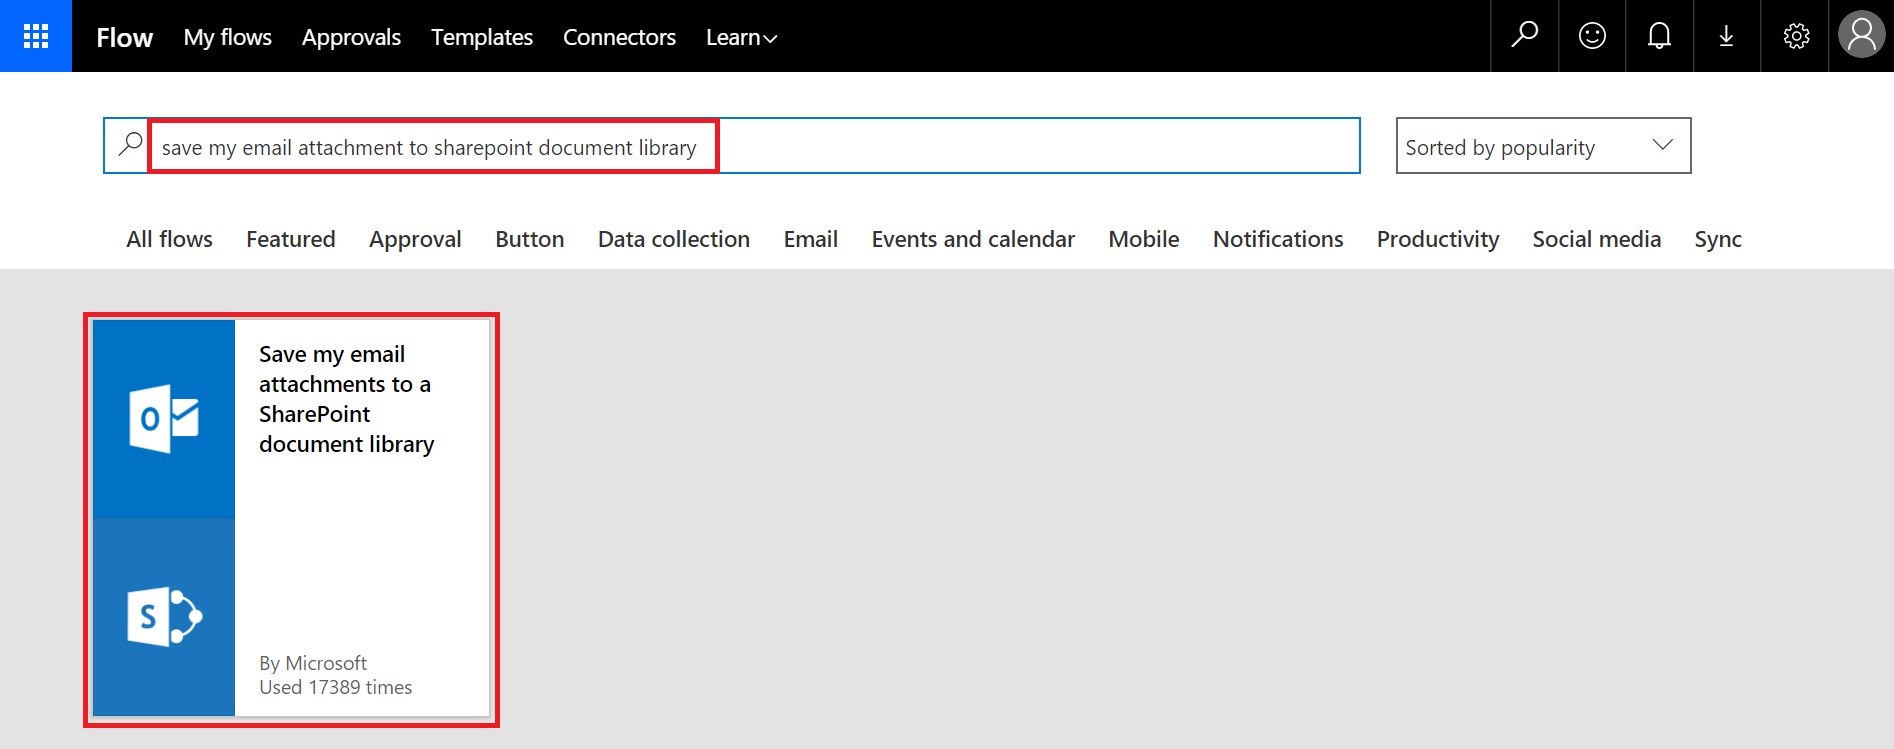
- In the next page, search for the required template by typing in “save my email attachment to sharepoint document library” and press enter
- You would see one template appearing. Click on that template
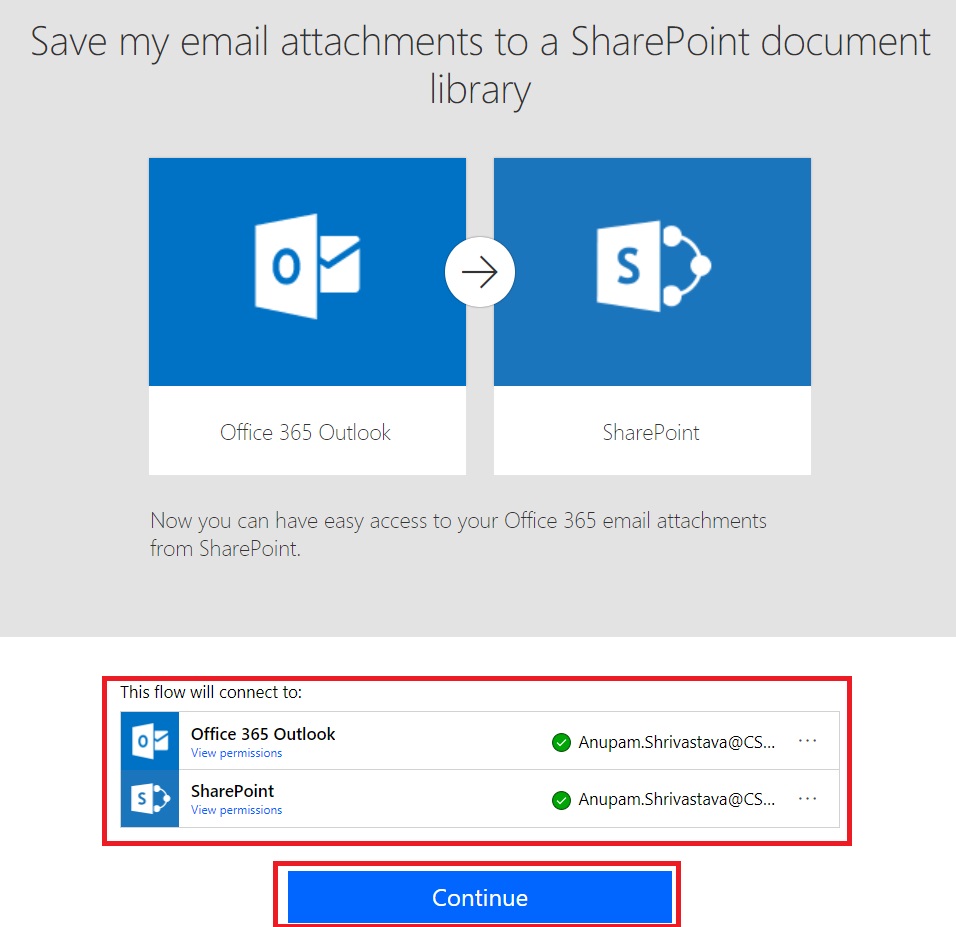
- It will show another page with source information and if with the given credentials, it could connect to those sources (exchange and sharepoint) or not.
- If all is good, then you would see green icons next to each source. Click on Continue to create the flow
- At this stage the flow gets created, but the required fields do not have actual values which we want.
Configure Flow
Now that we have our flow created based on the desired template, we can configure it to read the attachments received in the mailbox that we created and upload to the document library of our choice.
Configure Source
We first need to configure the source which will trigger the flow to start. This mean, when any new mail is received. For this we want to monitor the shared mailbox created earlier. So, we need to add that account under my connections. Click on the three dots (…) and click on Add new connection.
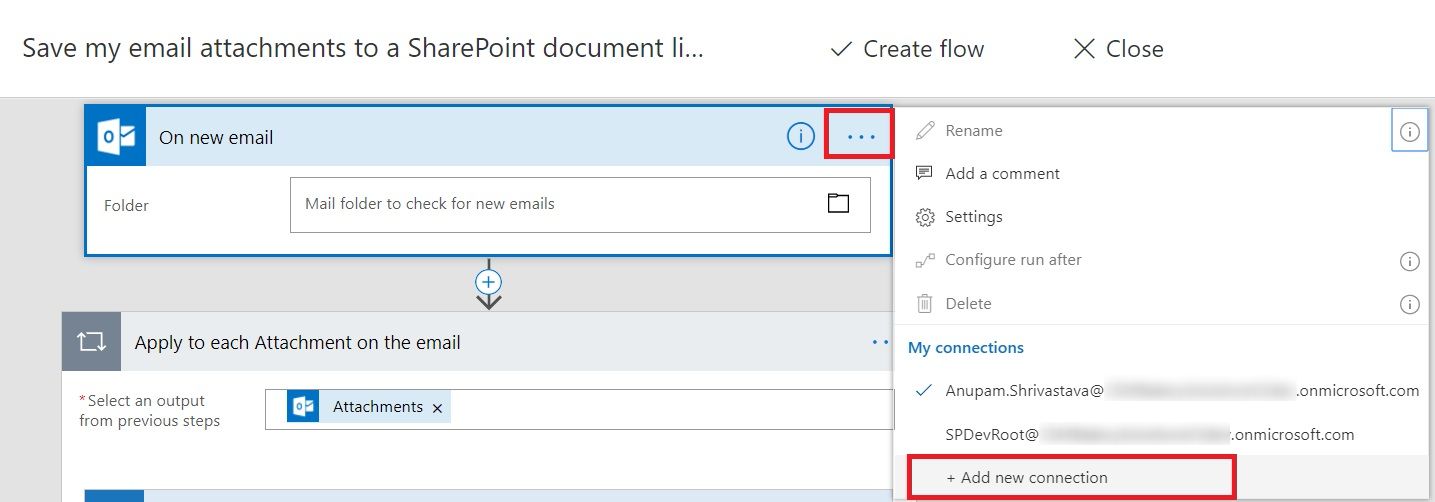
It will pop-up a credential login window. Login with the email ID of the shared mailbox and password created earlier.
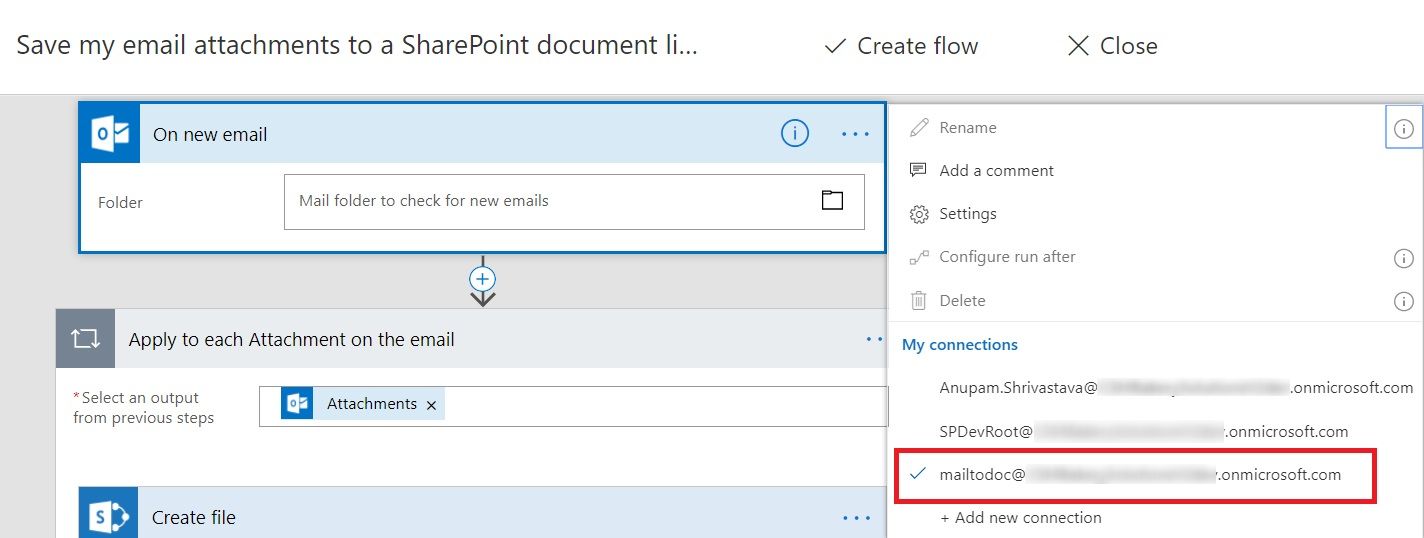
Once created, you can see that added under My connections
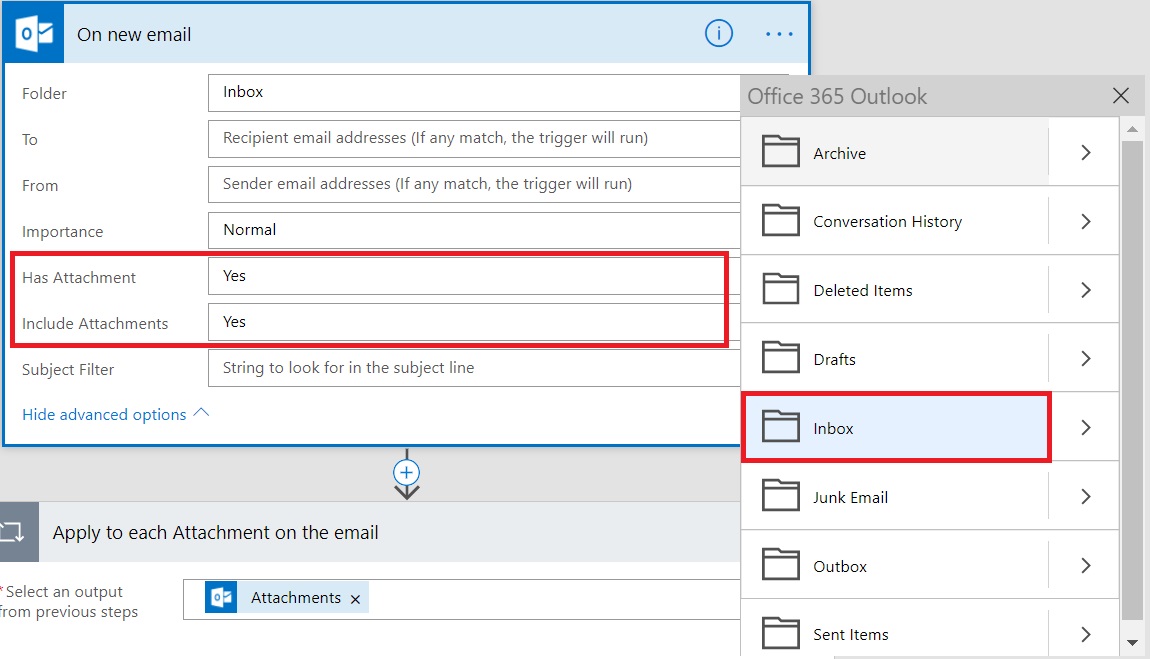
Once the connection is added, we need to configure which folder to look into the incoming mails. So, click on the folder icon next to the text box with screen tip as “mail folder to check for new emails” and select Inbox from the menu. You may also want to select Has Attachment and Include Attachment to yes to ensure this flow only triggers when the incoming mail has any attached documents.
So now the source is set. Let’s configure SharePoint part.
Select the Site URL either from dropdown or just by typing it in the site URL in Site Address and then the document library in the Folder Path field and click Save Now.

You will get this success screen, click Done.

Now are flow is configured, enabled and ready to run whenever a mail is received in our shared mailbox.

Verification
Now that all is configured, let’s send a mail to our shared mailbox and see if our flow works as expected. From our outlook or any other mail client just attach a sample document and sent that to the email id of the shared mailbox.

It may take a few minutes, before you can see the flow gets triggered. wait for 5-15 minutes and then check your flow. It should come up as succeeded under Run History.
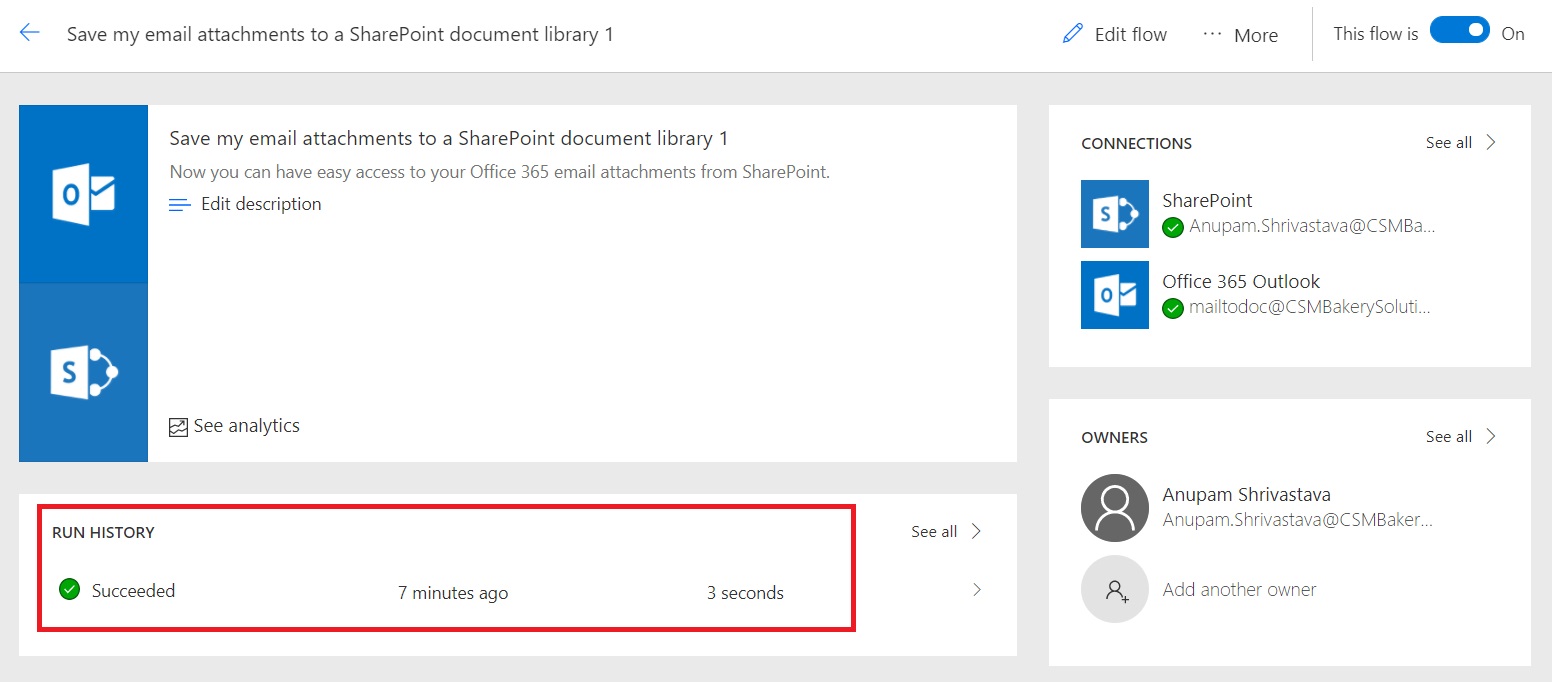
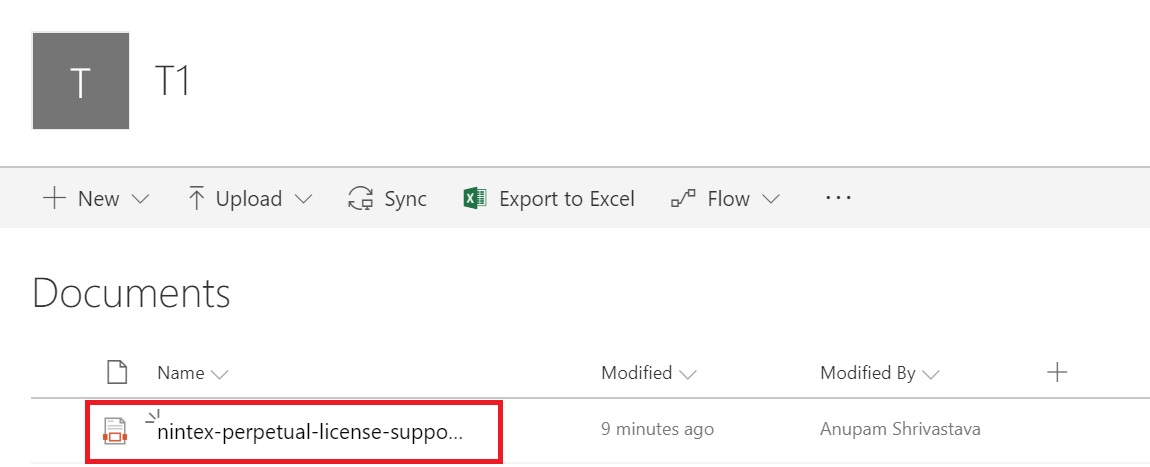
Now, it’s time to look into our SharePoint document library which we had configured in the flow and find out if that attached document was uploaded. You would see the document was uploaded and modified by would appear as the same account under which the flow gets executed.
So, all good. We have a SharePoint document library to which we can send documents via mail. For each such document library, we can create a new shared mailbox and a flow. You can share this flow with your colleagues to make it a Team Flow, so that they can also monitor and manage it.
Drawbacks
Even though this incoming mail solution for SharePoint Online works with less than 15 minutes of effort, it still lacks many features which are there in on-premise version out of the box.
- For simplest implementation, a separate shared mailbox needs to be created for each library, so there is a dependency of exchange administrator.
- To reset the password, there is a dependency of User management administrator
- Either some admin needs to configure all flows for all required email enabled libraries or corresponding site admins should have the technical knowledge to be able to do it themselves.
- It is not easy to restrict permissions to the users who have permissions to upload in the corresponding document libraries. Specially, if there are large number of such users are there.
Summary
I will just summarize by saying Microsoft Flow provides a really easy and useful way to configure incoming mail feature in SharePoint Online. For me this is a preferred solution, as it doesn’t require users to move to Microsoft Groups, Teams etc. and provides the same document upload experience as in their existing SharePoint sites.
Enjoy,
Anupam
11 comments
This is useful as a workaround for cloud based solutions. What the post above doesn’t consider are:
1. Treatment of duplicate file names – the sender has no knowledge that the upload has failed if there’s already file with the same name on the destination Doc Library.
2. Email footers contain images that are treated as files and uploaded, soon cluttering the document library with useless images files.
What is needed is a document type policy with a way to administer a test at runtime to ensure that the files attached marry up with allowable files only (say only .xlsx, .pdf and .docx as an example) with a message to the sender to say some files did not match the criteria and therefore weren’t uploaded.
In addition, if a file with the same name exists on the destination folder, notify the person trying to upload so they can take appropriate action.
You can just add additional actions in the Flow to take care of the scenarios you highlighted.
You could do this by setting flow to watch a different folder, and then set up server side mailbox rules to move the correct mails into the watched folder.
Great tutorial. But is it possible to recieve calendar invitations to this newly created mailbox and to write these events in a sharepoint calendar?
Yes, I had written another article about that – here you go – https://anupams.net/send-meeting-invites-sharepoint-online-calendar/
Normal attachments are working great. However, when I try to forward an email as an attachment it doesn’t work.
Another drawback is that you might wanna add some metadata, like who was the sender of that email. Turns out, for me at least, that this will only work if the sender is in the company’s AD, if not, it will return an 400 error “user not found”. Still haven’t been able to find a workaround. I give up.
Hi
I liked this post and I have tried it but it does not work for me.
When I check “Run history” I only get status “Skipped” in the first evetn (“On new email with attachement”.
I know that I have sent a emial with attachments.
You can login to the outlook web at https://outlook.office.com/mail/inbox with the shared mailbox account and see if mail is being received in the mailbox or not.
Hello. If I cannot reset password of the shared mailbox, hence it connects to my personal account’s mailbox, is there a way to solve this issue? Our company’s admin won’t let me reset password of the shared mailbox 🙁
As mentioned in the article, the choice of Shared Mailbox was mainly due to the fact that it doesn’t require exchange online license to be assigned to work. The solution will work with any other mailbox (like it’s working with your personal mailbox). You can ask your company admin that they can setup Multi-factor Authentication on that account, if they are concerned about security or offer you some other mailbox with exchange online license assigned.