In a complete Office 365 implementation, every user gets a personal web space called OneDrive Site. This is a place where they are supposed to store files which are not supposed to be shared or ready to be shared with larger audience. OneDrive for Business sites combined with OneDrive client provides great way to ensure users are truly mobile. It allows them to access their files anywhere from any device, of course, depending on organizational policies.
Organizations have love-hate relationship with OneDrive – Some have accepted it to the core whereas others see it as a potential security hazard, which might allow leakage of confidential data by their employees knowingly or unknowingly. But I will not get into this discussion in this article.
OneDrive Files Synchronization
When OneDrive client is installed for the first time, it will prompt to login using your Office 365 account and the location on your machine where you want to keep your OneDrive Files synchronized. Once logged in, it will start synchronizing all files within that folder with your OneDrive Site immediately.
The feature discussed in this article applies to Personal OneDrive storage as well using microsoft accounts like hotmail.com or outlook.com
You would see a green icon with your Files/Folders to highlight that the synchronization has been completed.
So, all good. You can open these files now from any other device including OneDrive App on Mobile and read/update the content. You can also set up the OneDrive sync on any other machine have the entire content replicated there. Works like a charm.
So what’s the Problem
If all works so well, is there anything to worry about? Actually yes – Storage requirement on your client machines! Even though your OneDrive site can handle as much as 10TB of content, we need to wait for sometime to get that kind of storage in-built in our laptops/desktops.
Some organizations have been really innovative about OneDrive usage and are even using that as a backup solution. Consider this scenario – configure the entire users folder (c:\users\<your name>) as the OneDrive Sync location. Now, everything you do on your machine (desktop, documents etc.) everything will be synced to OneDrive. When you delete a file, it will go to OneDrive site’s recycle bin and will stay there for up to 93 days, even if you delete from your local recycle bin also.
It’s a little tricky to get this scenario implemented though, as OneDrive will create its own folder named OneDrive inside your user folder. But that’s a story for some other article.
So, you got the idea. As the usage of OneDrive site grows with Onedrive for business sites and may be multiple SharePoint team sites, you can see your system’s disk space running out in a few months.
What can we do about it
Well, it’s as simple as click on a button, literally 🙂 I am talking about the feature “Files on Demand” of OneDrive Client.
OneDrive Files On-Demand feature requires Windows 10 version 16299.15 or later and OneDrive build 17.3.7064.1005 or later. You can latest version of OneDrive client download from here.
Enable Files on Demand
This feature is available under Settings tab. Right click your OneDrive client icon and click on Settings and then click on Settings tab.
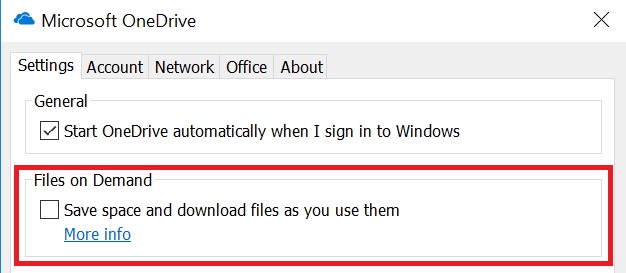
This option is NOT enabled by default. So, all synced files will be downloaded on the client machine and take disk space locally.
Let’s go ahead and click this checkbox and click OK.
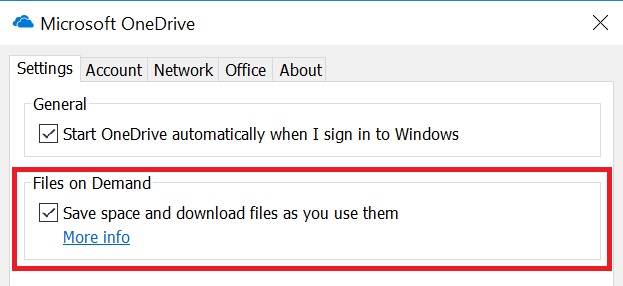
When you click OK, your OneDrive client settings dialog box will be closed.
This setting is unique per device. So, if you are syncing the same OneDrive location with multiple machines, you need to do this setting in all those machines separately.
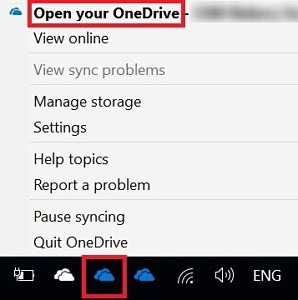
OneDrive Synced Folder
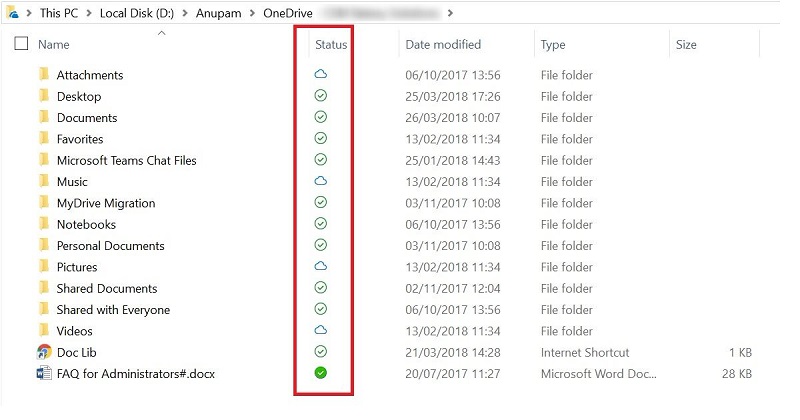
Let’s now take a look at what happens to already synced files and folders when “Files on Demand” option is selected in OneDrive client. Right click your OneDrive client icon and open the synced folder.
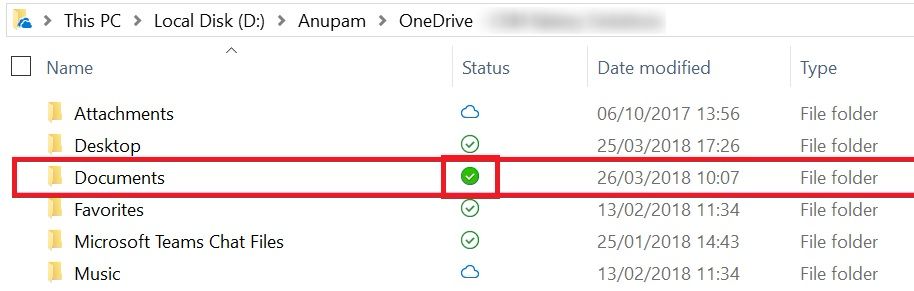
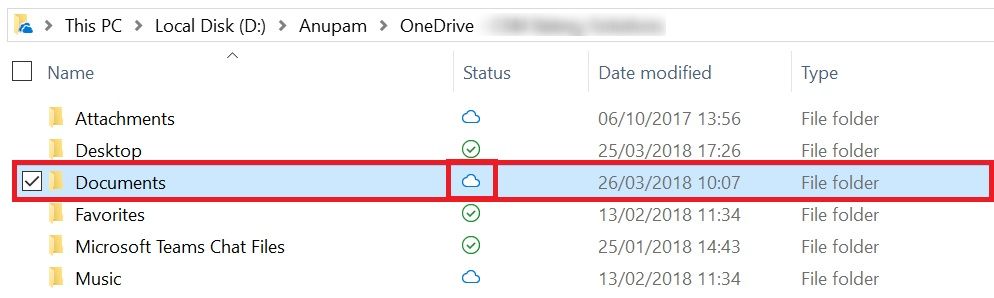
You would immediately notice that Status column now shows a number of different icons.
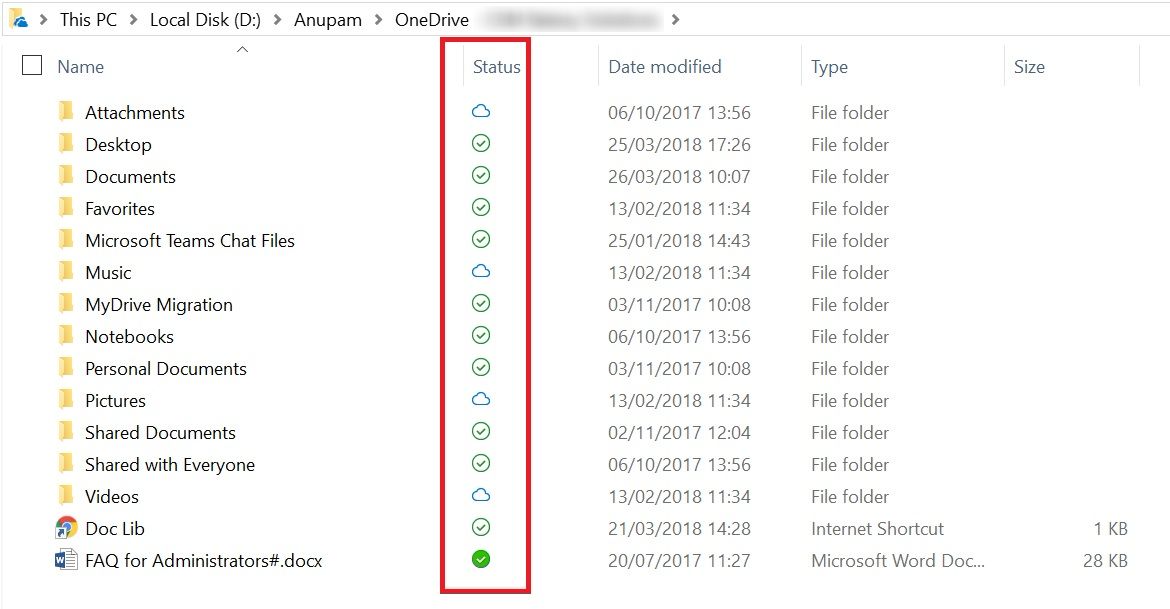
What do these different icons mean?
- Cloud Icon: It means the File/Folder is Online only and is NOT taking any space on the client machine.
- Green Circle with Green check mark: It means the online only file was opened and hence has a local copy available and will take the disk space on client machine. If a folder is marked with this icon, that means new files/folders created from another synced device or directly using OneDrive web interface within that folder will appear as cloud only files/folders.
- Filled Green Circle with White check mark: It means the file/folder always has a local copy available and will take the disk space on client machine. If a folder is marked with this icon, that means new files/folders created either from another synced device or directly using OneDrive web interface within that folder will always be downloaded locally.
Keep Files Locally
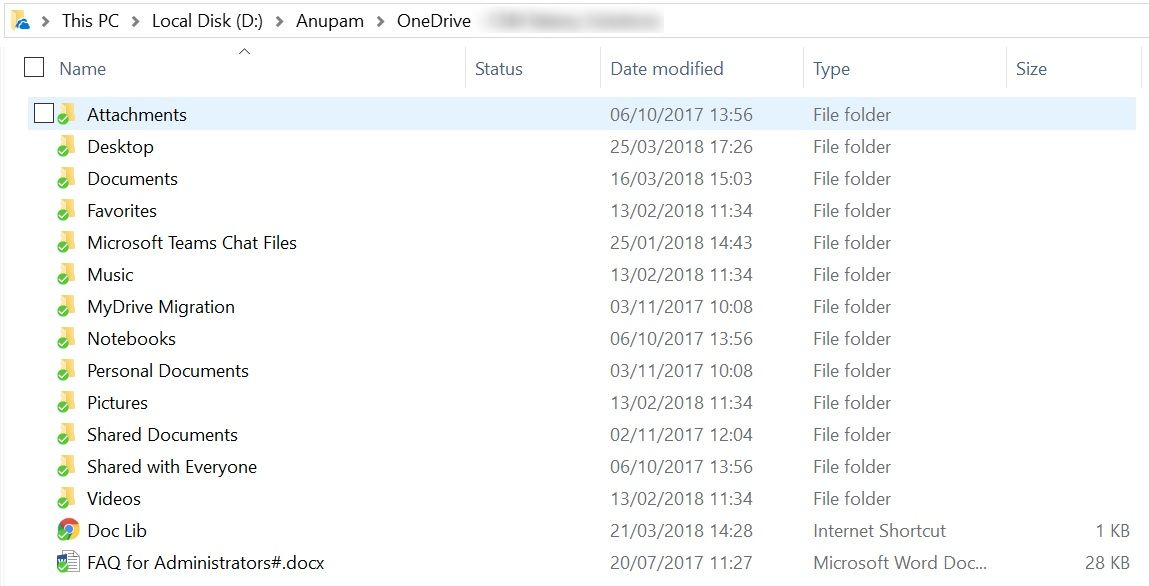
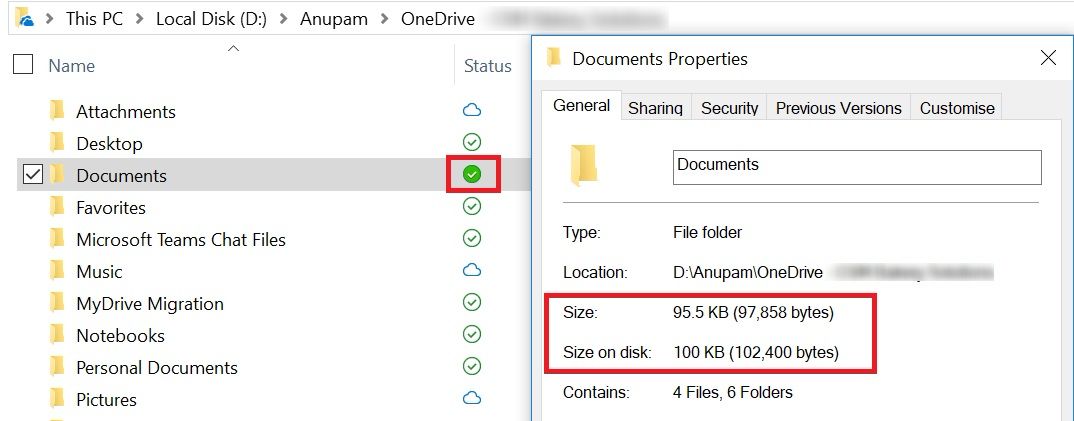
When an online only file is opened, it’s downloaded automatically and the status icon changes to “Green Circle with Green check mark“. Now, if you want to keep this file/folder locally always, just right click that file/folder and select “Always keep on this device”.

You will see the file/folder icon will change to “Filled Green Circle with White check mark” within a few seconds/minutes depending upon the size.
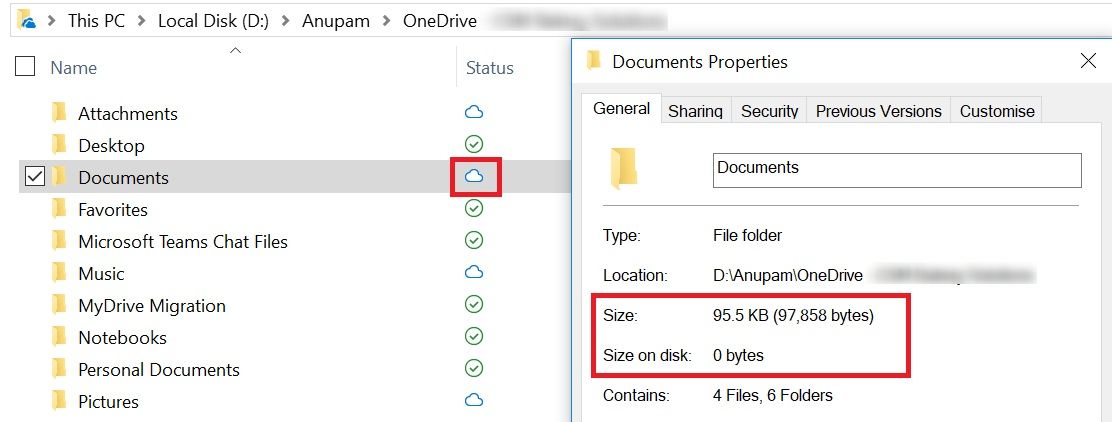
If you want to see how much space synced files/folders are using on your local disk, just check the properties. As in this case, you can see, it’s using 100 KB on disk.
Keep Files Online Only
This was the main topic of this article, so here we go 🙂
You can selectively pick and choose which files/folders you want to keep Online only. Like files on which you work frequently make sense to keep locally, otherwise it will be downloaded next time you open that.
For online only files, you will still get the information about last modified and windows search on file name. It works like a shortcut to online files, just a bit better.
So, to make any files/folders online only, just right click on that and select “Clear Space“.
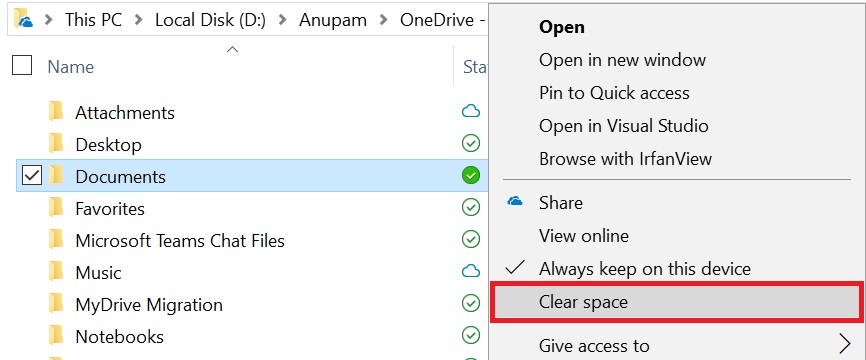
You would see, it will immediately start cleaning up space from your local disk by removing the content of those files/folders. You would see a sync icon during this process.
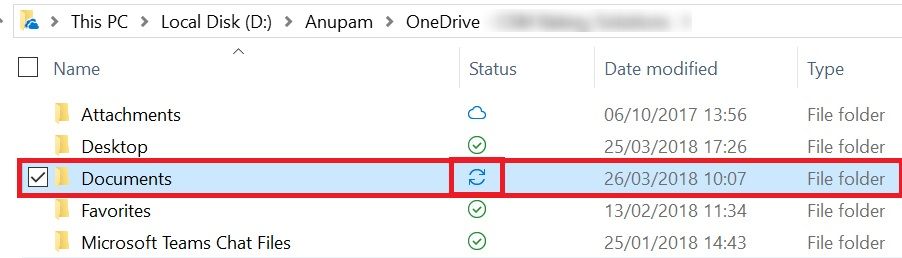
After a few seconds/minutes, you could see that the file/folder has been changed as Online Only.
Now, let’s just a quick look what happened on local disk. You would see, the Size on disk now appears as 0 bytes 🙂
It is also possible to have a folder online only and some files inside that folder configured as Always keep on this device
And that’s it. You would still see all the files and folders in your File Explorer but now it will consume a lot less space on your local disk 🙂
Hope this helps.
Enjoy,
Anupam