
Recently I got across a discussion about SharePoint Online now supporting both Classic and Modern Sites. As with other Office 365 services, Microsoft has been releasing the features incrementally in SharePoint Online as well.
Update
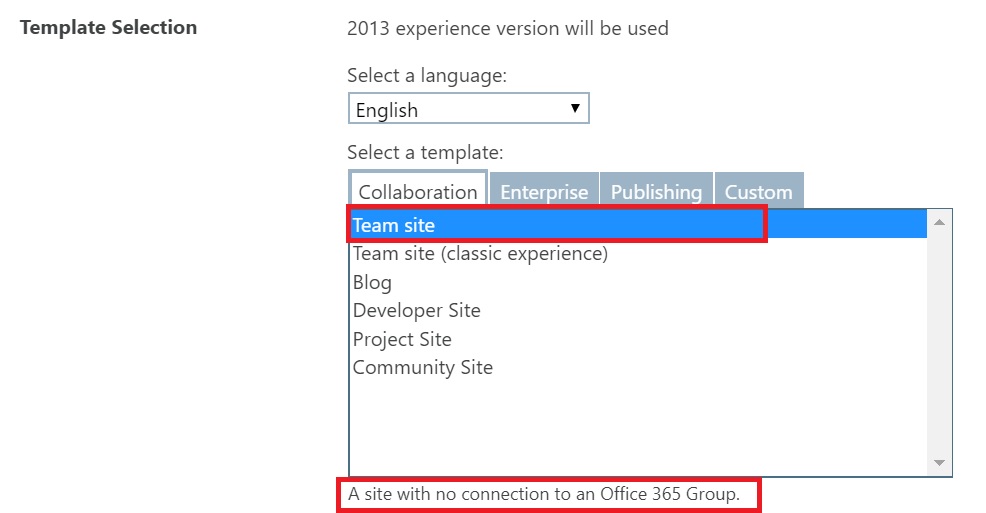
Now, it is possible to create modern sites directly from SharePoint Admin center, which are NOT office 365 group connected. Just select the “Team site” from the list of templates in the Template Selection field.
Continue with rest of the post only if your site was created in classic mode.
Why This Article
When we create a Site Collection from SharePoint Online Admin Center, we still get a landing page with classic page and look n feel. Now if we leave all the settings as is, site will have a mix of modern pages and classic pages and user experience will not be consistent. It may still be useful in some scenarios where we want some pages to use older web parts though.
So, this article is about how to set up that site, so that all the current and future pages comply with modern look n feel and we get Responsiveness for entire site as bonus 🙂
When I googled a bit, I found the ways described to create modern sites essentially include creating Office 365 Groups! That doesn’t work for me. Even though Office 365 Groups do create a Modern SharePoint Site Collection, that’s tricky as anyone can create a group and become site collection administrator of that unless that is restricted using PowerShell. Also, groups come with some additional functionalities like Conversations, which redirect to exchange online and doesn’t go too well with non-technical users, for whom the UI changes completely.
Well there are more reasons, not to replace our normal team sites with groups yet, but I won’t go into those yet. I would just focus on how to create our SharePoint site collection which uses modern interface.
So, let’s start.
Create a Site Collection
We’ll start with a out of the box site collection based on team site template. Go to SharePoint Online Admin Center and create a new Site Collection based on Team Site Template.
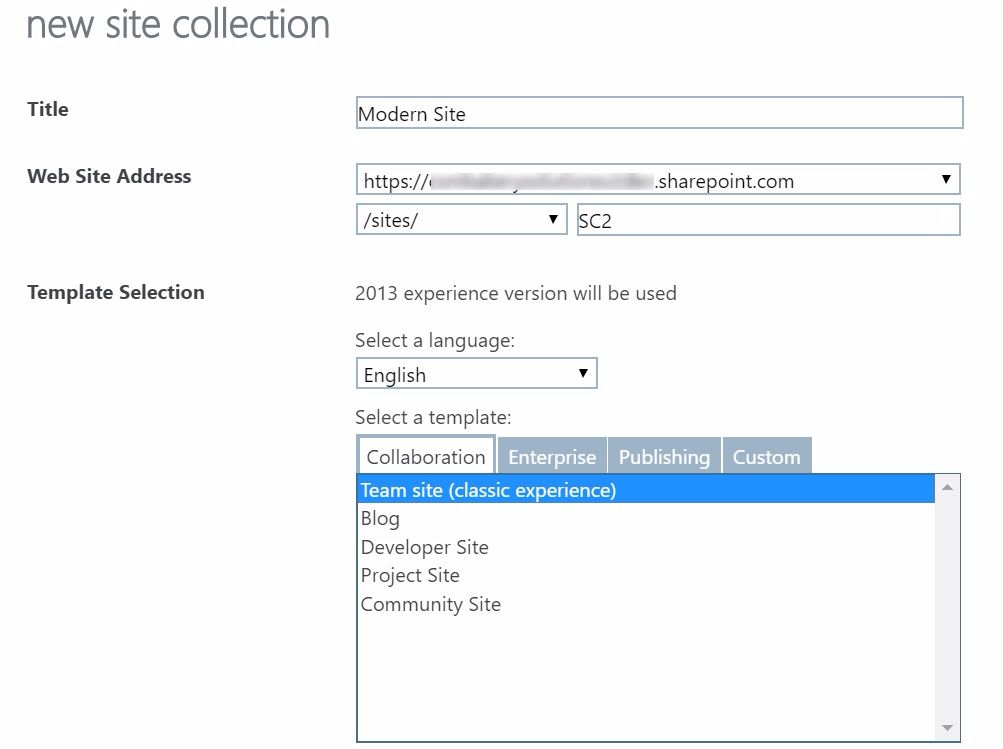
It will take between 5 to 15 minutes before the site gets created. When you browse the site, you will see almost nothing new in the landing page. It’s a classic wiki page that we have seen since long.
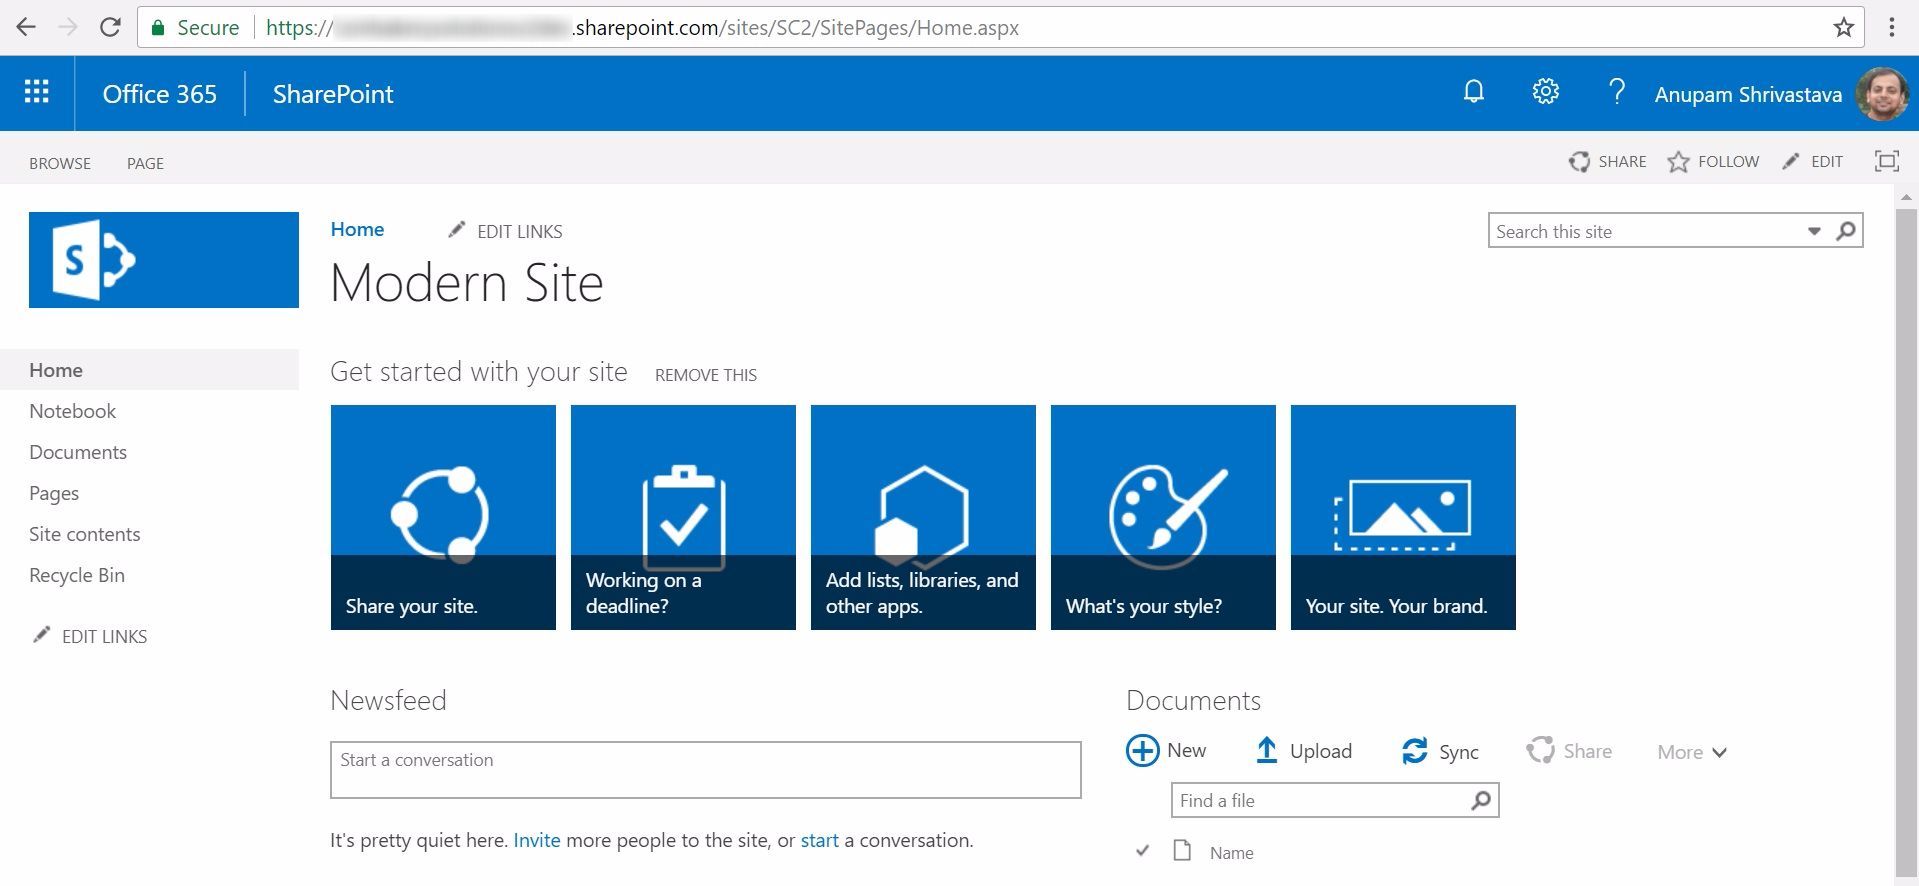
Even though, internal pages like Document Libraries and Lists are already in the modern look n feel now, for pages we need to do some additional work.
If you happen to use Publishing Site Template, instead of Team Sites, no problem, Just go to Site Settings and from under Site Features, enable Site Pages feature and then follow this article for rest of the configurations.

Create a New Modern Page
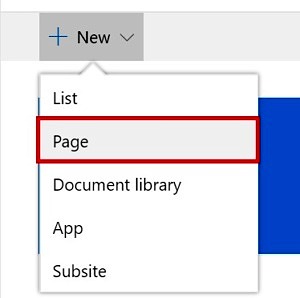
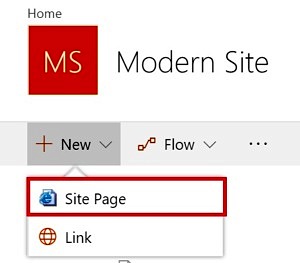
We’ll start with creating a new modern page. Go to Site Contents and click on New – Page
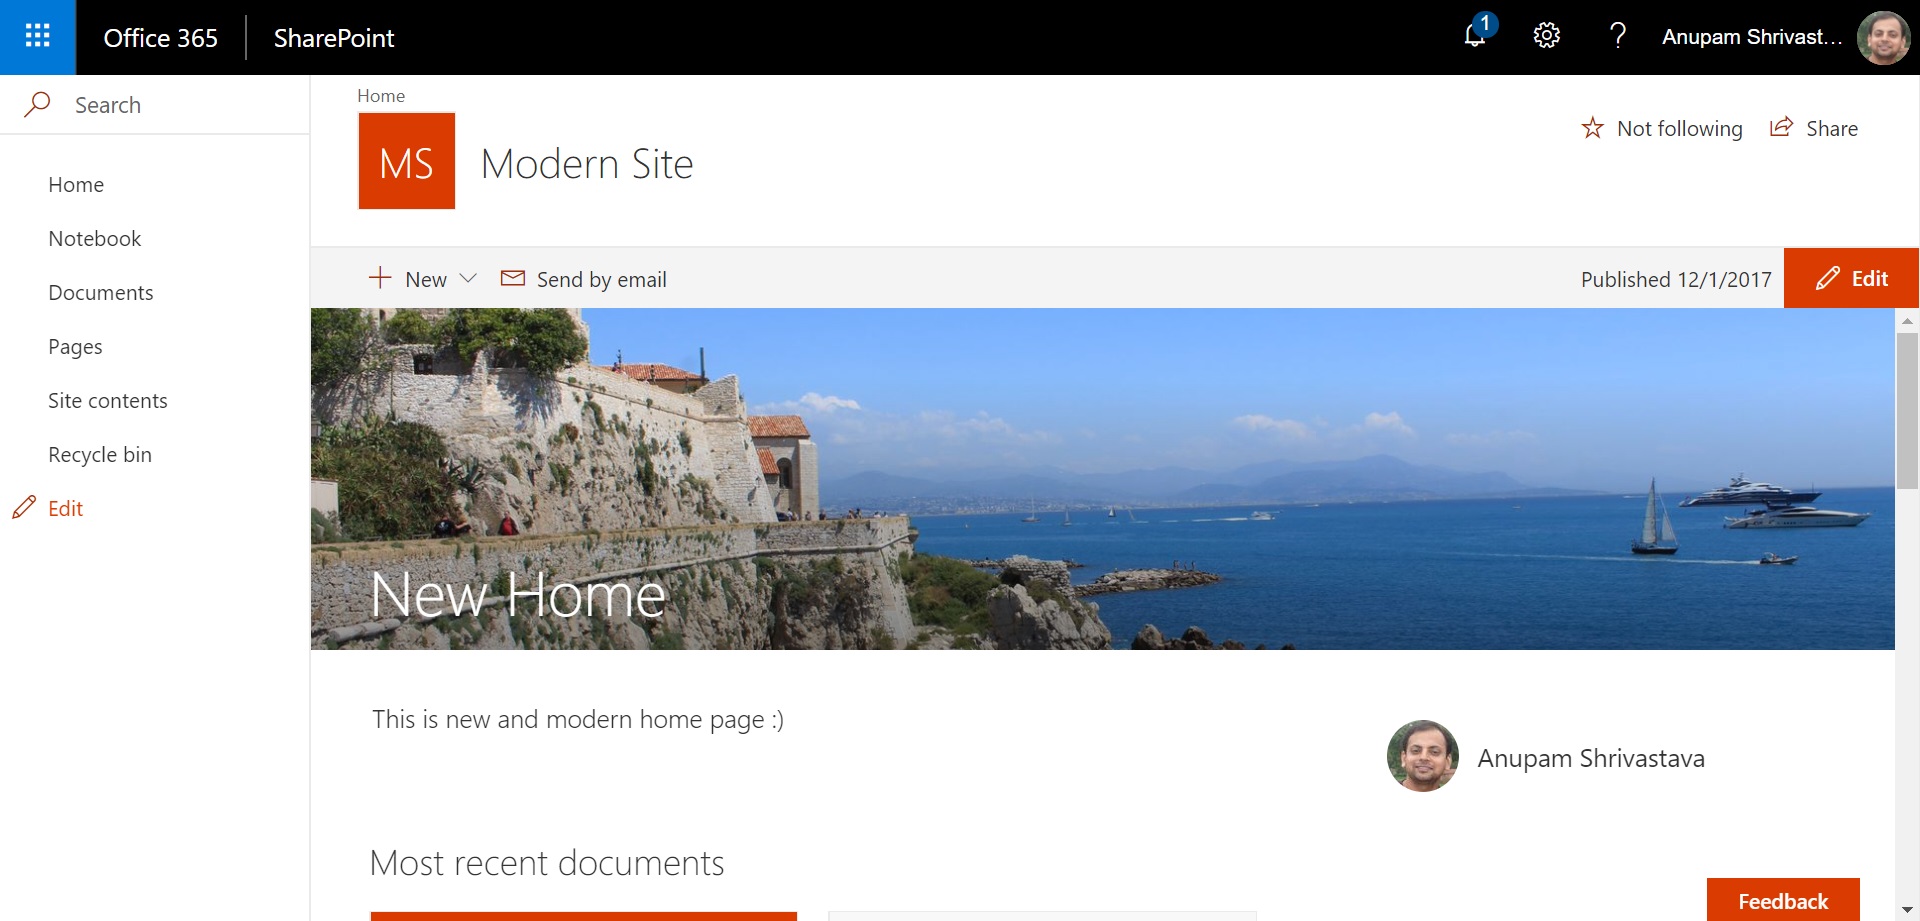
A new modern page will be created under Site Pages library. Give it a name, let’s say “New Home”. Configure the page will various content and sections as you want and publish it.

At this point, your Site Pages library will have both Classic Pages which get created by default and this new modern page.
Set the modern page as Default Home Page
Now that we have our modern page created, let’s set that up as default landing page of the site.
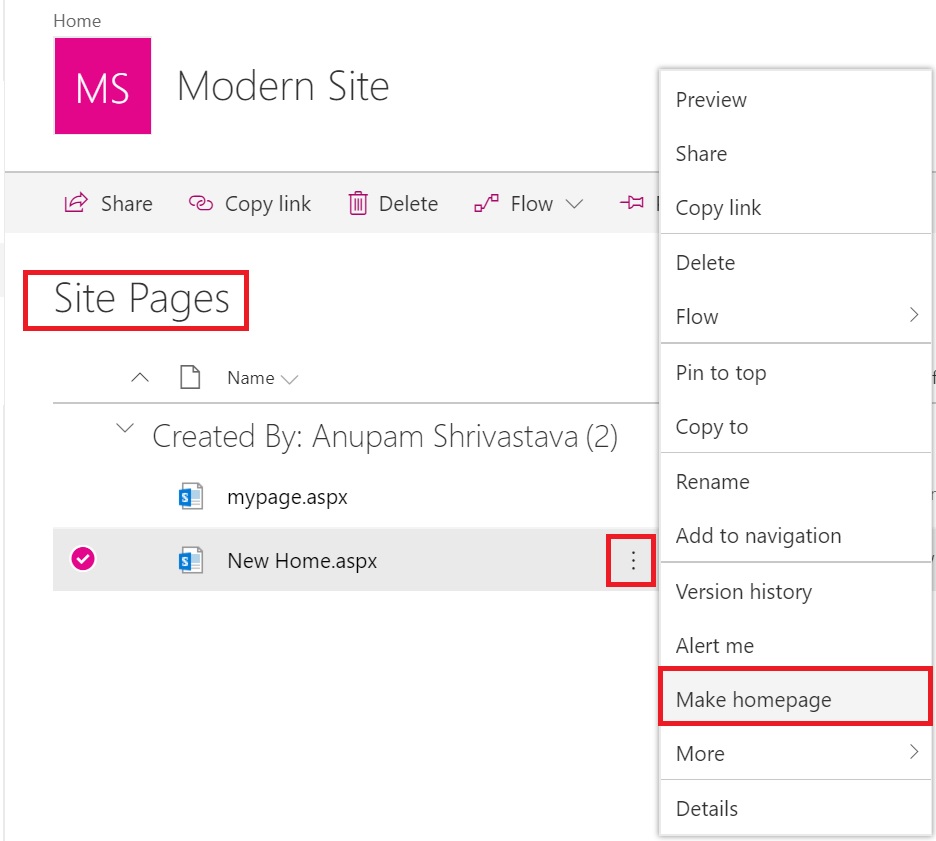
The easiest way to do so is to go to the Site Pages library and click on the vertical (…) and select “Make Home Page” from the menu.
Welcome page can also be changed in team sites using a few lines of PowerShell command.
[code]
#Connect to the SharePoint Online Site
$Username = "[email protected]"
$Password = Read-Host -Prompt "Please enter your password" -AsSecureString
$Site = "https://myteant.sharepoint.com/sites/SC2"
$Context = New-Object Microsoft.SharePoint.Client.ClientContext($Site)
$Creds = New-Object Microsoft.SharePoint.Client.SharePointOnlineCredentials($Username,$Password)
$Context.Credentials = $Creds
#Update the welcome page
$web = $Context.Web
$rootFolder = $web.RootFolder;
$rootFolder.WelcomePage = "SitePages/New Home.aspx";
$rootFolder.Update();
$Context.ExecuteQuery();
[/code]
And now when you browse your site collection, you will land directly in this new modern page and not on the default classic page.
Disable Classic Pages Creation
At this point even though we have a new modern page, Site contributors can still create pages based on classic model like Web Part page and wiki pages. Let’s see how can we disable the same.
Step 1:
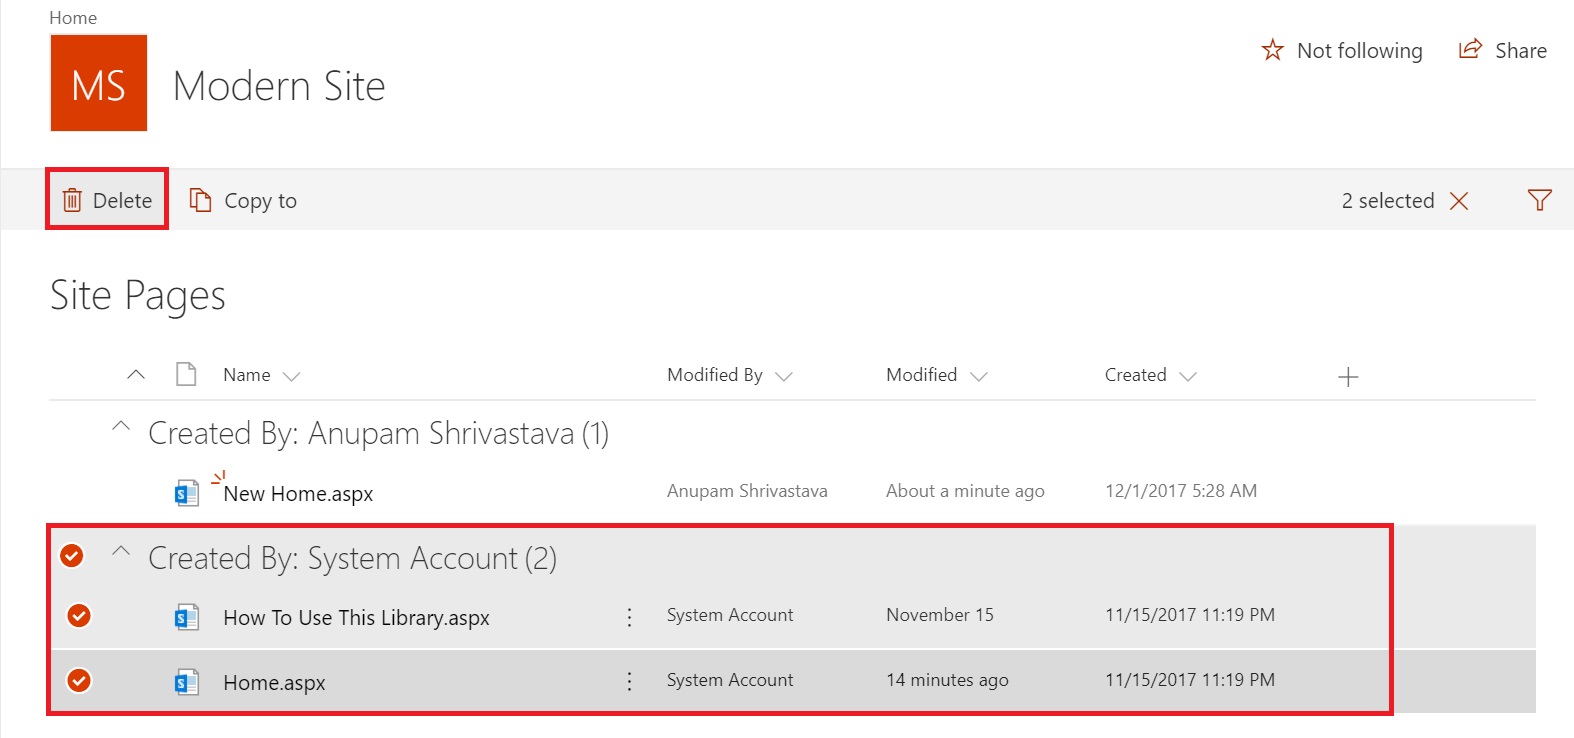
First step is to delete those pages which got created by default with the site. That’s easy, just go to the Site Pages library, select the highlighted pages below and delete.
Step 2:
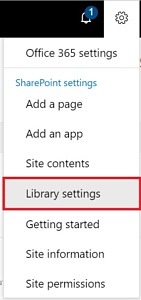
Now, go to Library Settings of Site Pages
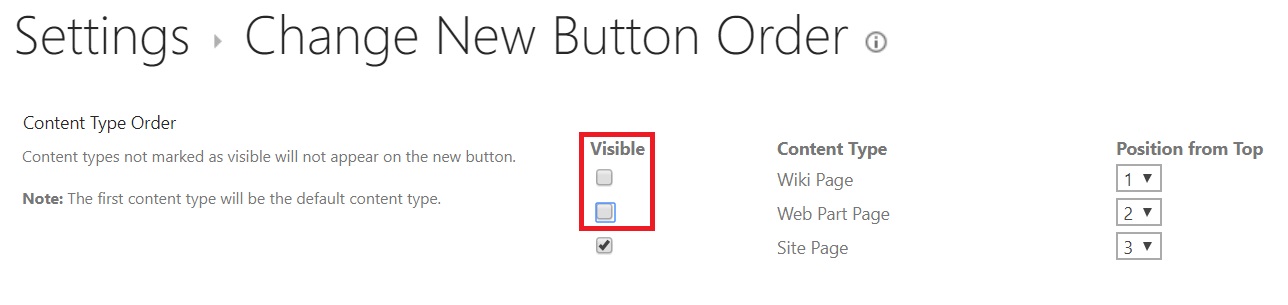
Scroll down to Content Types and click on “Change new button order and default content type”

In the next screen, simply deselect the check boxes next to Wiki Page and Web Part Page and click OK.
And that’s it. Now if any site contributor goes to create a new page in the Site Pages library, he/she will not see the options to create web part page or wiki page.
And that’s it. Your entire site now is the modern site and completely responsive.
You can also create this site using normal SharePoint Online PowerShell/CSOM without using Office 365 Groups.
Enjoy,
Anupam
5 comments
You can make the modern page a home page in the UI.
Go to Site Pages.
Click (select) the modern page you just created.
click on the three dots in the menu options,
you will get a drop down, with more options, one being “Make homepage”
Thanks for pointing that out… I have updated the article…
Hi, thanks for this. I followed your instructions but I can’t see ‘Page’ via the ‘New’ drop down. Site Pages is Active. Any ideas please?
Thanks again
Yes, Go to SharePoint Admin Center –> Settings and check for if Site Pages is configured as “Allow users to create Site Pages”.
Good tutorial. Thank you,