Hey guys,
Automation and Machine Learnings are the new buzz words these days and Microsoft is leading the way.
Azure Bot Service has been rolled out recently, which is currently in preview mode but has plenty of stuffs to try your hands on.
In this article, I am going to explain step-by-step, how you can get started with Azure Chat Bot service using Natural Language processing.
First of all of course you need to have an Azure subscription, you can sign up for free here.
Once you have the subscription ready, go to http://portal.azure.com
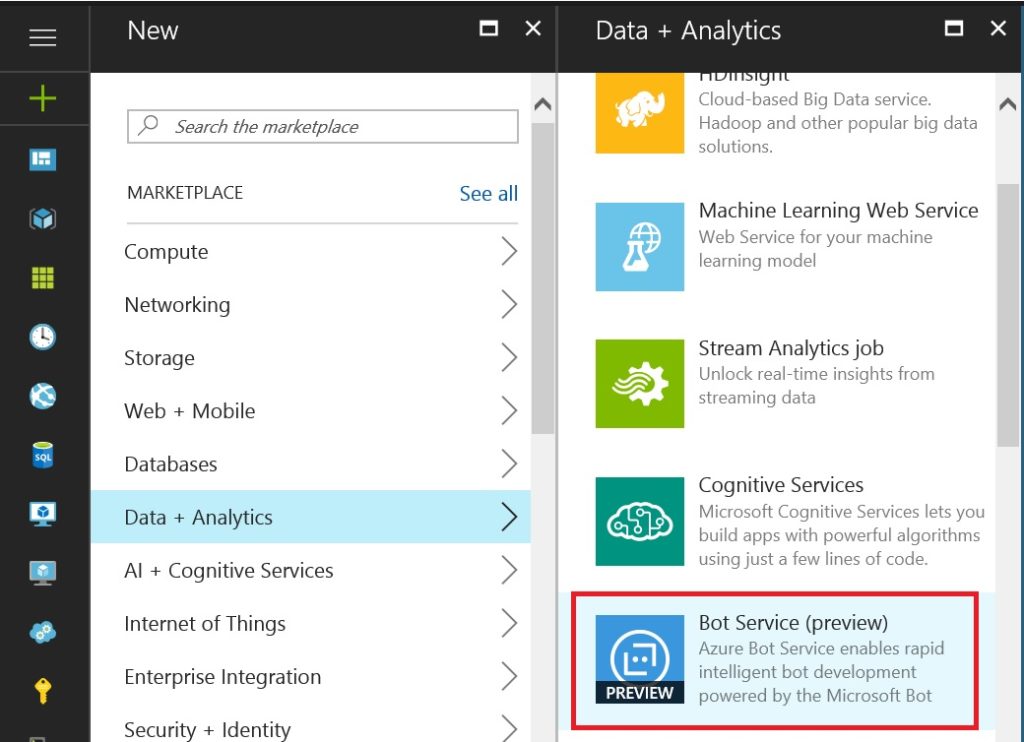
Browse to New – Data + Analytics – Bot Service
Enter the App name, Subscription, Resource Group and Location and press Create

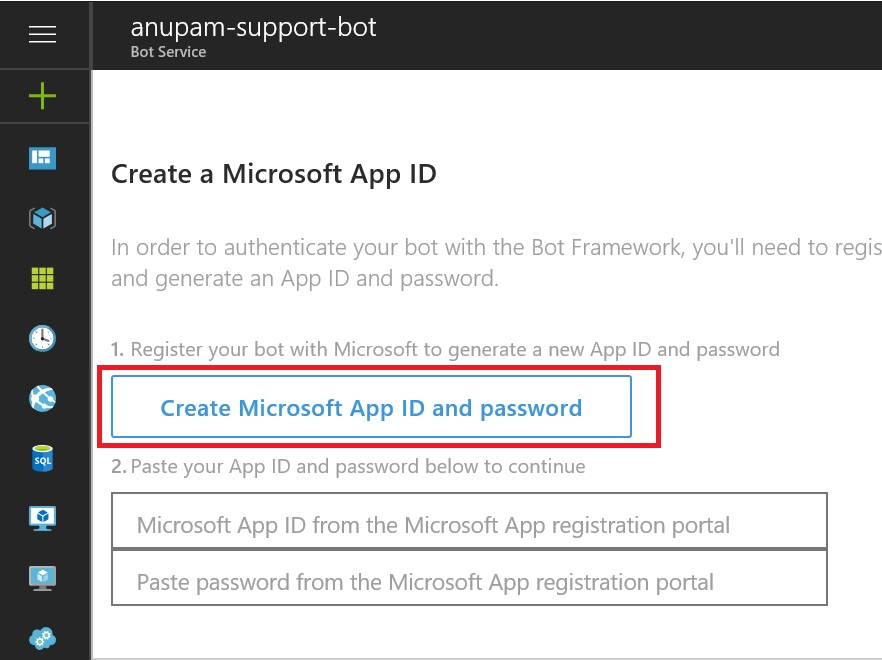
Once the App gets created, you will get a page similar to this asking to Generate Microsoft App ID and password. Click on the button
 It will open a new screen with App name and App ID filled in, note down the App ID and click on “Generate an app password to continue” button
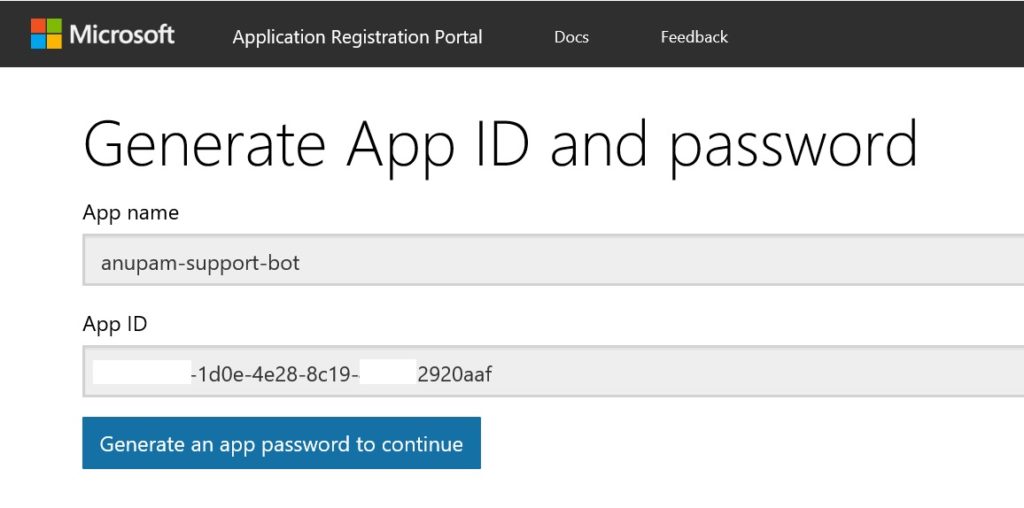
It will show a pop up with new password generated, copy that password too in a notepad, we’ll need both the App ID and the password in next step

Paste the App ID and Password in the fields on the form and select NodeJS as language. You can select C# too, but for this article, we are going to use NodeJS.

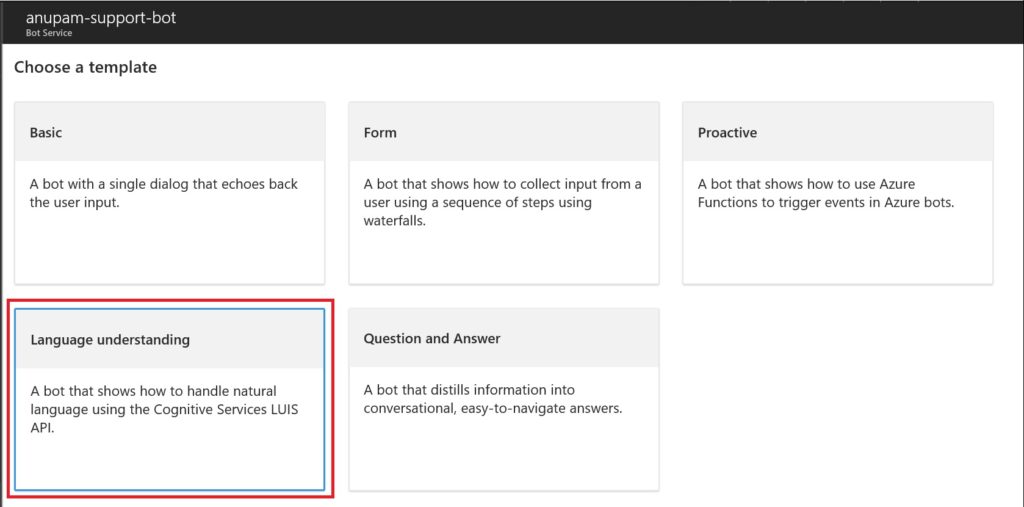
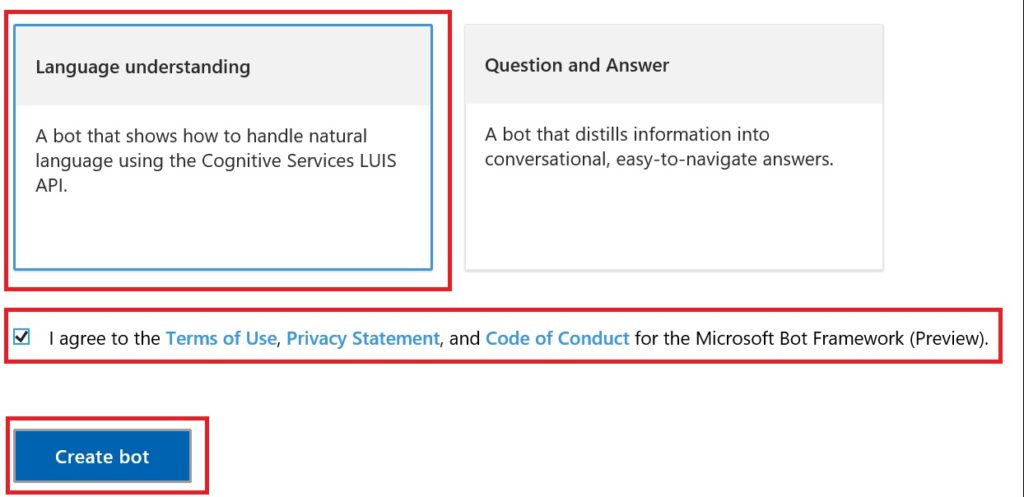
Scrolling down the page further will ask to choose a template, select Language Understanding
Check the terms of use and click “Create bot”
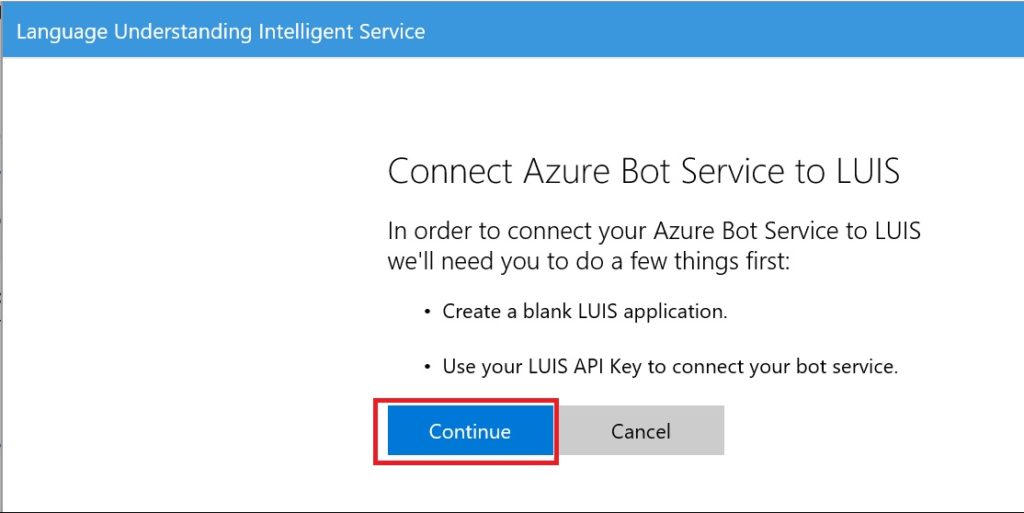
It will show up a window to connect and setup LUIS application. You can create LUIS application separately as well at https://luis.ai but if you do it from here, it will just connect the application with your bot automatically. You will need to use the same Azure account to create the application.
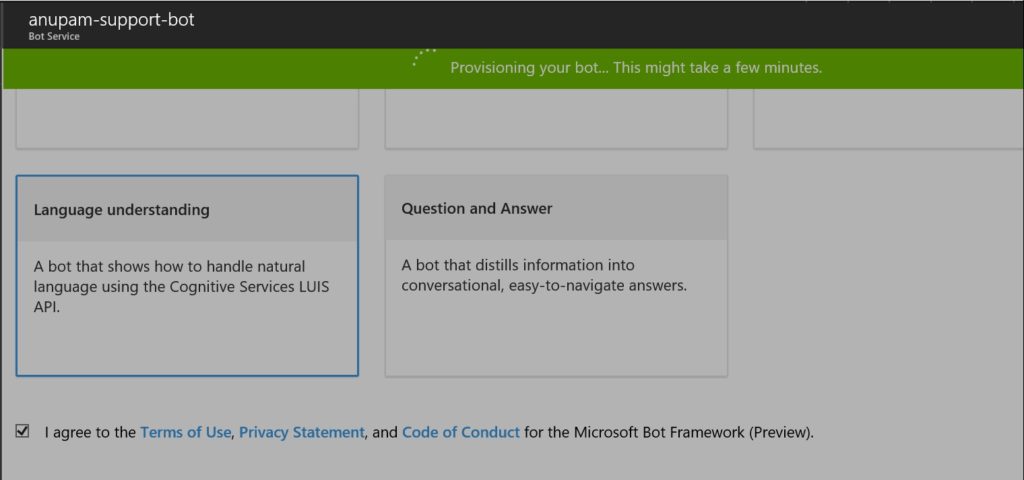
Now, just wait for a few seconds to get the bot provisioned by Azure.
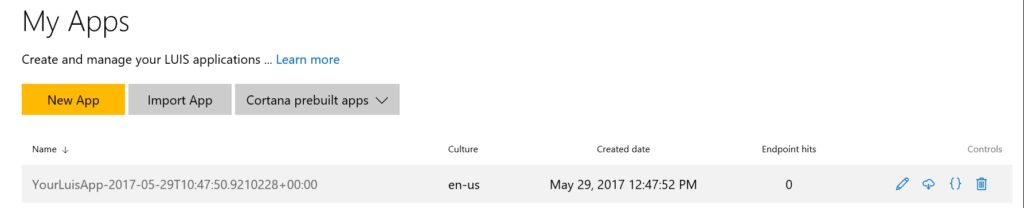
Now, it’s time to let us teach our LUIS app some context. Go to https://luis.ai, login with your azure account and click on My Apps. You will see your App listed there. Click on the name of the app to edit.
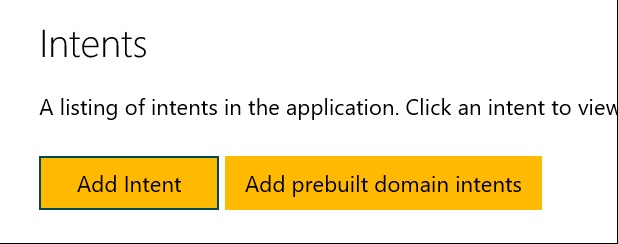
Click on Intents from Left navigation and Add a new Intent
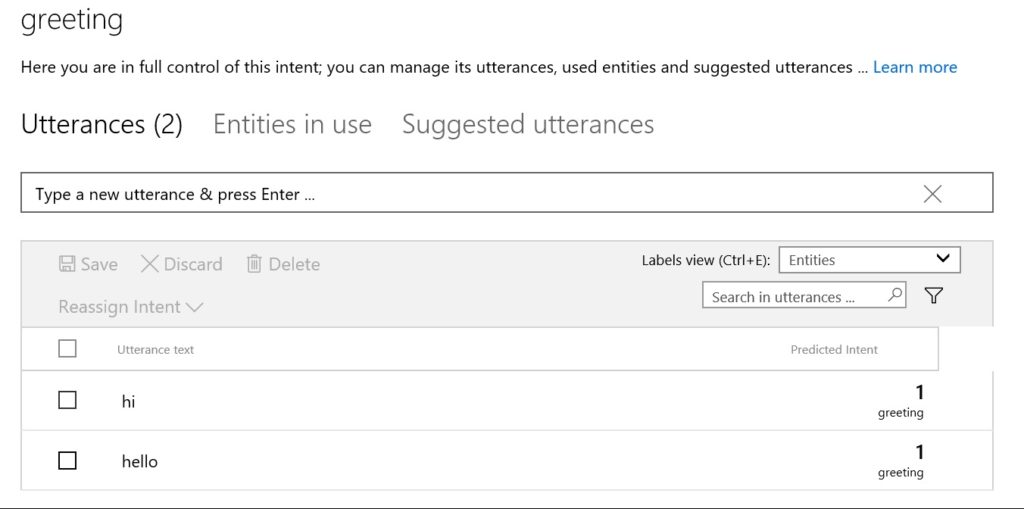
Type greeting and click save

Now type some utterances like Hi, Hello etc. which you want to be identified as a greeting intent and press enter. Repeat for additional words.

Here I have added two utterances
We can configure various other options there like Entities, Prebuilt domains, Features etc, for for the sake of this first bot, I am going to skip all those and jump train the application.
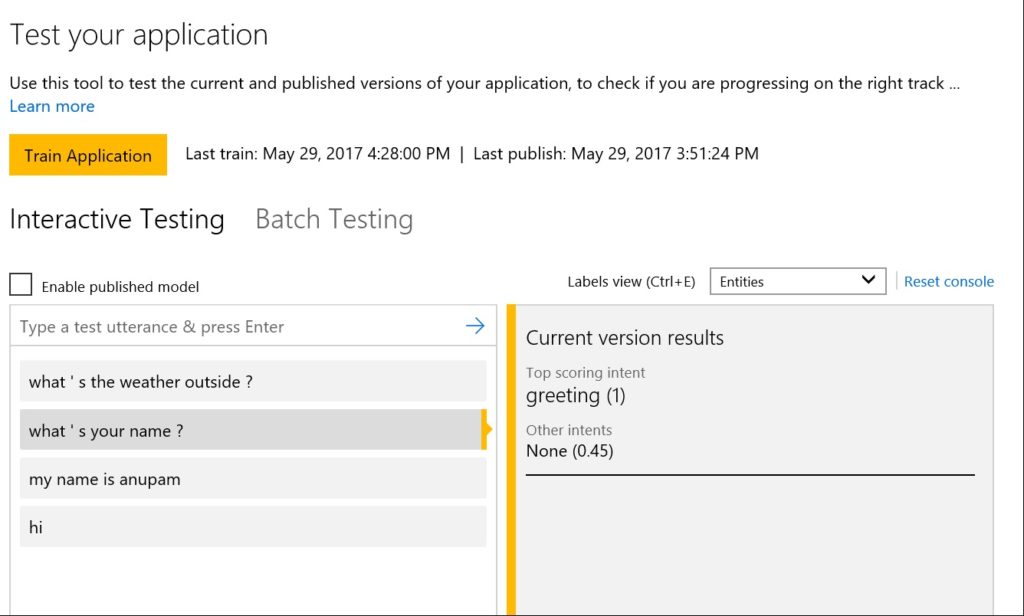
Click on Train and Test from left navigation and click on Train Application

Once the application is trained, you can test it by typing the words, Hi, hello etc. in the text box and click enter, the right side box will show the identified intent, a value close to 1 is considered best match and close to 0 is least match.
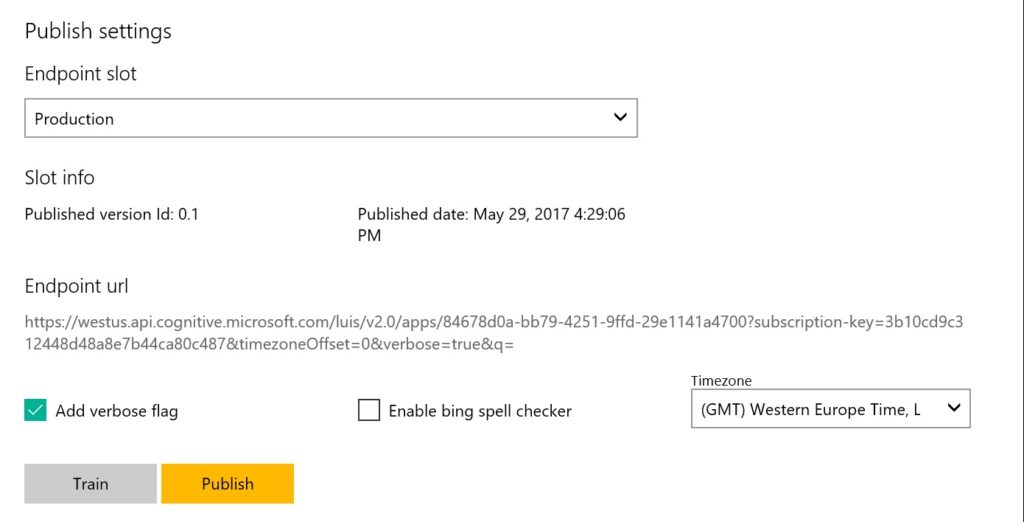
All good now, click on Publish App from left navigation and select Production under EndPoint slot and click Publish.
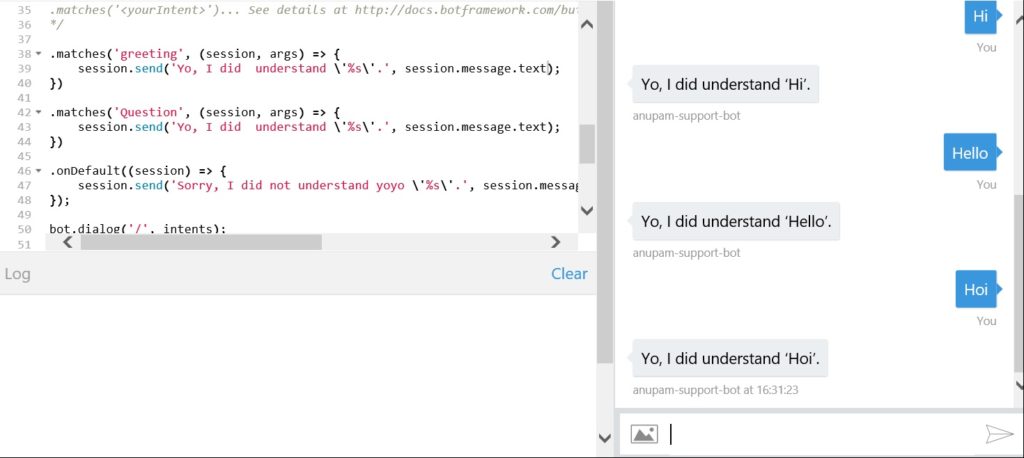
All done here in LUIS, go back to your bot now and change the index.js file to include this code, just above the .ondefault((session)… line and press save
 .matches('greeting', (session, args) => {
   session.send('Yo, I did understand '%s'.', session.message.text);
 })
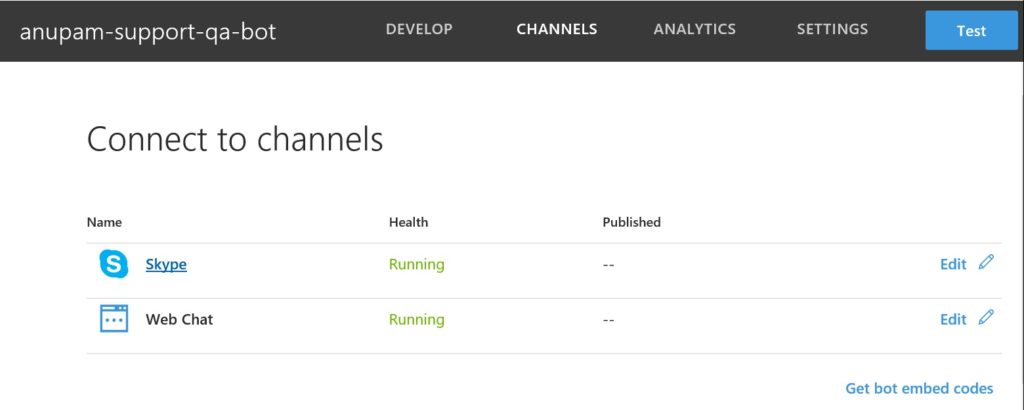
Your bot is ready and we are done, well almost… One last thing, we can connect this bot with skype as well and chat from where. To do so, just click on “Channels” on top navigation from your bot interface and click on Skype
It will open another page to login to Skype, use any existing skype credentials (even your personal one) to login and click on add to contacts. Pls. ensure to use the Desktop installed version, it did not work for me when I tried to use Skype installed from windows 10 app store. The bot gets added but never responds in that case.
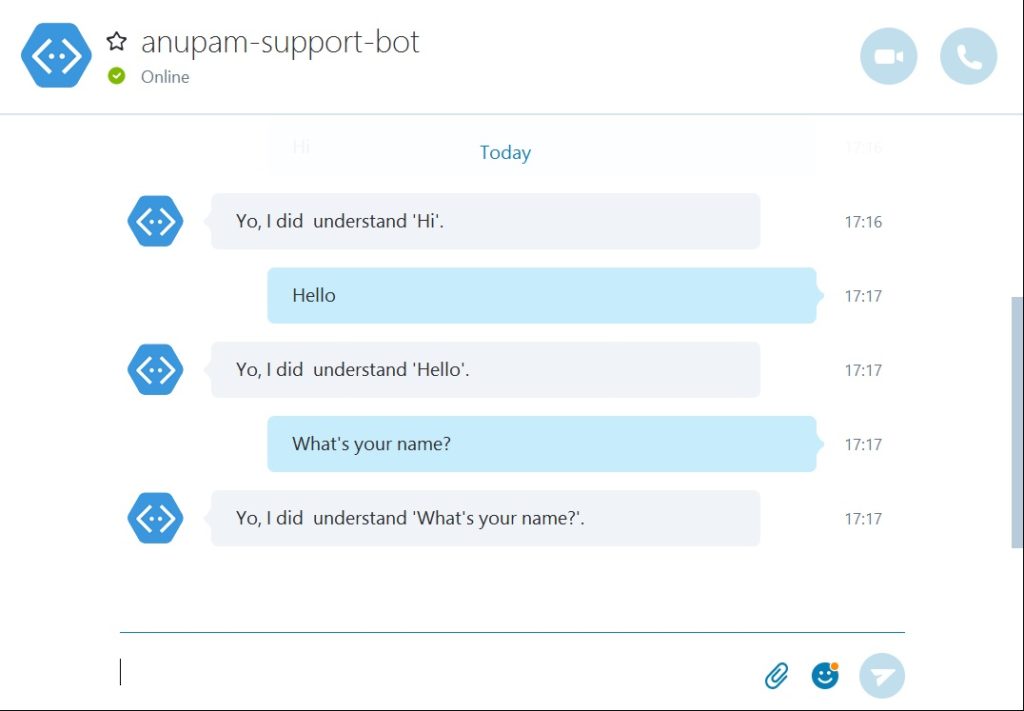
Now, once your skype is logged in it will show the bot as chat contact, just add that and start chatting 🙂
All done now, you have your first chat bot up and running and chatting…
Enjoy,
Anupam
2 comments
Even though there are many other related articles, this was a perfect start, really step-by-step… thanks
Thanks David, hope that worked for you.