A few days ago, I wrote articles about Create your first Azure Chat Bot – Step by Step followed by Configure LUIS application for practical use in Azure bot and Create your first Azure Chat Bot with QnA Service – Step by Step. In this article lets explore how can we create an Azure Chat Bot which can have an interactive forms flow, i.e. a bot which can accept information as if filling a form and take some action based on provided inputs like booking a flight ticket or raising a support request. Half of the steps are similar to what you might have already seen in my previous posts about Azure Chatbots.
Let’s take a quick look again. First of all of course you need to have an Azure subscription, you can sign up for free here.
Once you have the subscription ready, go to http://portal.azure.com
Step 1: Create an Azure Chat Bot
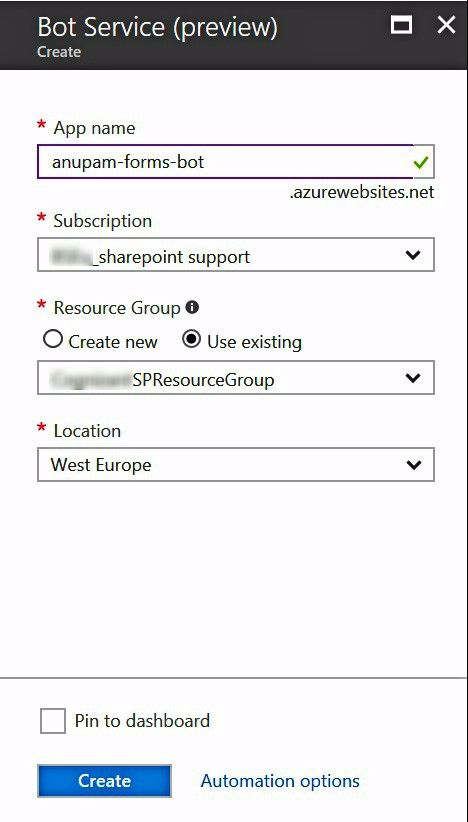
- Browse to New – Data + Analytics – Bot Service
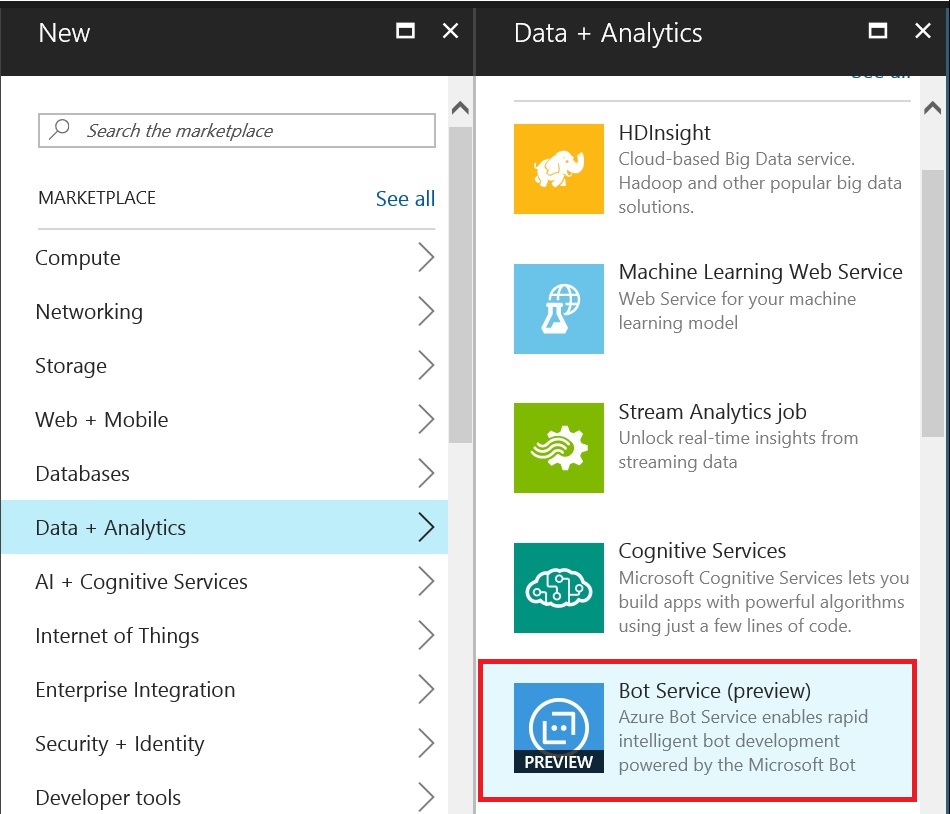
- Enter the App name, Subscription, Resource Group and Location and press Create
Step 2: Create a Microsoft App ID
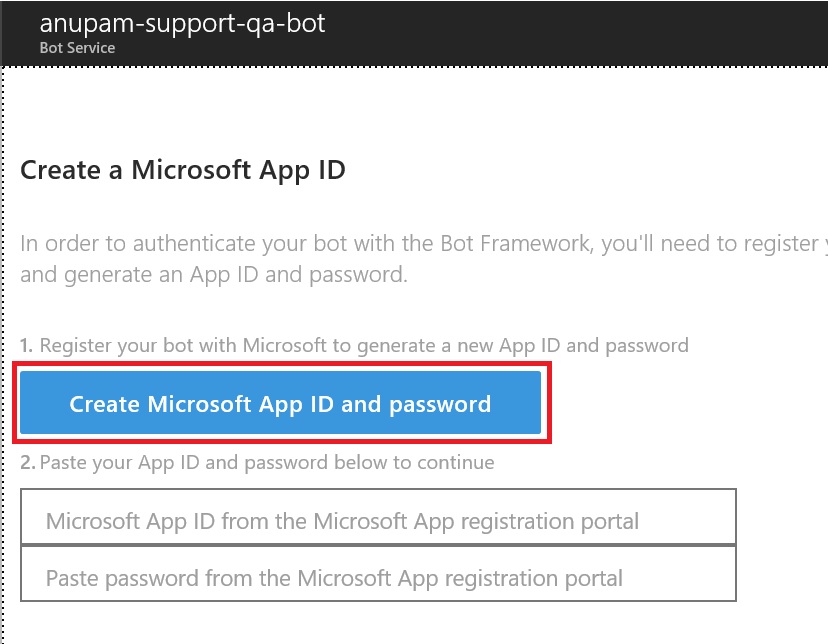
- Once the App gets created, you will get a page similar to this asking to Generate Microsoft App ID and password. Click on the button “Create Microsoft App ID and password”
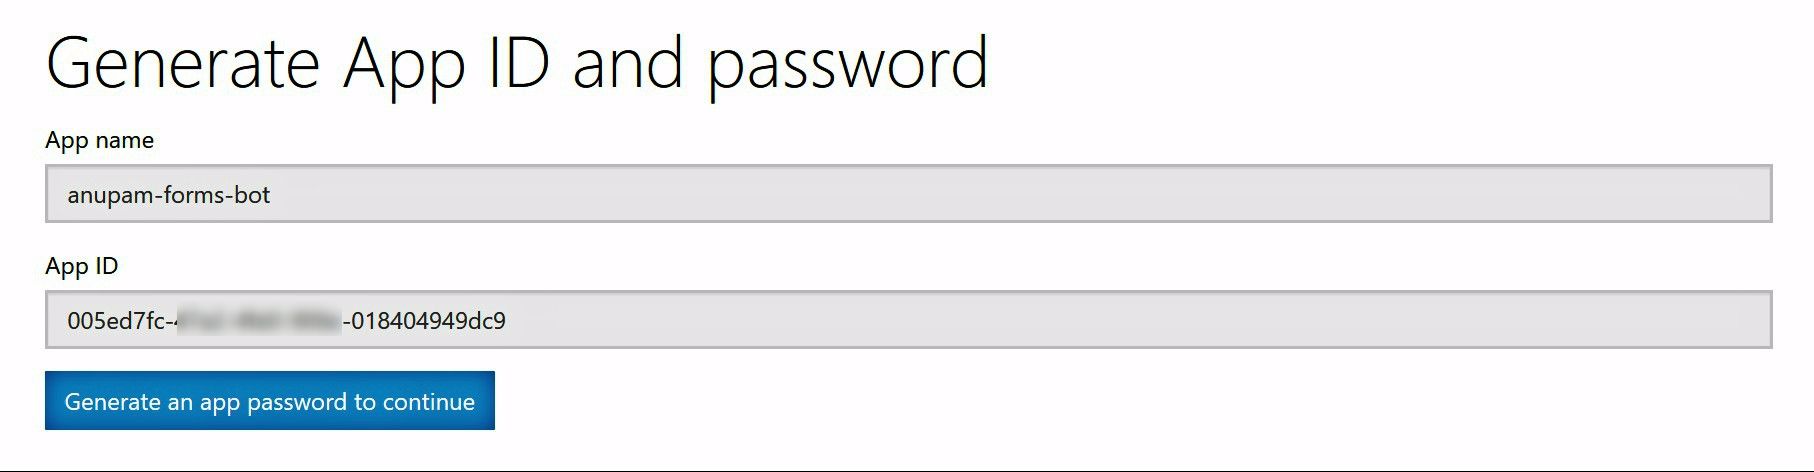
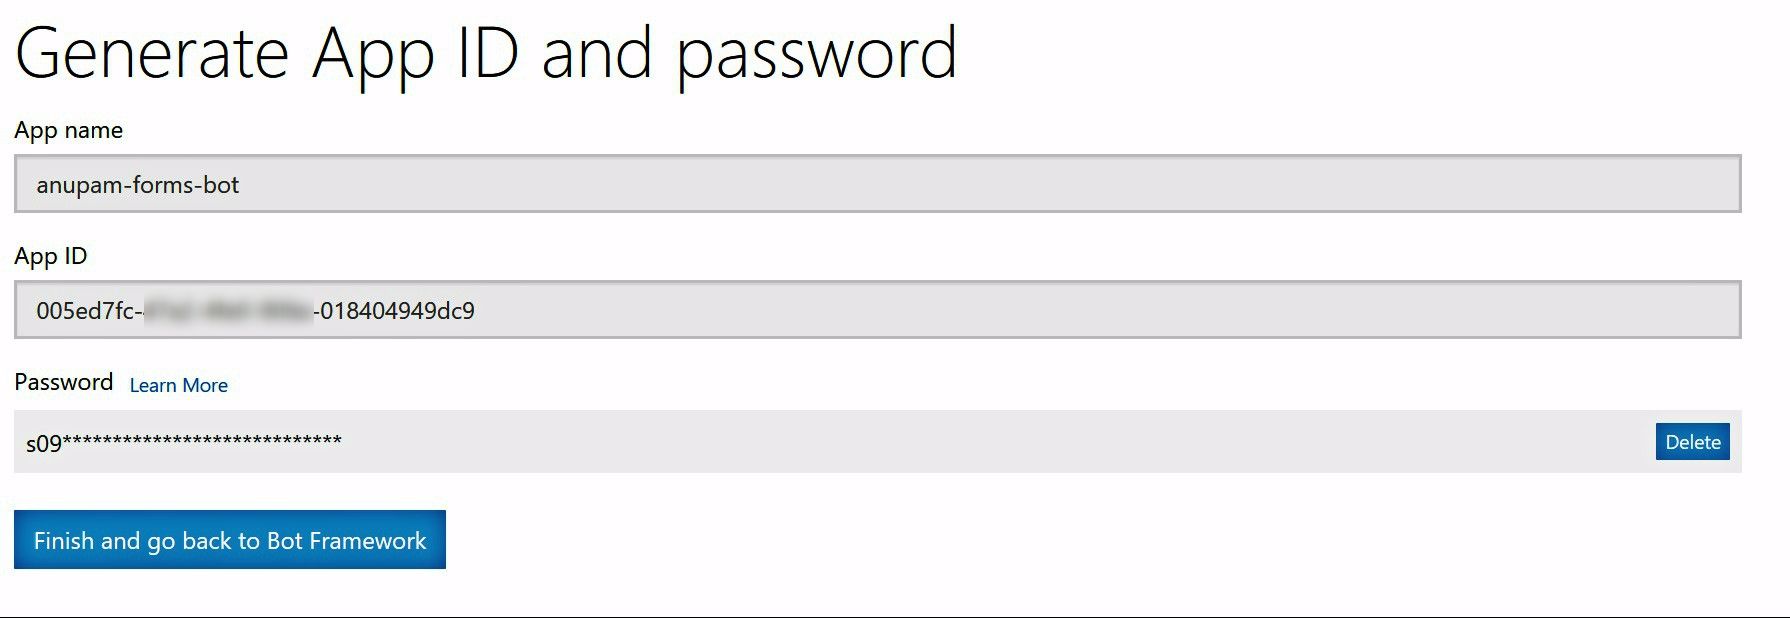
- It will open a new screen with App name and App ID filled in, note down the App ID and click on “Generate an app password to continue” button
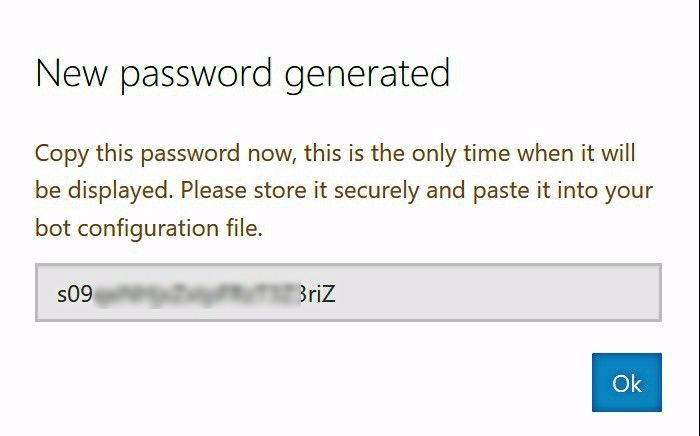
- It will show a pop up with new password generated, copy that password too in a notepad, we’ll need both the App ID and the password in next step
- Click OK on the form and click on “Finish and go back to Bot Framework”
- At this point our App has been registered with Microsoft Application Registration portal at https://apps.dev.microsoft.com
Step 3: Complete Bot Creation
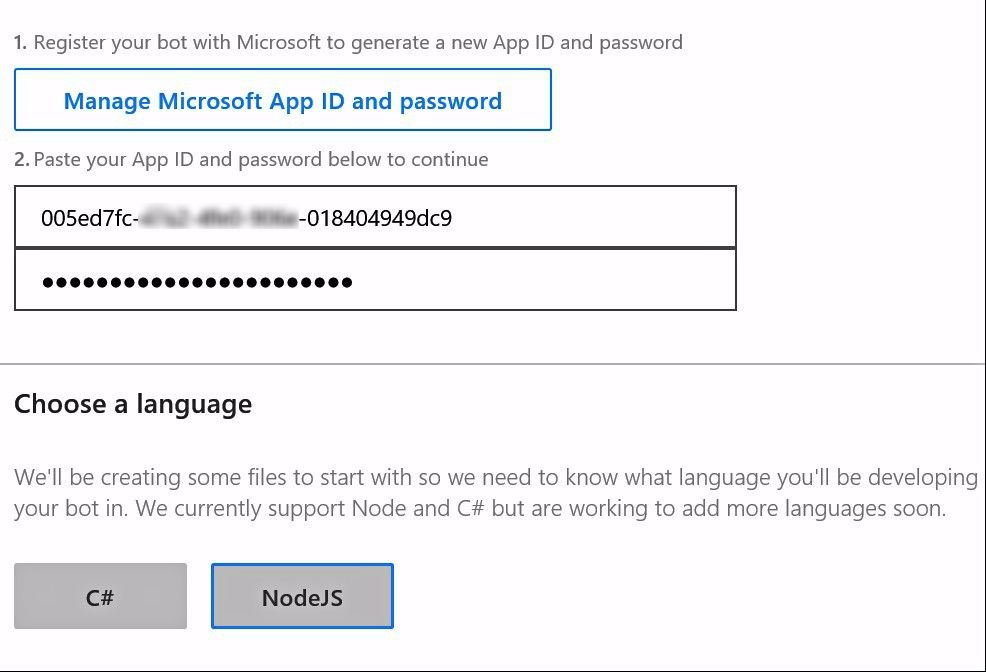
- Paste the App ID and Password in the fields on the form and select NodeJS as language. You can select C# too, but for this article, we are going to use NodeJS.
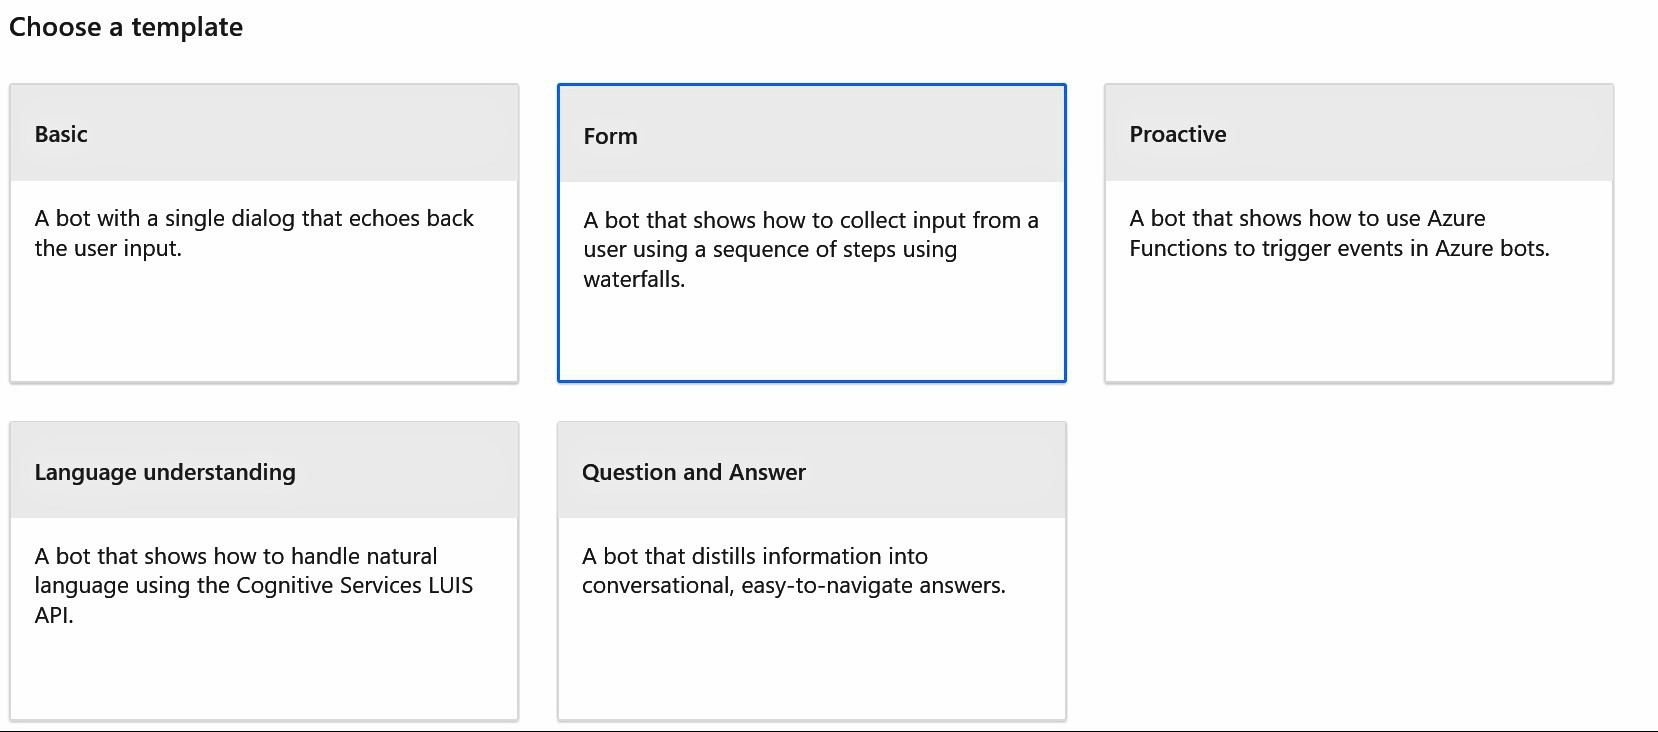
- Scrolling down the page further will ask to choose a template, select “Form”.
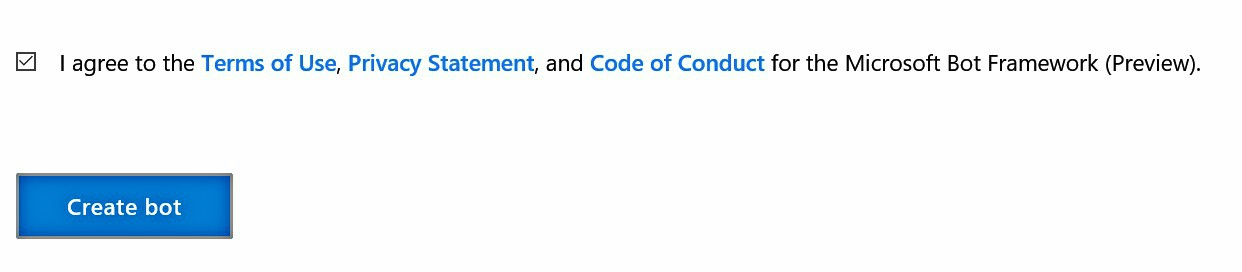
- Check the terms of use and click on “Create bot”
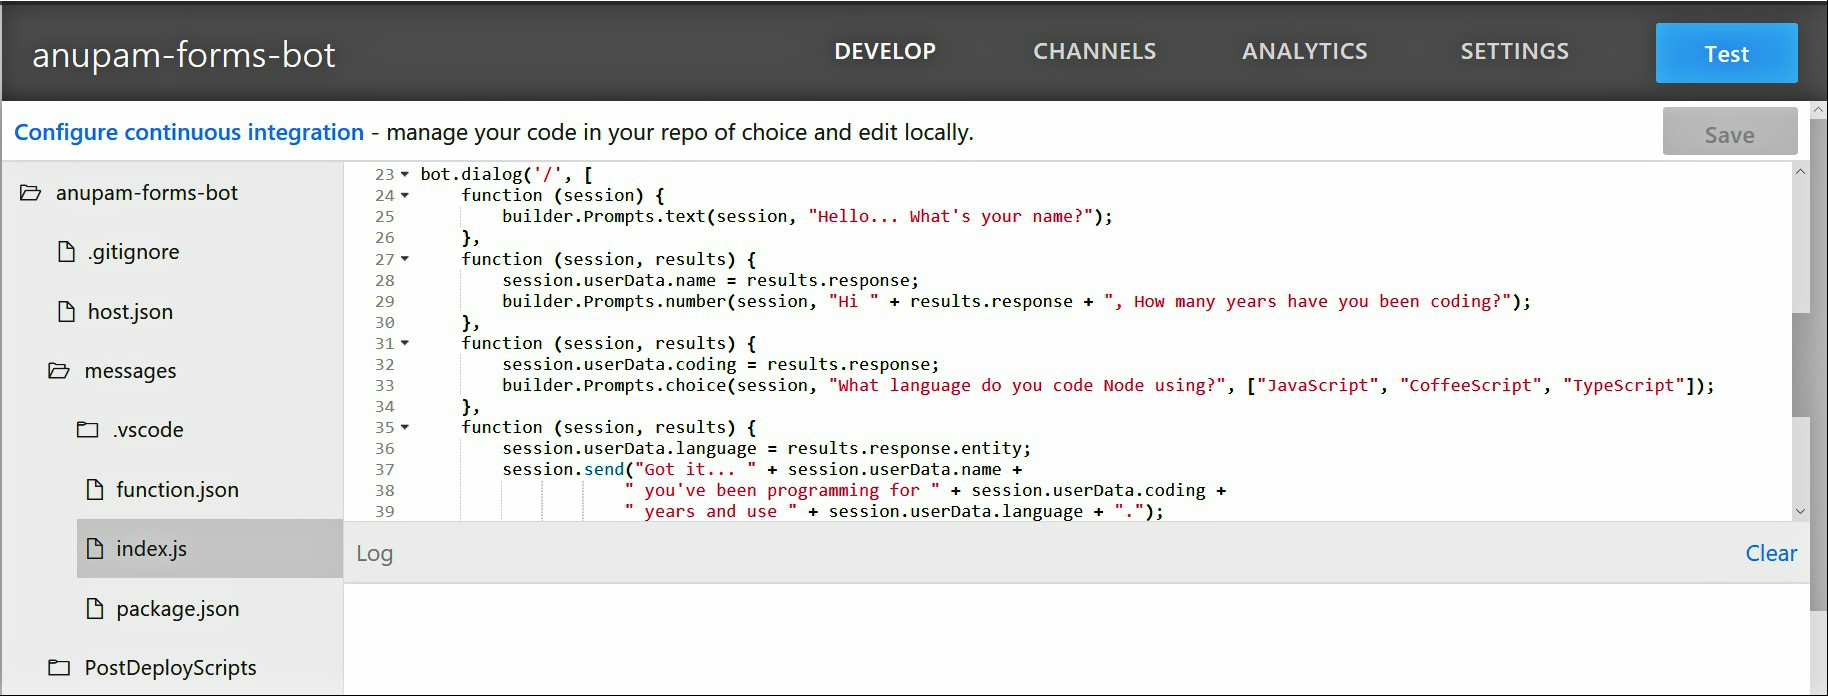
- Once the provisioning completes, you will see the Bot interface, ready with a predefined forms template code in NodeJS.
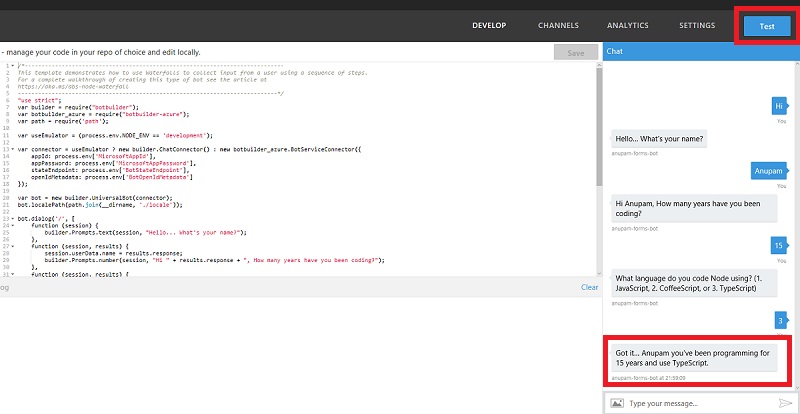
Step 4: Test the Bot
- Click on Test and type “Hi” and bot will start a waterfall like form fields questions and record your responses to take action at the end.
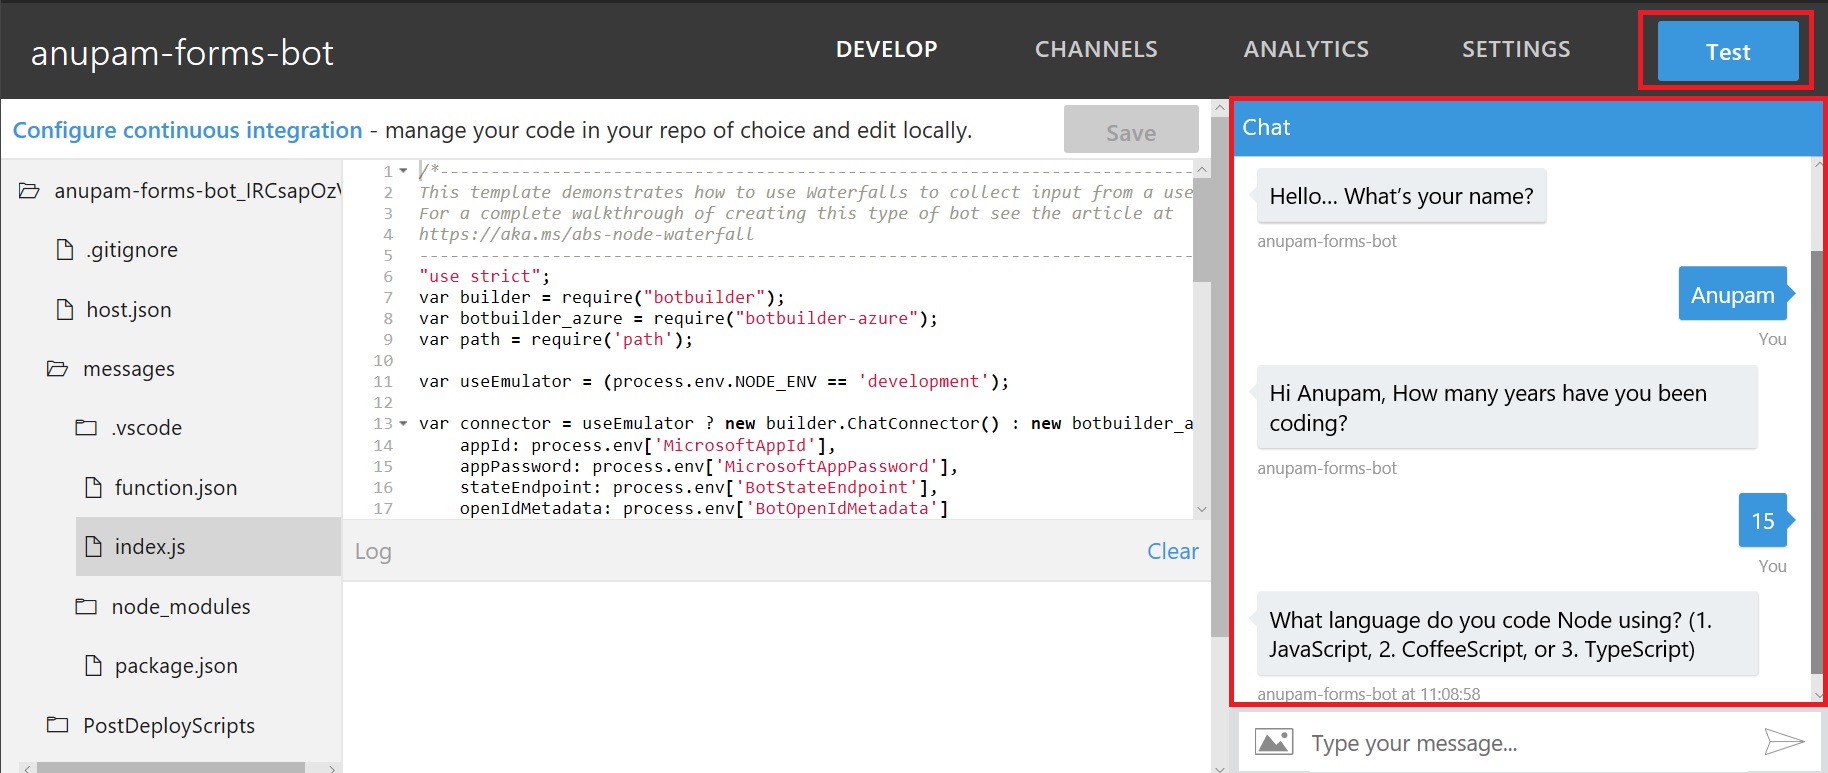
Once the information is collected, you can call a REST service or azure function to take any action.
This is just to get you started. We will take a look at how to Integrate Azure Chatbot with SharePoint in my next article.
You can also connect your bot with Skype Channel as explain at the end of my article Create your first Azure Chat Bot – Step by Step
Enjoy,
Anupam